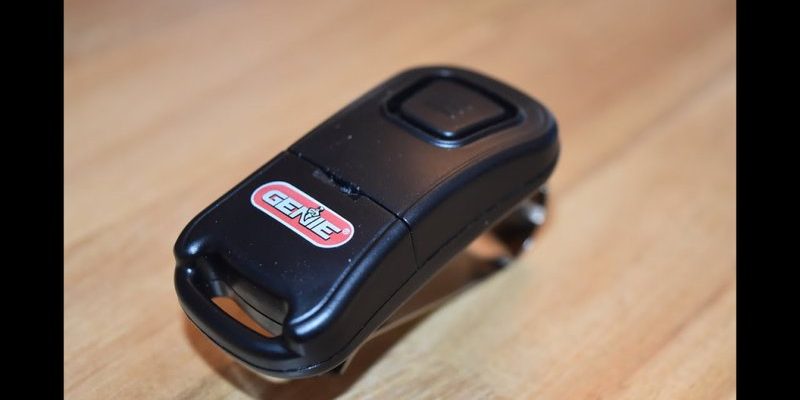
Honestly, most people don’t think about these little remotes until they start acting up. They’re easy to take for granted, just like a car key or your TV remote. Genie is one of the most popular brands out there, and their remotes are known for reliability. Still, every gadget has its day, and when your Genie garage remote stops working, a bit of simple troubleshooting can often save the day. No need for panic—or a surprise workout lifting that heavy door.
Common Reasons Genie Garage Remote Stops Working
Let’s start with the basics. You might be surprised how often the tiniest issues can knock out a Genie garage remote. Think about your remote like a battery-powered walkie-talkie: it only works if both sides—the remote and the garage opener—are speaking the same language, loud and clear.
Dead batteries are the classic culprit. It sounds obvious, right? Yet, batteries run out quietly, with no drama. Sometimes, the remote gets weaker and weaker—maybe you have to stand closer to the door, or press the button extra hard—until it finally stops working. Swapping out the battery is the easiest first step.
Other times, the issue is with the signal. If the Genie opener is plugged in but not responding, the remote and the opener might have lost their “friendship”—meaning, they’re out of sync and need to be paired again. Nearby interference from new electronics (like Wi-Fi routers or LED lights) can also scramble things. Every so often, the problem isn’t with the remote at all, but with the sensors on the garage door track or the opener’s own electronics.
Physical damage or dirty contacts don’t help, either. Remotes live tough lives—dropped in purses, wedged in car seats, or left baking on dashboards. Buttons can get stuck, or little bits of dust can sneak inside and mess with the circuit board. If your Genie remote took a tumble recently, a closer look might reveal the problem.
Sometimes, the simplest solution really is the right one. Swapping the battery, checking the contacts, or giving the remote a gentle clean might just bring it back to life.
How To Check and Replace the Battery in Genie Garage Remote
You might be wondering, “What kind of battery does this thing even use?” Most Genie remotes use common coin-cell batteries (like CR2032 or CR2016), but some use AAA or AA batteries. The model number is usually printed on the back or inside the battery compartment.
Here’s the thing: replacing the battery is almost always step one. Here’s how you can do it without breaking a sweat:
- Slide or unscrew the battery cover. Some older Genie remotes have tiny screws—grab a small Phillips screwdriver if needed. Others pop open with a gentle push or slide.
- Take note of the battery type and orientation. The flat side (the “+” side) usually faces out. Snap a quick photo before popping out the old battery, just in case.
- Insert the new battery and make sure it sits snugly in place.
- Reattach the cover and test the remote near your garage door opener.
If nothing happens, double-check you installed the battery correctly. And yes, make sure you’re using a fresh battery—not one that was “almost new” sitting in a drawer for two years. Dead batteries are sneakier than you think.
Steps To Re-Sync or Pair Genie Garage Remote
If the battery is fresh and you’re still staring at a silent door, it might be time to re-sync (pair) the Genie remote with the opener. Think of pairing like introducing two old friends who’ve forgotten each other’s faces.
Most Genie openers have a big “Learn” or “Program” button right on the motor unit (typically on the ceiling of your garage). Here’s a step-by-step to pair things up again:
- Climb safely to access your garage opener. Don’t stand on a swivel chair—grab a proper step stool.
- Look for the “Learn” or “Program” button on the opener. Sometimes it’s under a plastic cover.
- Press and release the “Learn” button. You’ll usually see an LED light up, signaling it’s in pairing mode.
- Within 30 seconds, press the remote button you want to use for opening the door. Listen for a click or look for a flash—this means pairing worked.
Test the remote. If nothing happens, repeat the steps. Sometimes, the opener just needs a firm “reminder” to accept a new signal.
Pairing resets are like a handshake—a little awkward at first, but when done correctly, everyone knows who’s welcome.
Troubleshooting Signal and Interference Problems
So, what if the remote works up close but not from the driveway? Or maybe it’s spotty—sometimes opening the garage, sometimes not. Welcome to the world of signal interference.
Genie remotes operate on radio frequencies, and those frequencies can get jammed up if too many nearby devices are broadcasting signals. Picture walking into a room where five people are talking at once; suddenly, it’s a lot harder to make yourself heard.
Here are some things that can trip up your Genie remote:
- New electronics in or around your garage (like LED bulbs, routers, or security cameras).
- Metal objects blocking the opener’s antenna. It’s usually a thin wire hanging down. If it’s bent upward or coiled up, straighten it out.
- Old or weak batteries (yes, those again), which shorten your signal’s reach.
Try unplugging any new gadgets near the opener and see if the remote works better. If you notice a pattern (say, the remote only fails when the Wi-Fi is on), you may have found your culprit. Sometimes, switching to a LED bulb designed to be “garage door opener safe” solves stubborn signal issues.
How To Reset Genie Garage Door Opener and Remote
Sometimes, everything just needs a fresh start. If you’ve tried new batteries and pairing, but your Genie remote still won’t cooperate, a reset can wipe out weird glitches or programming errors.
Most Genie openers let you clear all codes—erasing every paired remote, so you start from scratch. Here’s how to reset and reprogram:
- Hold down the “Learn” or “Program” button on the opener for 10–15 seconds until the light goes out. This wipes out all old remotes.
- Release the button.
- Re-pair your remote(s) one at a time, following the pairing steps above.
Let me explain: resetting is a nuclear option. If you’ve got multiple remotes or a built-in car opener (like HomeLink), you’ll need to reprogram everything. Still, a reset can solve stubborn issues, especially after a power outage or electrical surge.
It’s easy to worry about losing programming, but sometimes a clean slate is the only way forward—just like rebooting a glitchy computer.
Checking for Physical Damage and Cleaning Genie Remote
Remotes take a beating. Drops, spills, and mystery crumbs—life happens. If your Genie garage remote looks worse for wear, physical damage might be the issue.
First, inspect the case for cracks or chips. A split case can break the battery contacts or even knock loose tiny circuit board parts inside. Even if everything looks okay outside, open the battery compartment and peek for corrosion (a white or greenish crust) or rusty battery contacts. Corrosion can build up from old, leaking batteries, causing weak or missing connections.
Cleaning tips:
- Remove the battery and use a dry cotton swab (or a dab of rubbing alcohol) to clean contacts.
- Check for stuck buttons. If the buttons don’t “click” when pressed, something may be jammed or misaligned.
- Gently wipe down the exterior; sticky buttons can benefit from a careful clean—but don’t use too much liquid.
If there’s obvious damage inside the remote (loose parts, broken solder joints), replacement is often easier than trying to repair it yourself.
Using Universal Garage Door Remotes vs Genie Brand Remote
You might be wondering: “Do I have to stick with Genie, or can I use a universal remote?” The answer is, sometimes—but it depends on your opener’s age and technology.
Genie remotes are designed to work seamlessly with Genie openers, especially newer models. They’re easy to pair, and they use rolling codes for security (meaning, the remote’s code changes each time you press the button, which keeps your garage safe from code grabbers).
Universal remotes can work with many brands, including Genie, but you’ll need to check compatibility. Some support older Genie models; others only work with openers that use certain frequencies or security protocols. Universal remotes often need a few extra steps to program and might not support all Genie features (like multiple doors or lights).
If you like the idea of one remote for multiple doors (or replacing a lost original), a universal option can make sense. But in my opinion, brand remotes usually “just work”—so if you’re overwhelmed or want as little hassle as possible, sticking with Genie is the way to go.
When To Replace the Genie Remote or Call For Help
Here’s the honest truth: sometimes, even after your best efforts—new batteries, pairing, resets, cleaning—the Genie remote still refuses to play nice. Electronics have a shelf life, and remotes are no exception. If it’s more than five or six years old, there’s a good chance internal parts have just worn out.
If you’ve tried every step above and still can’t get it working, it’s probably time for a replacement. Genie remotes aren’t expensive, and swapping in a fresh one saves a ton of frustration. Plus, newer models often have better range and security.
If you’re not comfortable with ladders, wiring, or troubleshooting electronics, don’t be shy about calling a professional garage door technician. Sometimes, the issue is with the opener itself—worn-out circuit boards, bad wiring, or even faulty safety sensors. In those cases, a pro’s eye (and toolkit) is worth every penny.
Trying to fix a stubborn remote shouldn’t feel like solving a mystery novel. If you’ve reached the last page and still don’t have answers, a replacement or a quick call for help is the logical next step.
Final Thoughts: Keeping Your Genie Garage Remote Working Smoothly
Dealing with a Genie garage remote that stops working isn’t fun, but it’s almost always fixable with a bit of patience and the right steps. Start simple—check the battery, clean the contacts, and re-sync the remote. Watch for interference that could block the signal. If all else fails, don’t stress over replacing it or calling for help.
A working remote turns your daily routines into a breeze, not a roadblock. Take care of it the way you’d care for a trusty set of car keys, and you’ll spend more time enjoying your day—and less time stuck outside pressing buttons. If you ever run into trouble again, remember: the answer is probably simpler than it seems. Happy troubleshooting!