Here’s the thing: learning how to use a Philips universal remote with your projector is a bit like figuring out the friend who’s great at everything. It can juggle, dance, and play backup for almost any device. But, before it can run the show, it needs a little intro to your projector. If that sounds intimidating, don’t worry—using one isn’t rocket science. With the right steps, you’ll have the whole system synced and running smoother than microwave popcorn in just a few minutes.
So, let’s unravel how these remotes actually work with projectors, why they’re game-changers for home theaters or presentations, and what you should do when things get a little wonky (because, let’s be honest, all tech gets moody sometimes). Grab your favorite seat—here’s the complete walkthrough.
What Makes Philips Universal Remotes Special?
Philips universal remotes have this talent for talking to a whole zoo of gadgets—TVs, DVD players, streaming boxes, even projectors. Instead of juggling a million different remotes, you get one that can *wear all the hats.* Think of it as the Swiss Army knife in your living room’s drawer.
The standout part? You don’t need to be tech-savvy or memorize a ton of codes. Most Philips remotes come with easy-to-follow guides and a preloaded database of device codes. The real big deal here is flexibility: got an old projector from a conference room or a brand-new model at home? Chances are, this remote can pair with both.
But don’t just take my word for it. I’ve seen family members go from frustrated to delighted once they realize they can power on the projector, adjust volume, or switch inputs from the same gadget they use for their TV. Seriously, it declutters your coffee table—and probably your mind.
How Universal Remotes Work With Projectors
Let me explain why this actually works. Most projectors use infrared (IR) signals for their remotes. Philips universal remotes can send out a wide range of IR patterns, basically speaking multiple “languages” until your projector perks up and listens.
Here’s a simple analogy: imagine trying to get your dog’s attention in a park full of other dogs. You might try whistling, calling its name, or shaking a treat bag until your dog finally looks. The universal remote tries different “calls” (IR codes) until your projector responds.
Once you find the right code and the devices sync up, controlling your projector becomes as easy as flipping channels on your TV. Functions like power, source selection, menu navigation, and even volume (if your projector supports it) work right from the Philips remote. The process is smooth, as long as you follow the pairing or syncing instructions closely—don’t worry, I’ll walk you through those next.
Setting Up: How to Pair Your Philips Remote With a Projector
You might be wondering, “Do I need to know a secret handshake or some high-tech trick?” Honestly, it’s more like learning a simple dance. Most Philips universal remotes use a code entry or automatic search method to connect with your projector.
Here’s the step-by-step setup:
- Step 1: Power up your projector and make sure it’s ready for input. Kind of like making sure your friend’s actually home before you ring the doorbell.
- Step 2: Find the right device button on your remote (often labeled “TV,” “AUX,” or “Projector” depending on the model).
- Step 3: Enter pairing mode—this usually means holding the device button and the power button together until a light blinks. (Check your remote’s instructions for the exact combo, since they do vary.)
- Step 4: Input the code for your projector’s brand. Codes are in the instruction booklet or can be found online on Philips’ website. Don’t stress if the first code doesn’t work—sometimes you’ll need to try a few. That’s totally normal.
- Step 5: Test basic functions like power and volume. If the remote controls your projector, you’re golden. If not, repeat with the next code.
The first time I tried this, I did have to cycle through three different codes before the projector responded. It’s a little like trying keys on an unfamiliar lock—you’ll know when it clicks.
You might also see an automatic code search feature on newer Philips remotes. This scans through every code in the database until the projector reacts. It takes a few minutes, but it’s almost like letting the remote do all the thinking for you.
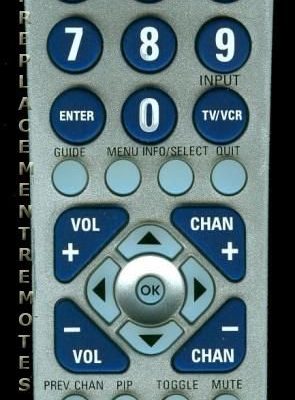
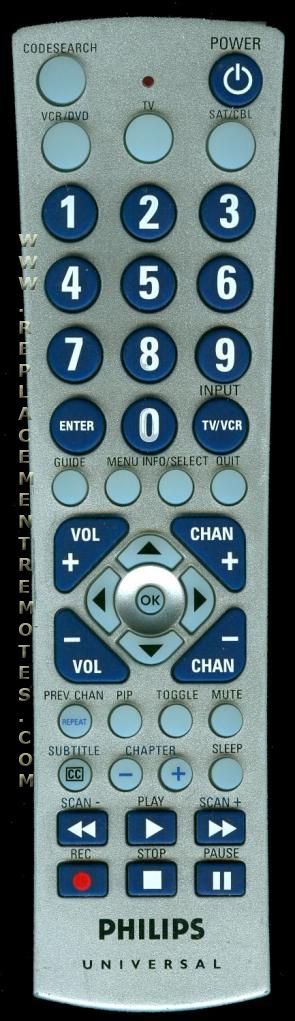
Understanding and Using Philips Remote Codes
Now, about those remote codes—they’re the magic words that help your Philips universal remote “speak” to your projector. Every projector brand, and sometimes individual models, have a unique code that tells the remote exactly how to behave.
It’s a bit like using cheat codes in video games (anyone else remember those?). You input a specific sequence, and voila, new powers unlocked. In this case, the power to avoid remotes multiplying like rabbits.
You can usually find a list of Philips remote codes in the user manual, but if it pulled a Houdini and disappeared, don’t worry. Philips’ official website has a searchable code database. Enter your remote’s model and your projector’s brand, and you’ll get the codes to try.
Some brands might have multiple codes. If the first one doesn’t work, it doesn’t mean you messed up—it’s just that some devices use different IR setups. In rare cases, if you have an off-brand or super-new projector, the universal remote might not have the right code. That’s when you can try an automatic scan or look for updates from Philips.
Troubleshooting: When Things Don’t Go As Planned
Here’s the truth: Even the best universal remotes have their moments. If your Philips remote isn’t syncing or stops working with your projector, don’t panic. Nine times out of ten, there’s a simple fix.
Common hiccups and how to solve them:
- The remote isn’t responding at all? Check the batteries first. (Seriously. I can’t count the times this was the issue.) Low or dead batteries make the remote act flakey or unresponsive.
- The code doesn’t work? Double-check you’re using the right code for your projector’s brand. Try entering it again, or move on to the next code listed.
- Some buttons work, others don’t? Not every remote supports every feature on every device. For example, advanced menu functions may require the projector’s original remote. If basic things—power, volume, input—work, you’re in business.
- Remote worked, then stopped? Sometimes the projector’s IR sensor has dust or something blocking it. A quick wipe or making sure you’ve got line of sight usually fixes this.
Honestly, most “broken remote” problems I’ve solved turned out to be battery-related or a code entered incorrectly. It’s never as complicated as it first seems.
And if all else fails? There’s always the trusty factory reset. On most Philips remotes, you can reset the remote to clear out any funky settings and start fresh. It’s like hitting the refresh button on your browser—everything feels smoother after.
Comparing Philips Universal Remotes to Brand Projector Remotes
You might be on the fence: “Should I just stick to the remote that came with my projector?” That’s a fair question. Here’s where a little side-by-side comparison helps.
Original projector remotes:
- Always work (well, unless you lose or break them—been there, done that).
- Have buttons mapped specifically for every feature your model offers.
- Replacement can be a pain; some brands charge a small fortune.
Philips universal remotes:
- Control multiple gadgets, not just your projector.
- Often easier to find and replace if lost.
- Might not have every niche function, but handle basics like power, input, and menu navigation just fine.
If you’re using your projector for straightforward stuff—watching movies, giving presentations, or gaming—the universal remote is honestly a life-saver. But if you’re doing lots of detailed settings changes, the original remote might still come in handy every now and then.
Keeping Your Philips Remote in Top Shape
Like any trusty tool, your Philips universal remote needs a bit of TLC. You don’t have to baby it, but a little care goes a long way. For starters, keep fresh batteries handy. You’ll notice the remote gets sluggish or unresponsive when the battery’s running low, and nobody wants the projector cutting out during the season finale.
Wipe the remote every once in a while to keep grime and dust out of the buttons. I once spilled soda on mine (don’t judge—I was excited during a big game), and a quick wipe with a slightly damp cloth avoided any stickiness or button issues.
If the remote starts acting weird—random codes, buttons sticking, or not pairing anymore—a reset usually sorts things out. Hold down the setup button until the light blinks, or check your manual for the exact reset combo specific to your model.
Alternative Options If Philips Doesn’t Work With Your Projector
Sometimes, despite your best efforts, your projector and Philips remote just refuse to become friends. Maybe the projector is a rare model, or the code just isn’t in the remote’s system yet. Don’t stress—there are workarounds.
- Get a replacement original remote. Most projector brands sell replacements online, though they can cost more than universal options.
- Try another universal remote. Some brands, like Logitech Harmony, have even bigger code databases and might cover obscure models.
- Use a smartphone app. If your projector supports Wi-Fi or Bluetooth, there’s often a free app to control it right from your phone. Not as tactile, but totally functional.
“When my brother’s old projector didn’t work with the Philips, he ended up finding a cheap replacement remote on eBay. It wasn’t fancy, but it got the job done until he upgraded.”
Keep in mind: even if things don’t work perfectly out of the box, there’s almost always a way to regain control.
Why Using a Universal Remote With Your Projector Is a Game-Changer
At the end of the day, having one remote to rule them all is just… easier. It cuts down on clutter, makes movie nights stress-free, and honestly just feels a bit futuristic. You still get to boss your projector around, switch sources, or tweak volume from wherever you’re lounging.
It’s not just about convenience, though. A Philips universal remote is usually super affordable, widely available, and way less frustrating than chasing down those weird, single-purpose remotes that seem to vanish into thin air.
If you’ve ever hesitated to set up your universal remote with your projector, I hope this guide makes it clear—*it’s not as complicated as it seems.* A few button presses, maybe a couple tries with codes, and you’re good to go. Once you’ve got it working, you’ll wonder how you ever managed juggling all those original remotes.
So next time you plop down for a movie or plug in for a big presentation, you’ll have one less thing to worry about. Just you, your Philips remote, and that glorious big screen. Happy projecting!