If you’ve ever stood in your living room, juggling three different remotes—one for the TV, one for the soundbar, and another for that mystery streaming box—you’re not alone. It kind of feels like being the conductor of a very lazy orchestra, right? A universal remote, like the ones from Philips, promises to turn all that chaos into harmony. Just one little handheld device to rule them all (okay, maybe not as dramatic as Lord of the Rings, but you get the idea).
But let’s be honest: setting up a Philips Universal Remote can seem weirdly intimidating at first. All those flashing lights, setup codes, and cryptic button combos… it feels a little like cracking a safe in a movie, minus the suspenseful music. The truth? It’s way simpler than it looks, especially once you’ve got the right steps in front of you. Grab your remote, pick your favorite chair, and let’s turn this remote setup into something a seventh-grader could teach their grandma.
What Exactly Is a Philips Universal Remote?
Alright, before fiddling with buttons and codes, it helps to know what you’re working with. Think of a Philips Universal Remote as a sort of Swiss Army Knife for your living room. Instead of wrestling with four or five different remotes (and never finding the right one when you need it), this single device can control almost any brand of TV, DVD player, or streaming box. How? It learns “codes” that tell your devices exactly what to do—all through infrared signals (the invisible light, not magic, I promise).
There are a bunch of Philips Universal Remote models out there—some have fewer buttons and basic functions, while others are loaded with all sorts of extras. The cool part is, they’re designed to “pair” with tons of gadgets, whether they’re super new or basically relics from your parents’ basement. The goal is to make life simple: one remote, all your devices.
Honestly, universal remotes are lifesavers if you have a mixed bag of gear from different brands. You don’t have to be a tech wizard. All it takes is a little patience (and maybe a fresh set of batteries). The Philips remote is a crowd favorite because it blends reliability with enough flexibility to make it work for most setups without breaking the bank.
Unboxing and Prepping Your Philips Remote
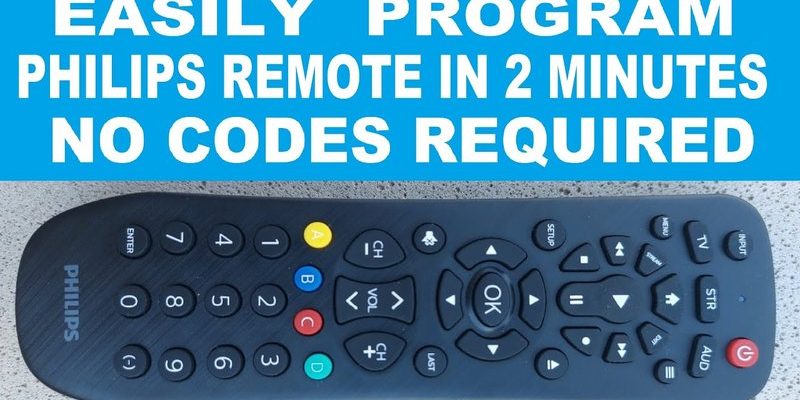
First things first—let’s make sure you’re starting out right. Open up the package and take a look at everything inside. Usually, you’ll find the Philips Universal Remote itself, a slim manual, and sometimes a tiny slip of paper with codes for different brands. Batteries might not be included, so double-check. Most models need two AAA batteries (and trust me, weak batteries are the number one setup killer).
If you’re like me, you probably skip the manual—but this is one of those times where it’s worth at least glancing over. The remote has some standard buttons (power, volume, channel), but pay attention to the “Setup” or “Code Search” button. It’s usually somewhere at the top or under a sliding cover, depending on the model. Don’t worry if the remote looks a little different from your old ones; that’s normal.
Here’s the thing: A universal remote can only work as well as it’s powered. So, pop in some fresh batteries, making sure the positive and negative ends match what’s marked inside. If the remote doesn’t light up or respond when you press a button, it’s usually a battery issue. It’s such a basic step, but it saves a lot of unnecessary troubleshooting later on.
Choosing the Right Setup Method: Code Entry vs. Auto Search
You might be wondering, “Why are there multiple ways to program this thing?” Well, Philips universal remotes keep it flexible. There are two main ways to sync your remote to your device: direct code entry and auto search. Each one has its perks, depending on whether you know your device’s code or you’re just winging it.
Code entry is the faster route if you’ve got the exact code for your TV or device (usually a 3-5 digit number). You just punch it in, and if you’re lucky, bam—your remote is paired, and you’re in business. The code lists are either in the manual, that little slip of paper, or online via Philips’ website.
If you have no clue about your device’s code—or maybe your TV isn’t a big popular brand—go with auto search (sometimes called “code search” or “scan”). The remote cycles through possible codes while you test if it’s working. It takes a bit longer but gets the job done for most obscure TVs and gadgets. Either way, once you’re paired, you can control the basics like power and volume, and sometimes even advanced features if your remote supports them.
Step-By-Step: Programming Your Philips Universal Remote With Code Entry
Okay, let’s get practical. Direct code entry is the go-to method if you can find your device’s code. Here’s how it usually plays out:
- Find the code. Check your Philips remote’s manual or head to the Philips Code Finder online. Search by brand and device type (like “Samsung TV”).
- Turn on the device. Make sure your TV or other gadget is powered up. The remote needs to send test signals.
- Hold the setup button. Press and hold “Setup” until the LED blinks or turns solid (depends on model). Some remotes just use the device button (like “TV”)—check your manual if unsure.
- Enter the code. Punch in the digits using the number pad. If the LED blinks off or stays on, that’s usually a good sign. (If it flashes rapidly, that code’s a dud—try the next one on your list.)
- Test the controls. Try basic functions: power, volume, change channels. If they work, you’re golden! If not, repeat with another code.
Let me be honest: sometimes you have to try a few codes to find the right one. Don’t let it freak you out. Some brands have a dozen code options because, well, electronics are complicated little beasts. Just work your way down the list patiently.
Syncing Using Auto Search: When You Don’t Have the Code
No code? No problem. The auto search—or “scan” feature—is your backup plan. It’s a little slower but dead simple:
- Turn on your device. Keep your TV/DVD/whatever powered up and within sight of the remote.
- Hold Setup. Press and hold the “Setup” button until the LED flashes, then tap the button for the device you want to program (TV, CBL, etc.).
- Start searching. Press a special button (often “Power” or “Channel Up”) repeatedly. Each press sends a new code to your device. As soon as your device turns off or responds, you’ve found the right code.
- Lock it in. Press “Setup” again to save the code. Now test all the remote functions to ensure they work.
Here’s why I love auto search: you don’t have to Google endlessly for codes. It’s especially handy with older TVs or weird brands that aren’t in the main code list. The only downside? It can take a couple of minutes, especially if you’re bouncing through dozens of codes. Pro tip: patience is your best friend here.
Common Problems and Troubleshooting Tips
Even the best universal remote setup can hit a few speed bumps. Don’t sweat it; most hiccups are easy fixes. Below is a table of common headaches and what to try:
| Problem | What To Try |
| Remote isn’t responding at all | Check batteries first—fresh ones work wonders. Make sure you’re pointing the remote directly at the device. |
| Power/volume works, but not other functions | Your code may only control basic features. Try another code for your device until you find one with more options. |
| LED won’t light up during setup | Double-check that batteries are inserted correctly and that the contacts are clean and not corroded. |
| Remote was working, now it’s lost sync | Sometimes universal remotes “forget” their codes during battery changes. Just reprogram using your favorite method. |
Here’s a real talk moment: If your remote is driving you up the wall, put it down for a sec. Grab a snack, reread the instructions, and try again. Sometimes, the simplest thing—like a weak battery or accidentally pressing the wrong device button—causes all the frustration.
Resetting and Reprogramming Your Philips Remote
Let me explain something important: universal remotes are not set-and-forget devices. Maybe you got a new TV, or your roommate tried a hundred codes and now nothing works right. A quick reset is the digital version of “starting fresh.”
To reset most Philips universal remotes, press and hold the “Setup” button for about 10 seconds until the LED blinks or turns off. Sometimes there’s a tiny reset pinhole (you’ll need a paperclip for that old-school move). After resetting, all your programmed codes are wiped, so you’ll have to sync everything again. Honestly, it’s like moving into a new apartment—everything gets a clean slate.
After resetting, I always recommend starting with fresh batteries. It really does make the whole process smoother. Then follow the code entry or auto search steps (whichever worked best for you last time). Resetting can solve weird and random issues, like the remote suddenly refusing to pair with a device for no reason.
Universal Remote vs. Brand Remotes: Is Philips Right for You?
You might be wondering, “Why not just get a replacement remote for each device?” Good question! A universal remote, like the Philips, is perfect if you have multiple devices from different brands or if you’ve lost the original remotes (which, let’s be honest, happens a lot). It saves you from a drawer full of mismatched clickers and daily confusion.
However, there are cases where a brand-specific remote is better. Sometimes, special features (like smart TV apps or voice commands) only work with the original remote. Universal remotes are awesome for basic controls—power, volume, channel—but can be hit-or-miss with fancy extras. For most people, though, the trade-off is worth the simplicity.
If you love having one remote to rule them all, Philips is a solid bet. It pairs with an impressive range of brands, it’s affordable, and the setup is beginner-friendly once you know the ropes. But if you absolutely need that secret Netflix shortcut button, keep your original around just in case. You never know when you’ll want both options.
Keeping Your Philips Universal Remote in Top Shape
Now that you’ve conquered the setup, let’s make sure your remote stays reliable. Universal remotes are sturdy, but a little care goes a long way. Dust or gunk in the buttons can make them unresponsive. Giving the remote a gentle wipe-down every now and then (no harsh cleaners, just a soft cloth) keeps it feeling like new.
Batteries are the lifeblood. If your remote starts lagging or the signal seems weak, swap in a new set—even if the old ones don’t look dead. And honestly, keep a couple of backup AAAs in a drawer. You’ll thank yourself at 10 PM when your remote stops working and you’re mid-binge-watch.
And here’s a fun tip: If you’re ever troubleshooting why nothing’s responding, stand close to your device and remove any obstructions. Sometimes, the simplest fixes make your setup feel totally magical again. Regular resets and occasional reprogramming will keep everything in sync, no sweat.
Wrapping Up: Enjoying Less Clutter and More Control
There’s something genuinely satisfying about pressing just one button and having the lights, sound, and screen all leap to life together. Once you’ve set up your Philips Universal Remote, the relief is real. No more digging through couch cushions or yelling, “Hey, who’s got the TV remote?” It’s just you, your favorite chair, and smooth, effortless control.
Setting up doesn’t have to feel like rocket science—just take it step by step, and don’t be afraid to hit reset if things get weird. If you ever trade out a device or hand the remote off to a tech-challenged family member, you’ll know exactly how to get it paired and working again. Honestly, that kind of peace of mind is worth every minute spent syncing.
So whether you’re wrangling a bunch of old devices or just want to simplify your movie nights, the Philips Universal Remote is a tiny investment with a big payoff. Enjoy hitting play on life’s little moments—without a stack of remotes weighing you down.