Here’s the thing, though—the “universal” part is a bit misleading if the setup feels like you need a PhD in obscure device codes. But honestly, setting up a One For All universal remote doesn’t have to be one of those hair-pulling tech moments. With a little patience (and maybe some snacks), you’ll have your gadgets in sync and ditch the remote clutter for good. Let me walk you through the entire setup process so your remote—and you—can breathe a little easier.
Getting to Know Your One For All Universal Remote
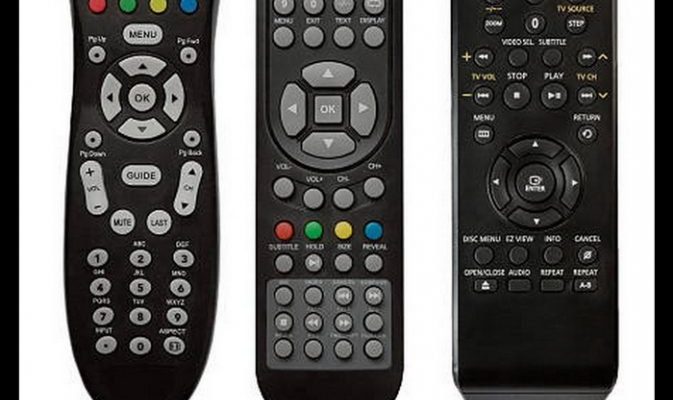
When you first pick up a One For All remote, it might look like any other clicker, but it’s hiding some seriously cool superpowers. Under the hood, it can *learn* to control everything from your ancient plasma TV to your brand-new Roku stick. Most models have a sleek minimalist design, so you won’t feel like you’re holding a 1990s spaceship controller.
You might be wondering, what makes these remotes “universal”? Well, they’re programmed to recognize thousands of device codes—each code is like a secret handshake for a specific brand and model. With these codes, your remote can talk to almost any TV, streaming box, DVD player, or audio device out there. If you’ve ever struggled to find the right remote in the dark, you’ll get why this matters. No more scavenger hunts when you just want to binge a show or turn down the volume during a commercial.
The real magic here is *versatility*. Whether you’re managing a home theater setup or just want to simplify grandma’s TV routine, a universal remote means fewer gadgets, less confusion, and more time spent actually watching stuff (instead of flipping through remotes). That’s the dream, right?
What You Need Before You Start
It’s tempting to just rip open the packaging and start pressing buttons, but trust me, preparation saves headaches. First, grab your One For All remote and make sure you have fresh batteries. Old batteries can lead to all sorts of weirdness—buttons not working, codes not saving, or the remote randomly resetting. It’s like trying to run a marathon after skipping breakfast; your remote needs that power boost.
Next up: your devices. Gather the TV, soundbar, streaming device, or whatever gear you want to control. Keep them all within reach. If you have the original remotes for each of these devices, it’s a good idea to set them nearby, especially if you need to use the One For All’s “learning” feature. Don’t worry, I’ll explain that part later.
Finally, locate the quick-start guide or manual that came with your One For All remote. If you tossed it out with the box (no judgment—I do that too), you can usually find a PDF version on the One For All website. Having easy access to the *code list* is super important, since finding the right code is pretty much step one of the setup.
Step 1: Power Up and Insert Batteries
Here’s where most setup sagas begin: powering up your remote. Flip it over and pop open the battery cover. Most models use two AAA batteries, but double-check yours just in case. Slide them in according to the + and – symbols—if you get this backwards, nothing will work and you’ll think the remote is broken. (Been there.)
Put the back cover on, then watch for a little LED light on the front of the remote. When you press any button for the first time, the LED should blink. That’s your signal the remote is alive and ready for action. If nothing happens, try new batteries or check they’re sitting snugly in their slots.
Pro tip: Always use good-quality, non-rechargeable batteries for the initial setup. Some rechargeable types can be slightly underpowered and mess with the remote’s performance.
Once you’re sure the remote is juiced up and buzzing with potential, you’re ready to move onto the actual syncing (or as the manual calls it, “pairing”) with your devices.
Step 2: Finding the Right Device Code
This part can feel a little bit like hunting for treasure, but it’s the key to making your One For All remote truly universal. Every device—TVs, Blu-ray players, streaming boxes—has a unique code that tells the remote how to talk to it. The code is usually a 4- or 5-digit number.
How do you find it? Check the code list in your manual or on the One For All website. Look up your device’s brand (like Samsung or LG). There might be several codes listed for each brand; that’s normal. You’ll probably need to try them one at a time to see which one works. Jot the codes down on a notepad or your phone before you start, so you don’t have to flip back and forth a hundred times.
The process reminds me of trying keys on a big keyring to see which one unlocks the front door. A little trial and error is totally normal.
If your device isn’t in the list, don’t panic. Some One For All remotes have an “auto search” feature, where you can scan through possible codes until the right one clicks. This takes a bit longer but works for most newer or obscure brands.
Step 3: Entering the Code and Syncing Your Devices
Alright, now comes the moment of truth—actually programming your remote with the code you found. Here’s the typical process, though it can vary slightly by model:
- Press and hold the “Setup” button until the LED light stays on. This puts your remote in programming mode.
- Press the device button (like “TV” or “AUX”) for the device you’re setting up. The LED blinks once.
- Enter your 4- or 5-digit device code using the number pad. The LED will blink twice if the code is accepted. If it blinks quickly or stays off, the code didn’t work—try the next one on your list.
Once the code is accepted, test the basic functions. Try turning the device on and off, changing the volume, or flipping channels. If something doesn’t work, repeat the steps with the next code. Don’t give up if it takes a few tries! Some brands have dozens of possible codes.
Story time: The first time I programmed a universal remote for my dad, it took three different codes before the volume buttons actually worked. Sometimes one code gets the power working but not the menu. Patience pays off!
If nothing works after all the codes, double-check your batteries or try the auto-search method as an alternative.
Step 4: Using the Learning Feature for Extra Compatibility
Here’s where the One For All remote really struts its stuff. If none of the codes make your remote fully control your device, you can “teach” it using the original remote. This is called the *learning* feature. It’s like showing your new puppy some tricks—point, click, repeat.
Set both remotes (your One For All and the original) on a table, about two inches apart. Hold down the “Setup” button on your One For All until the LED stays on. Then press the device button you want to teach. Next, press the key you want to program on your One For All, and then press the same key on your original remote. The LED should blink to say it’s learned the new signal. Repeat this for any buttons that aren’t working right.
- Not all universal remotes have this feature—check your model.
- If the LED never blinks or blinks rapidly, try fresh batteries or move the remotes closer together.
It’s a bit time-consuming, but this is how you get oddball buttons (like “Input” or “Smart Menu”) working perfectly, even with older devices. It’s almost like custom-tailoring the remote to your unique setup.
Step 5: Resetting and Troubleshooting Common Problems
Sometimes, despite your best efforts, something goes sideways. Maybe a button isn’t working, or your remote starts acting possessed (like turning on the wrong device). Here’s how to reset your remote and troubleshoot the most common headaches.
To reset, hold down the “Setup” button until the LED blinks twice, then enter a special reset code (usually 9-8-1 or 9-8-0, depending on your model). This wipes out all programmed codes and takes your remote back to factory settings. It’s the remote equivalent of a fresh start.
- If commands are lagging or inconsistent, try replacing the batteries or cleaning the battery contacts.
- If only some buttons aren’t working, use the learning feature to reprogram them.
- If the remote only works from very close range, check for obstacles or interference from other electronics.
Honestly, most remote problems boil down to tired batteries or simple programming mix-ups. Don’t be afraid to start over if needed—sometimes it’s the fastest fix!
If you’re really stuck, the One For All website has code lookup tools, detailed manuals, and customer support chats. You’re definitely not alone—universal remotes have their quirks, but there’s almost always a solution.
Comparing Universal Remotes to Brand-Specific Remotes
You might be wondering, is a universal remote like One For All really better than just using the remote that came with your device? Here’s how I see it. Brand remotes are usually reliable and designed for one thing only—they’re like a well-worn pair of shoes that fit just right. But if you have more than one device (and who doesn’t these days?), switching between different remotes gets old fast.
Universal remotes, on the other hand, are all about *simplicity* and *space-saving*. They bring everything together in one handheld package. That said, there might be a slight learning curve when you first switch over. Some ultra-specific device features might be missing or need a little extra setup using the learning feature. But the peace of mind (and uncluttered coffee table) is honestly worth it, especially if you’re always losing the “right” remote.
So if your living room looks like a remote control graveyard, it might be time to embrace the One For All. It’s the next logical step once you’ve accidentally mixed up your TV remote with your neighbor’s.
Tips for Long-Term Use and Keeping Things Synced
Now that your remote is up and running, a few small habits will keep everything in sync. For starters, keep fresh batteries handy and replace them every few months. Weak batteries are the root of most weird remote behavior, from laggy responses to random resets.
Every time you add a new device—a replacement TV, a cool new soundbar—remember to find the appropriate device code and repeat the setup process. Keeping your *code list* somewhere safe (taped inside a drawer, for example) is a lifesaver if you ever need to re-program the remote quickly.
Finally, treat your remote kindly. Even though it’s packed with tech, it’s not invincible. Avoid dropping it or letting sticky snacks get into the buttons. If you ever notice keys sticking, a gentle cleaning with a slightly damp cloth can keep everything clicking smoothly. Trust me, a little TLC goes a long way in remote world.
Wrapping Up: All Devices, One Remote—One Less Thing to Worry About
If you’ve made it this far, you’ve probably realized that setting up a One For All universal remote isn’t as intimidating as it first seems. Sure, it involves a few codes, a pinch of patience, and maybe a minor wrestling match with the battery cover. But the payoff—having every device in your living space playing nicely together? That’s pretty priceless.
In a world where tech is supposed to make life easier, universal remotes are one of those rare gadgets that actually do. No more frantic searches for the right remote or asking guests “Which one turns on the TV?” Just one clicker, total control, and a lot less clutter. Happy channel surfing!