Let’s be honest, there’s a certain charm in making new tech work with old hardware. For folks who don’t want to throw out a perfectly good TV just to binge Ted Lasso, learning how to program your Apple TV remote for older TVs is pure gold. Whether you’re using a first-generation Apple remote or the newer aluminum Siri Remote, the process can feel mysterious—like a secret handshake you’re not totally sure how to do. But don’t panic! This is way easier than you might think, and you don’t need to bust out your old instruction manuals (unless you just love that new-paperback smell).
Understanding the Apple TV Remote and Why It Matters
Here’s the thing: Apple TV remotes aren’t always designed to play nice with older TVs right out of the box. Most Apple TV remotes (especially the newer Siri Remote and Apple TV Remote) use Bluetooth to talk to the Apple TV device itself, but older televisions rely on infrared (IR) to receive commands for basic things like power and volume. This difference is a big deal if your TV doesn’t recognize the Apple remote by default.
Imagine you’ve just set up your Apple TV, and you’re ready to relax. You press the volume button… and nothing happens. It’s like trying to call out to a friend in a noisy room—they just can’t hear you unless you’re using the right language (in this case, IR signals). That’s why programming your Apple TV remote to control an older TV isn’t just nice to have—it’s absolutely essential for keeping everything running smoothly without a pile of remotes cluttering your coffee table.
Another wrinkle? Not all Apple TV remotes are created equal. The earlier, skinny white remote is limited compared to the newer black or silver Siri Remote, which has built-in support for IR learning. If your TV is from the early 2000s (or before), you’ll almost certainly need to take a few extra steps to get things synced up. And don’t even get me started on batteries. A dead remote battery will have you blaming Apple’s code when all you needed was a charge.
Setting Up the Apple TV Remote for Older TV Models
Getting your Apple TV streaming remote to work with an old-school TV feels sort of like training a puppy. It takes a few tries and some treats (or in this case, patience), but once you get the hang of it, it’s pretty straightforward.
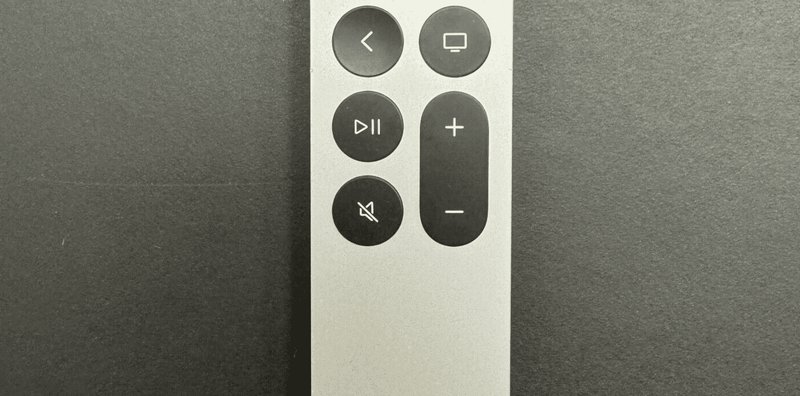
Start by grabbing your Apple TV remote—ideally, one of the newer Siri Remotes with IR functionality. Make sure your TV is on and set to the input where your Apple TV is connected. If you’re not sure which button to press, look for the classic volume, mute, and power controls on your remote.
Now, go into the Apple TV’s settings:
- Navigate to Settings on your Apple TV.
- Tap Remotes and Devices.
- Choose Volume Control.
- If your TV doesn’t respond, pick Learn New Device and follow the on-screen prompts.
Here’s why this is cool: Apple TV can “learn” the infrared code your TV understands by copying the signals from your original TV remote. It’s a bit like your Apple TV remote is at school, memorizing the teacher’s handwriting. You’ll point your TV’s remote at the Apple TV, press the required buttons, and the Apple TV remote will pick up the code it needs to talk to your TV.
Pairing, Syncing, and Troubleshooting: Step-by-Step
You might be wondering, “What if it doesn’t work on the first try?” Honestly, that’s pretty normal—older TVs and new tech can be a little stubborn about getting along.
First, double-check the remote’s battery. A low battery is the most common culprit when the remote just isn’t registering with your TV or Apple TV device. For remotes with a removable battery, swap it out for a fresh one. If you’ve got a rechargeable Siri Remote, plug it in for at least 30 minutes.
Next up: pairing and syncing. For most Apple TV remotes, the process is automatic. If your remote isn’t responding, press and hold the Menu (or Back) and Volume Up buttons together for five seconds. This tells the Apple TV, “Hey, I want to pair!” If you see a message on screen, follow the instructions.
If all else fails, try a quick reset:
- Unplug your Apple TV from the wall for 10 seconds.
- Plug it back in and wait for it to boot up.
- Repeat the pairing process.
Sometimes, patience is the real hero. Give each step a minute or two before moving on—you’d be surprised how often things just need a moment to catch up.
If your TV still won’t respond to volume or power commands, double-check those learned IR codes. Older TVs may have quirky code sets, and running through the “Learn New Device” process again usually does the trick.
Comparing Apple TV Remotes to Universal Remotes
Let me explain why a universal remote *might* be worth considering if you’re hitting dead ends. Apple TV remotes are fantastic for the Apple ecosystem, but older TVs sometimes need a little more flexibility—especially if you’ve got a VCR, DVD player, or other old-school components in the mix.
Universal remotes can sync, reset, and control multiple devices with a single controller. They’re sort of like the Swiss Army knife of living room technology. You program them by entering simple codes found in the manual (or even online databases), and most of them support a wider range of IR codes than the Apple remote.
That said, universal remotes come with their own learning curve and, frankly, can look pretty intimidating with their sea of buttons. But if you’re tired of juggling remotes for your Apple TV, cable box, and ancient TV, going universal can save you a ton of hassle. As always, make sure whichever remote you choose supports your devices and offers IR learning compatibility.
Using HDMI-CEC vs. Manual Programming
Here’s another trick I wish someone had shared with me sooner: some older TVs with HDMI ports support a handy feature called HDMI-CEC, which lets devices connected via HDMI control each other. If your TV has it (sometimes labeled differently on brand menus—Samsung calls it “Anynet+”, for example), your Apple TV remote might control volume and power without any manual programming or IR codes.
To find out if your TV supports HDMI-CEC:
- Check your TV’s menu/settings for CEC options (sometimes under “System” or “External Devices”).
- Turn CEC on if it’s not enabled.
- Restart both your TV and Apple TV for changes to take effect.
If HDMI-CEC doesn’t work (or your TV is too old to support it), that’s where manual IR programming comes in. Either way, knowing which route your setup supports can save you an hour of troubleshooting and Googling.
Common Issues: Troubleshooting and Fixes
Alright, let’s talk about the stuff no one likes to admit: things can (and will) go wrong. But when they do, you’ll want to know how to fix them without pulling your hair out.
- If the remote isn’t doing anything at all, check the battery or try recharging it. It’s wild how often this simple fix is overlooked.
- If only certain buttons (like volume or power) don’t work, redo the IR learning process using your original TV remote.
- If your Apple TV remote feels “laggy,” try moving closer to the Apple TV or clearing any obstacles that might block the IR beam.
- If your TV’s volume still won’t budge, check if the TV itself is set to receive IR commands (some menus let you disable this feature), or see if there’s a side switch for disabling the onboard speakers (especially on older models).
The simplest explanation is usually right. Don’t start tearing down your entertainment center until you’ve checked every cable and setting.
If your remote is totally unresponsive, try borrowing a friend’s Apple TV remote to rule out hardware issues. Sometimes, a remote has just reached the end of its life—it happens to the best of us.
Keeping Your Setup Running Smoothly
Now that you’ve wrangled your Apple TV remote and taught it to play nice with your old television, a little maintenance goes a long way. Every few months, check your remote’s battery status (especially if you notice sluggishness). Recharge or replace the battery as needed, and keep your Apple TV software up to date. Software updates often include improved code compatibility and bug fixes—seriously, it’s worth the five-minute wait.
Another pro tip: keep your IR sensor on the TV clear of obstructions. A stack of DVDs or an overzealous houseplant might block the signal. And if you rearrange your living room, do a quick test run before settling in with popcorn.
- Update your Apple TV firmware when prompted.
- Revisit your remote’s learned IR codes if you change TVs or audio systems.
- Treat your remote with love—those aluminum shells may look tough, but they don’t like being dropped (trust me, I’ve tested this… accidentally).
Wrapping Up: Making Old and New Work Together
Honestly, there’s something satisfying about making your shiny Apple TV remote work with an older TV. It’s proof that you don’t need to toss out your whole setup to enjoy the latest streaming shows. With a bit of patience, some code learning, and the occasional battery swap or reset, you can create a seamless viewing experience—no matter how vintage your TV is.
If you ever feel lost in a sea of remotes and blinking lights, just remember: you’re not alone. Most home tech is a patchwork quilt of old and new, and that’s perfectly okay. Programming your Apple TV streaming device remote for older TVs isn’t just about convenience—it’s about making tech work for you, not the other way around. Happy streaming!