Most Liftmaster systems use a similar pairing process, whether you’ve just replaced a battery, bought a new remote, or had a power outage that caused them to lose sync. The Liftmaster brand is known for reliability, but even the best can get out of sync now and then. Here’s what actually goes on when you sync a garage remote with the wall control: you’re telling your opener, “Hey, trust this remote. Let it in.” It’s a bit like programming an exclusive guest list for your garage.
Understanding Liftmaster Garage Remote and Wall Control Functions
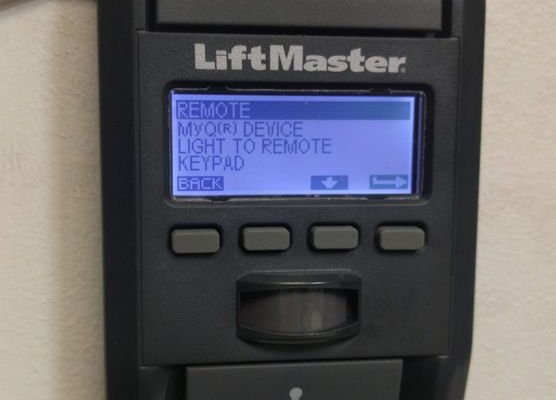
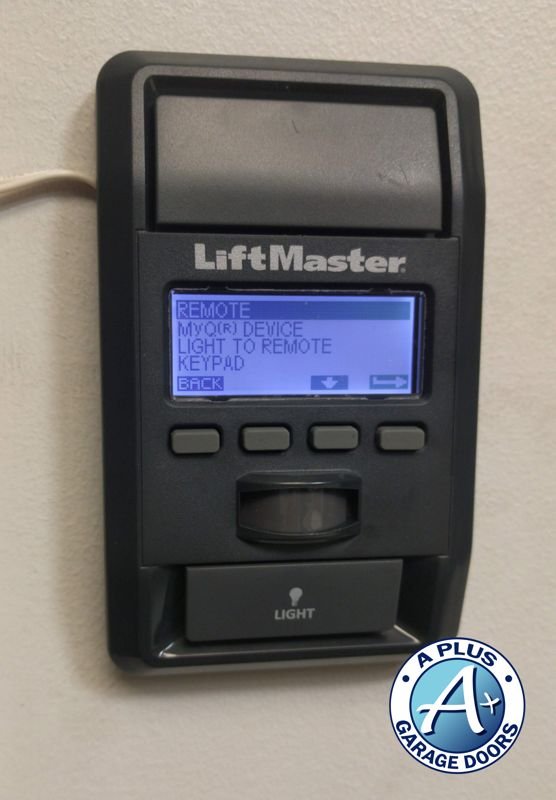
Let me explain what each part does before you jump into syncing. The **Liftmaster garage remote** is that small device usually clipped to your car visor. Its job is to send a coded signal—a secret handshake—to your garage door opener, telling it to open or close the door. The **wall control** (sometimes called a wall console or button) mounts near the door inside your garage. It’s hardwired (or sometimes wireless) to the opener itself, so you can control things even if you’re not in your car.
You might be wondering why both exist if they can each open the door. Here’s the thing: redundancy is your friend. The wall control acts as a reliable backup, while the remote offers convenience from your vehicle. Each device uses a secure code to communicate with the opener, and those codes have to match for everything to work smoothly. If they’re not synced, the opener won’t respond.
Sometimes, you might notice your remote works, but the wall control doesn’t—or vice versa. That’s a sign something’s out of sync. The system expects both to use approved codes. If you try to pair a new remote and skip the wall control, you may run into trouble later. So, syncing everything together is the best way to avoid those annoying moments when you’re stuck outside pressing buttons in the rain.
When and Why You Need to Sync Your Liftmaster Remote With Wall Control
Picture this: you’ve just bought a new Liftmaster remote because the old one vanished (it happens to the best of us), or maybe you changed the battery and now, nothing happens when you press the button. These are classic signals it’s time to sync your remote and wall control.
Here are a few reasons you might need to perform a sync:
- New remote or wall control: Any time you add a device, the opener needs to learn and approve it.
- Battery replacement: Changing the battery sometimes resets the remote’s memory, requiring you to re-sync.
- Power outages: A sudden loss of power can wipe codes from the opener’s memory banks.
- Malfunction or troubleshooting: If the remote or wall control starts acting up, syncing can resolve simple code or pairing issues.
Skipping the sync process isn’t recommended. Sure, sometimes the remote and wall control might “just work,” but often their codes drift apart. That’s when you get the dreaded unresponsive garage door. It’s a bit like speaking two different languages—you might get lucky and communicate now and then, but real fluency needs both sides properly introduced.
Preparing to Sync: Tools and Safety Steps
Before you start pressing buttons, take a minute to set yourself up. Trust me, a few precautions make the whole process smoother—and safer.
First, make sure the garage is well-lit. You’ll need to access the opener unit (the big box on your ceiling) and see the wall control and remote clearly. If you need a ladder, set it up securely. Keep the area clear of anything that could trip you (toys, hoses, rogue bicycles—you know the scene).
Gather your essentials:
- Your working Liftmaster garage remote
- The wall control panel
- A fresh battery for the remote (if you’re unsure about the old one)
- A small step stool or ladder (if your opener is mounted high)
- Optional: The user manual for your Liftmaster model (sometimes a quick peek answers unique questions)
Safety first: If pets or kids are around, ask them to stay clear during syncing. Garage doors can move suddenly. Also, avoid standing directly under the door or opener motor while pairing, just in case.
Finally, locate the “Learn” button on your Liftmaster opener, usually found on the back or side panel. This button is the gatekeeper for pairing new remotes and wall controls. The color of the button (yellow, purple, red, or orange) can sometimes change the steps a bit, so note which you have. If there’s any dust or cobwebs, a quick wipe helps so you can see indicator lights clearly.
Step-By-Step: How To Sync Liftmaster Garage Remote With Wall Control
Here’s where the magic happens. These steps walk you through syncing your Liftmaster remote with the wall control, even if you’ve never touched an opener before.
Step 1: Access the “Learn” Button
- Climb your ladder carefully and look for the small round or square “Learn” button on the opener unit. It might be behind a light cover—just pop it off if needed.
- Remember the color; sometimes instructions reference it for troubleshooting.
Step 2: Prepare the Remote
- Have the remote ready in hand. If you suspect the battery is weak (maybe the range was short or the LED was dim), swap in a new one now.
- Decide which button you want to use for this particular door if your remote has several.
Step 3: Engage Learning Mode
- Press the “Learn” button on the opener. The indicator light nearby should turn on or blink. That means it’s listening for a new code.
- You usually have about 30 seconds to pair—so don’t wander off.
Step 4: Sync the Remote
- Press and hold the desired button on your remote for about 3 seconds. You might see the opener light flash or hear a click.
- That’s your sign it worked. If nothing happens, repeat the step, making sure you’re within range.
Step 5: Test the Remote
- Step down and press the remote button again. The door should move. If not, repeat from step three.
Step 6: Pair Wall Control (if needed)
- Most wall controls auto-sync by design, but if yours is new or replaced, check the manual for pairing steps. Usually, pressing the main button after syncing the remote helps finalize the connection.
Sometimes instructions seem too simple, and you start doubting yourself. If you follow these steps slowly, you’ll see how everything clicks—literally. If not, don’t worry; troubleshooting is up next.
Troubleshooting: When Liftmaster Remote Won’t Sync
Let’s be honest: things don’t always work on the first try. If you press “Learn,” tap your remote, and nothing happens, don’t panic.
Check the battery first. This is the number-one culprit. Even a brand-new remote can ship with a weak cell. If the LED on your remote is dim or doesn’t flash, swap it out.
Distance and interference matter. Make sure you’re within 5–10 feet of the opener when syncing. Electronic devices (phones, WiFi routers, big metal shelves) can cause interference. Step closer, or try again when the garage is quiet.
Clear old codes if all else fails. Your opener might be full—yes, it can “remember” only a set number of remotes. Hold down the “Learn” button for 6–10 seconds until the light goes out. This erases all codes. Then, re-sync each remote and wall control from scratch.
Wall controls rarely fail, but it happens. If the wall control won’t respond, check wires for loose connections, or—if it’s wireless—replace those batteries too. If you see flashing lights or error codes, consult the manual for your specific model.
If you’re tempted to throw the remote across the garage, take a breath. Most pairing issues are solved with a fresh battery, a reset, or a careful re-try of the steps above. Don’t overthink it.
How Liftmaster Sync Codes Work: A Quick Peek Inside
You might be curious what’s actually going on during that “Learn” step. Liftmaster uses something called **rolling code technology**. Instead of using the same signal every time, the code changes after each press—like a password that constantly updates.
This is important for security. Older garage door systems could be hacked with code grabbers, but rolling codes make that almost impossible. When you sync a Liftmaster remote, you’re pairing it with this secure system, letting the opener know it can trust signals from your remote and wall control.
Both the wall control and the remote are programmed to use these codes. That’s why a simple resync fixes most problems: the opener just needs to know whose “voice” to listen for. If you’re considering a universal remote instead of Liftmaster’s, just check that it supports rolling code systems (often branded as Security+ or Security+ 2.0).
Comparing Liftmaster Remotes: Universal vs Branded
Picking the right remote matters more than you might expect. Liftmaster offers their own remotes, but you’ll see plenty of universal options in stores too. Here’s the thing: not all universal remotes work with rolling code Liftmaster models, especially Security+ 2.0.
- Liftmaster OEM remotes: Guaranteed to work, easy to sync, and usually offer the best range and reliability.
- Universal remotes: Hit-or-miss. Some can pair, but you’ll have to check the packaging for “compatible with Liftmaster Security+ 2.0” or similar wording.
- Smartphone garage control: Many Liftmaster openers now work with smart home systems or branded apps (like MyQ). These offer pairing via app, with a similar “Learn” step in the settings.
Honestly, if all you need is a simple open-and-close, stick with the official remotes for the smoothest sync and best longevity. But, if you like tinkering, some universal or smart options can be fun—just make sure they list code support before you buy.
Maintaining a Reliable Sync: Tips for Long-Term Performance
Once you’ve synced your Liftmaster garage remote and wall control, you expect it to “just work” every time. And usually, it does. But like a car or your favorite coffee maker, a little maintenance keeps things smooth.
Change batteries yearly. Even if the remote seems fine, a fresh battery prevents those annoying “won’t open” mornings. Look for a CR2032 or whatever model your remote uses.
Test both the wall control and remote monthly. If either seems laggy or needs several presses, it’s time to re-sync or swap the battery.
After any power outage or electrical issue, double-check everything. Rare, but sometimes surges can cause the opener to forget paired devices.
Clean contacts. Remotes live rough lives: lint, crumbs, and grit inside your car. Wipe battery contacts and the buttons occasionally.
And if you ever add a new remote, remember the pairing process resets the memory for just that device, not the wall control. But if you perform a full reset (holding “Learn” for 6–10 seconds), you’ll need to re-pair every device. It’s a good habit to keep a checklist handy of which remotes should work with your opener.
Staying ahead of small issues means your Liftmaster system stays reliable. A minute here and there beats a soaked coat while you fumble for an umbrella outside a nonresponsive garage.
Wrapping Up: Enjoying a Synced Liftmaster Garage Remote and Wall Control
Pairing your Liftmaster garage remote with the wall control is one of those small homeownership rituals that pays off every day. Once you get the hang of the steps—find the Learn button, press the remote, test, repeat if needed—it becomes second nature. Most problems, from battery woes to mysterious “learn” button moments, can be fixed with patience and a methodical approach.
Honestly, the whole experience highlights how these devices are designed for security and convenience. The rolling codes keep your garage safe. Having both a wall control and a remote gives peace of mind and a backup plan. If you’ve ever been stuck outside or had a stubborn opener, you know how satisfying it is to have everything click perfectly.
Now that your Liftmaster garage door opener, remote, and wall control are synced, you can trust your garage will respond when you ask—rain or shine, morning or midnight. And next time someone’s stuck outside their own garage, you might just have the answer they need.