Chamberlain makes some of the most popular garage door openers in America. Their remotes are everywhere—tucked into car visors, rattling in junk drawers, living their best lives on keychains. But every so often, you’ll need to sync a new remote with your wall control, or maybe redo the connection after replacing the battery. It can sound intimidating, but once you know the routine, it’s like learning a simple dance move. Let’s walk through the process together, break down any jargon, and get your garage system working smoothly again.
Understanding Your Chamberlain Remote and Wall Control System
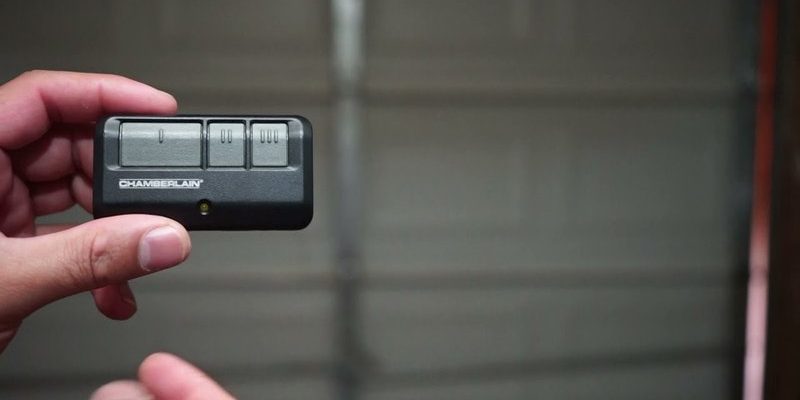
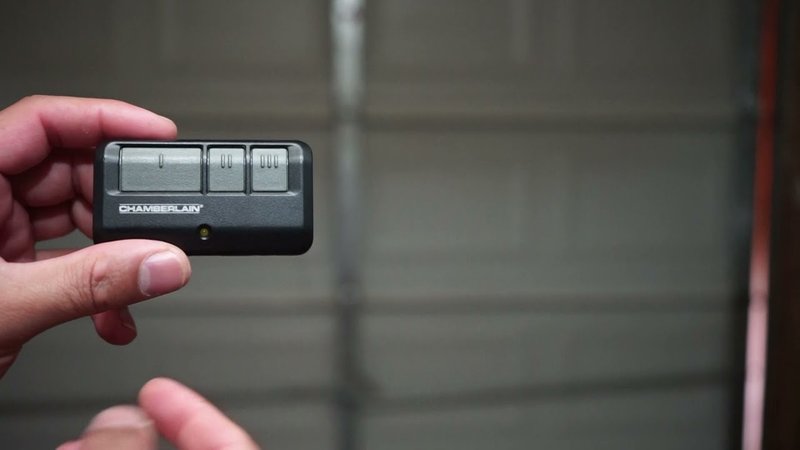
First, it helps to know what you’re working with. Chamberlain remotes come in different shapes—some have a single button, others flaunt three or four. No matter the style, the core function stays the same: each remote sends a code to your garage opener, telling it to open or close. The “wall control” is usually a wired button mounted just inside your garage, often the last thing you press when you leave the house.
Why does syncing matter? Here’s the thing: after you reset the opener, switch out the battery, or grab a fresh remote, you need to pair it with the opener through the wall control. Without this pairing, the remote is like a stranger knocking on your garage’s door—no entry granted.
The relationship between your remote and wall control relies on “code hopping” for security. Long story short, every press of the remote sends a new, unique code to the opener, which only your paired devices recognize. If just one part of this communication gets lost—like after a hard reset—you need to resync everything for peace of mind.
What You’ll Need Before You Sync
Let’s get real: nothing stalls a project faster than missing batteries or a dead remote. Before you start, grab everything on this quick checklist:
- Your Chamberlain garage remote (make sure you know which model you have, but don’t stress about memorizing serial numbers)
- New battery for the remote, if you’re not sure when you last changed it
- Access to the wall control panel (the hardwired button on your garage wall)
- A ladder if your garage opener’s “learn” button is tough to reach
Honestly, checking the battery is step zero. If your remote worked fine before and suddenly stopped after a battery swap, odds are you just need to resync. Also, some Chamberlain systems use MyQ or Wi-Fi wall controls. If yours is high-tech, the steps might differ a bit, but the basic concept remains: pairing the code between the remote and the opener.
Step-by-Step Instructions for Syncing Chamberlain Remote With Wall Control
Let me explain the classic method for most Chamberlain models. The process feels a bit like setting a secret handshake. Here’s how to sync your Chamberlain garage remote with the wall control:
- Locate the “Learn” button on your garage door opener unit. This is usually a small, colored button (often yellow, purple, or red) near the antenna or wiring. You might need a flashlight, since it’s rarely in a glamorous spot.
- Press and release the “Learn” button. Once pressed, the opener’s indicator light should glow steadily or blink—this signals it’s ready to accept a new remote code. You have about 30 seconds to complete the next step.
- Press the desired button on your remote (the one you intend to use for this door). Hold it for a solid second or two, until you see the light on the opener blink again or hear a click. That means the code has been accepted.
- Test the remote. Step back safely, then press the synced button. If the door moves, you’re in business. If not, repeat the steps: sometimes timing or holding the button a bit longer fixes a fussy first try.
Some wall controls have their own “Learn” or “Program” button. If yours does, you might be able to pair the remote directly at the wall pad by holding down the “Learn” button on the wall unit and following a similar remote-press process. Either way, the goal is for the opener to recognize your remote’s signal.
Common Problems and How To Troubleshoot
You might be wondering: what if the remote still isn’t working? Don’t panic. Here’s a rundown of what can go wrong—and how to fix it:
- Remote still unresponsive: Check the battery again. Even new ones can be duds. Also, ensure you’re using the right button on the remote (many multi-button remotes can be programmed for different doors).
- The “Learn” light won’t blink or turns off too quickly: Sometimes, pressing the button too long or too short confuses the opener. Try pressing the “Learn” button just firmly enough for one second.
- Opener blinks but door doesn’t move: This could mean your opener needs to be reset entirely. Unplug the unit for a minute, plug it back in, and try the process from the top.
- Interference or range issues: LED bulbs in garage door openers, nearby Wi-Fi routers, or other electronics can mess with the remote’s signal. Test from a closer distance and, if needed, swap out nearby bulbs for old-school ones.
Troubleshooting these quirks might feel tedious, but most issues boil down to signal interference, expired batteries, or missed steps in the pairing process.
How Code Syncing and Pairing Actually Work
Ever notice how older garage openers could be tricked by anyone with a “universal” remote? Chamberlain solved this with “rolling code” technology, which changes your remote’s signal every time you use it. Think of it as your opener and remote having a new password for every handshake.
When you sync the remote, you’re basically telling the opener: “Trust this device. Let it in.” The wall control acts as a backup—if the remote ever fails, or if you need to reset all remotes at once, the wall button is your control center.
Some Chamberlain systems use advanced features like MyQ or smart home integration. These models can store more codes and even let you control everything via smartphone. The pairing process is similar, but if you have a MyQ wall control, check the display menu—sometimes syncing involves scrolling through digital settings instead of pushing physical buttons.
Comparing Chamberlain Remotes: Universal vs Brand-Specific
Let’s compare the classic Chamberlain remote with universal garage remotes you see online. Brand-specific remotes (like those made by Chamberlain) are built to sync perfectly with the opener’s unique code system. They’re reliable, secure, and usually effortless to pair.
Universal remotes, on the other hand, claim compatibility with several brands—including Chamberlain—but syncing them can be hit or miss. Sometimes you’ll need to cycle through dozens of codes or tweak settings just to get a basic connection. For most folks, sticking with the official Chamberlain remote is less hassle, especially if security and frustration-free syncing matter to you.
Here’s my take: if you’re replacing a lost remote, stick with the brand version unless you have a specific reason to go universal. The pairing steps are often clearer, the support is easier to find, and troubleshooting is far simpler with original equipment.
Resetting and Clearing Old Codes: When and How
Sometimes, you’ll want a fresh start—maybe after a break-in scare or if you’ve lost a remote and don’t want strangers opening your garage. Clearing all old codes from your Chamberlain opener is simple, but it wipes *every* remote from memory, including yours.
- Hold down the “Learn” button on the opener (not the wall control) for about 6–10 seconds until the indicator light goes out. This means all synced remotes have been erased.
- To re-add remotes, follow the same pairing steps as above, one at a time.
Just remember to re-sync every remote you still have after a full reset. Forgetting this step means you’ll be locked out until you re-pair each one.
Tips for Successful Syncing and Best Practices
Consistency is your friend. Here are a few best practices I’ve picked up (sometimes the hard way):
- Always use fresh batteries before syncing. Weak batteries cause pairing to fail or drop unexpectedly.
- Keep your remote and opener within a few feet of each other during the sync process for a strong signal.
- Label remotes and buttons after syncing—especially if your household has multiple garage doors.
- Store a backup remote somewhere safe in your home. You never know when your main one might go missing.
- If you move into a new house, always reset the Chamberlain opener’s codes to clear out any forgotten remotes.
Honestly, syncing isn’t hard once you get the hang of it. The process just feels intimidating the first time around.
When To Call Chamberlain Support
Most issues resolve with a little patience. But sometimes you’ll hit a wall—like if the opener flashes a strange error code, or nothing happens even after you’ve tried every trick in the book. That’s when it’s time to bring in the pros.
Chamberlain support is surprisingly helpful, especially if you have your model number ready. They can walk you through advanced troubleshooting, help you identify compatibility issues, or let you know if it’s time for a hardware replacement. Don’t feel bad about asking for help. Garages are finicky, and sometimes a quick phone call saves hours of stress.
Syncing your Chamberlain garage remote with the wall control doesn’t have to feel like a puzzle with missing pieces. Once you know where to press, what to expect, and how to handle common hiccups, the process is straightforward—even oddly satisfying. Whether you’re adding a new remote, recovering from a dead battery, or securing your opener after a reset, you now have the steps and tips to get your system working smoothly. Next time you roll up the driveway, you’ll know exactly how to keep your Chamberlain opener in sync and your garage under your control.