Honestly, I’ve been there: holding the Harbor Breeze remote in one hand, manual in the other, wishing I could just *tell* the fan what I wanted. But there’s a trick to using these remotes, and once you know the steps, you’ll wonder why it ever seemed tricky in the first place. Whether you’ve just installed a new Harbor Breeze ceiling fan or inherited one with your apartment, learning how to set the perfect fan speed is a game-changer for comfort, energy savings, and noise.
Understanding the Harbor Breeze Ceiling Fan Remote
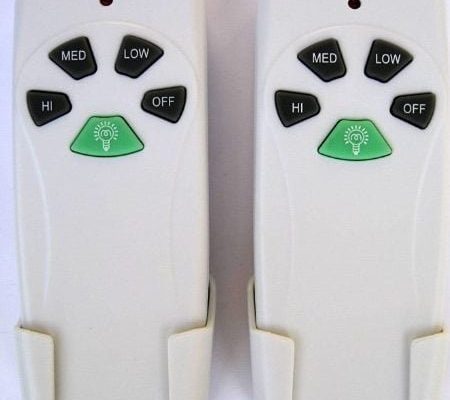
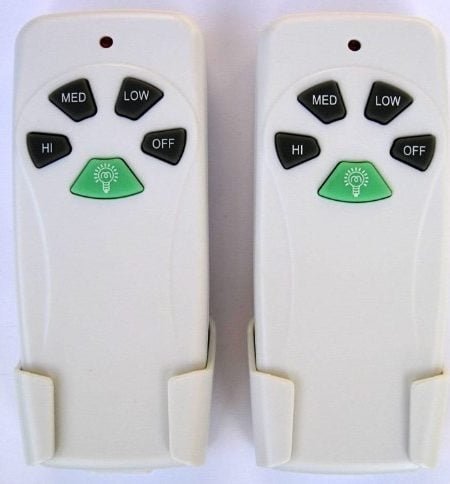
Let me explain what you’re working with. The Harbor Breeze ceiling fan remote is designed to simplify life—no more dangling pull chains or awkward chairs just to reach those switches. Most Harbor Breeze remotes are rectangular with buttons labeled for speed (usually Low, Medium, High), plus a power button and maybe a light control.
Here’s the thing: not all Harbor Breeze remotes look or work exactly the same. Some have sliders instead of buttons, and newer models often include more advanced features—like dimmer controls or even programmable timers. But regardless of style, the main function stays the same: giving you full control of your fan and (sometimes) its light from anywhere in the room.
Many folks wonder if you need a special code or if the remote needs to be paired to the fan. Sometimes, yes: if you’ve just set up your Harbor Breeze fan, you’ll want to check that the remote is synced and the batteries are working. That’s the foundation—without it, none of the speed buttons will do a thing.
How to Pair and Sync Your Harbor Breeze Remote
Before you can set the fan speed, the remote and the fan itself need to be in sync. Think of it like pairing your phone with Bluetooth headphones—if they’re not connected, nothing happens. Most Harbor Breeze ceiling fans and remotes use a simple pairing process, but it helps to know the steps.
First, check the batteries. Sounds basic, but a weak or dead battery is the most common reason the remote isn’t working. Open the battery compartment (usually on the back or under a sliding cover), pop in fresh AAAs or the type specified in your manual, and you’re set.
Now let’s get the remote and fan talking. Inside the fan’s motor housing or the remote, you’ll often find a set of tiny switches called “dip switches.” These are codes that let the remote know which fan it controls—super useful if you have more than one Harbor Breeze fan in the house. Make sure the dip switches on the remote and in the fan match exactly. If you’ve just installed the fan, you might have to climb up and open the canopy to set these.
Once the dip switches match and the batteries are fresh, turn the fan’s wall power off for about 30 seconds, then flip it on again. Grab the remote and press the power button. If you hear a beep or see the fan blades twitch, you’re in business.
Tip: If syncing doesn’t work right away, try resetting the remote by holding both the “Fan Off” and “High” buttons for 10 seconds. Sometimes, older models need this extra nudge.
Setting Fan Speed: Low, Medium, and High Explained
Okay, now to the fun part—actually setting the fan speed using your Harbor Breeze remote. Most remotes break down speed into three simple options: Low, Medium, and High. Each one changes how much air the fan moves, which affects both comfort and energy use.
Here’s a mental picture:
- Low speed is like a gentle summer breeze—barely there, just enough to keep stale air moving.
- Medium speed adds some power, great for mild days or steady background comfort.
- High speed cranks things up, perfect for sweltering afternoons or when you’ve got a room full of guests.
To change the speed, all you need to do is point the Harbor Breeze remote at the ceiling fan and press the button for your desired setting. Sometimes there’s an LED indicator or a subtle change in fan noise to let you know it worked. If you’re switching from High to Low, don’t worry if there’s a slight delay—fans sometimes take a moment to change speeds smoothly.
Some Harbor Breeze remotes feature a “reverse” button, often marked with two arrows chasing each other. This changes the blade direction for winter or summer modes—a handy feature, but unrelated to speed.
Troubleshooting Common Remote and Fan Speed Problems
Let’s be real, even with the best design, things go wrong. Maybe your Harbor Breeze ceiling fan remote refuses to change speeds, or the fan speed settings don’t seem to respond. Here’s what to do before you give up and reach for the ladder.
First, check the line of sight. While most remotes are radio-frequency (RF) and don’t require perfect aiming, obstacles or low batteries can still get in the way. Make sure you’re in the same room, aiming at the fan, and not too far away.
Second, look for signal interference—other wireless devices nearby, or even power surges, can mess with the remote’s signal. Try turning other electronics off and see if the problem resolves.
If nothing changes, double-check the dip switch settings or pairing process. A small mismatch here will break communication completely. Also, inspect the fan’s receiver (inside the canopy or behind a cover)—sometimes a reset here does the trick.
If all else fails, Harbor Breeze sells replacement remotes and universal remotes compatible with their fans. Just double-check the model before buying, since not all remotes work with every fan.
When To Reset or Replace The Harbor Breeze Remote
Sometimes the remote itself is the problem. If you’ve swapped batteries, checked dip switches, and gone through pairing, but your Harbor Breeze ceiling fan still won’t change speed, it might be time for a full reset or even a replacement.
To reset, most Harbor Breeze remotes respond to holding down the “power” and either “high” or “off” buttons together for about 10 seconds. You’ll often see an indicator light flash, showing the reset worked.
If the remote feels sticky, buttons are unresponsive, or there’s visible damage—honestly, it’s just easier to buy a replacement. Universal remotes are handy if you can’t find the exact model number; many are programmed to work with Harbor Breeze fans right out of the box, and often include updated features or better battery life.
One last thing: if you replace the remote, you’ll need to match the new remote’s dip switches to your fan. It’s a quick job but absolutely crucial.
Comparing Harbor Breeze Remotes to Universal Fan Remotes
You might be wondering if you have to stick with a Harbor Breeze-branded remote, or if any universal remote will do the trick. Good question. Here’s what matters:
- Harbor Breeze remotes are designed for out-of-the-box compatibility—no codes, no guesswork, just match the dip switches and pop in the batteries.
- Universal remotes work with a range of brands, but usually require an extra setup step (like entering a code or using a receiver kit).
Honestly, for most folks, the original Harbor Breeze remote is easiest. If you’re upgrading or replacing a broken remote, universal options give you flexibility—especially if you have several brands of ceiling fans in your home.
But pay close attention to product descriptions. Some universal remotes don’t support advanced features like light dimming or reverse. And if your Harbor Breeze fan has unique features (like a learning code or specific receiver), it’s safest to stick with the original manufacturer.
How to Maintain Your Harbor Breeze Remote and Fan for Best Performance
Taking care of your remote and ceiling fan can save you time and frustration down the line. Start with the simple stuff: Keep the remote free of dust and spills (no judgment—remote controls have a way of attracting snacks and sticky drinks). Open the battery compartment every few months to check for corrosion or leaks, especially if you live somewhere humid.
For the fan itself, make sure the receiver (the little brain that talks to your remote) is dry and dust-free inside the canopy. Every so often, run through all the speed settings to make sure they respond—sometimes, a rarely-used remote can develop sticky contacts or lose sync.
If you notice lag, a weak signal, or erratic speeds, change the batteries right away. It’s annoying, but low batteries can cause all sorts of weird problems, and the fix is so easy you’ll wish you’d tried it first.
Quick tip: If you move or remodel and cut power to the fan, run through the pairing steps again to make sure everything works once you turn the power back on.
Final Thoughts: Making Your Harbor Breeze Fan Work For You
Setting the fan speed with a Harbor Breeze remote shouldn’t be a mystery. Once you get the hang of the pairing process, code sync, and simple troubleshooting, you can tweak your comfort level any time—without leaving the couch. It’s a simple bit of technology that can turn an awkward, sticky room into a cool retreat or a cozy, warm space with just a tap of your thumb.
So, next time your Harbor Breeze ceiling fan seems stubborn or stuck on one speed, remember: a fresh set of batteries, matching dip switches, and a little patience can go a long way. These fans are built to last and, with the right remote setup, they’ll keep you comfortable for years—no ladders, no guesswork, and no more wind tunnel days unless you actually want them.