Nest, which is part of Google’s smart home family, builds remotes that are slick and powerful. But, like any tool, they can glitch, lose their pairing, or just stop responding. When the app isn’t an option, you’ll need to rely on physical buttons and a bit of patience. Let me walk you through how to reset and troubleshoot your Nest smart remote without needing your phone at all.
Understanding Your Nest Smart Remote: Parts and Functions
Before you jump into the reset steps, let’s get familiar with the Nest smart remote’s layout. Honestly, knowing the buttons and what they do makes the whole process less intimidating. Most Nest remotes follow a straightforward design: a circular navigation pad, a power button, a select/OK button in the middle, and sometimes a pairing or reset button hidden in plain sight.
If you flip the remote over or look along the sides, you might spot a small hole labeled “reset” or “pair.” You’ll usually need a paperclip or something similar to press it. The battery compartment is also important; some reset instructions require removing or reinserting batteries. Understanding these physical features will save you from unnecessary frustration.
Key buttons and parts to look for:
- The main navigation pad (arrows or touch ring)
- The select or OK button
- The power button
- A hidden reset or pair button (often recessed)
- Battery compartment door
Think of the remote like an old-school TV clicker but with a few extra bells and whistles lurking under the hood.
Take a close look at your specific model, since different generations sometimes shift things around. If you’re ever unsure, a flashlight helps reveal tiny, hard-to-see labels.
When (And Why) You Might Need To Reset Your Nest Remote
So why bother resetting your Nest smart remote? Well, here’s the thing: remotes can lose connection to their devices, freeze, or act slow for all sorts of reasons. Maybe someone spilled a drink nearby (no judgment), or the batteries got swapped out upside-down. Sometimes, after a software update, the remote just stops syncing correctly.
You might be wondering if a simple battery swap is enough. Sometimes, sure—but a true reset wipes lingering connection issues, clears out old pairing data, and lets you start fresh. If your remote’s not syncing, buttons are unresponsive, or you’re seeing strange codes on the screen, a reset is often the magic fix.
Typical reasons to reset:
- Lost connection between the remote and the TV or hub
- Sync problems after moving the device or installing new WiFi
- Batteries replaced but remote still won’t work
- Glitchy behavior—buttons not working, lag, or repeating commands
Resetting is kind of like rebooting your laptop when it’s stuck. It doesn’t erase your TV settings or home setup—it just gets the remote talking properly again.
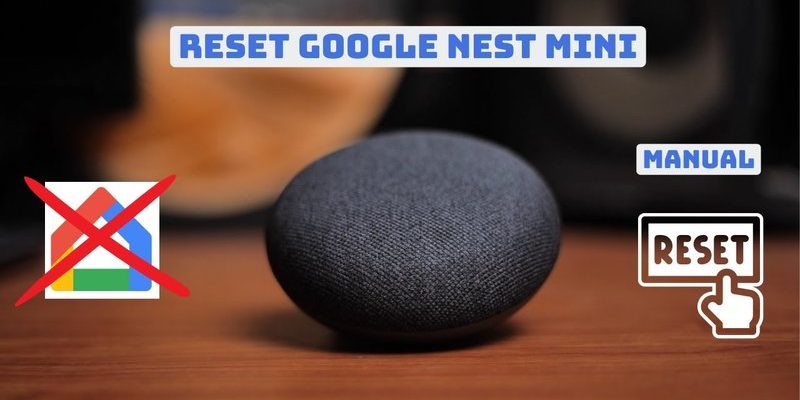
How To Reset Nest Smart Remote Without Using The App
Here’s what you came for: the no-app reset. Nest designed their remotes so you can still fix things without jumping through app hoops. Let me explain the basic steps, but keep in mind: details can shift a bit by model.
Step-by-step Nest smart remote reset:
- Flip the remote over and remove the battery cover.
- Take out the batteries. Wait 10 seconds to fully power down the remote’s circuits.
- Look for a tiny hole labeled “reset” or “pair.” If you see one, gently insert a paperclip and hold for 10–15 seconds. You might feel or hear a tiny click.
- Put the batteries back in, making sure they’re freshly charged and facing the right direction.
- With the batteries in, keep holding the reset button for another 5 seconds if needed. Some remotes blink or flash to show they’re clearing settings.
- Release the button. Wait for a steady LED light or a blink to confirm the reset worked.
- Now, test the remote: try pairing it with your Nest streaming device or TV. Usually you press and hold the pairing button until the device enters “sync mode” (blinking light), then confirm on the TV screen.
If you don’t see a reset button, don’t panic—removing and reinserting the batteries slowly often acts as a soft reset on simpler models.
If at any step you’re unsure, check for a user manual inside the battery compartment flap (some Nest remotes hide a tiny instruction sticker there).
Troubleshooting Common Nest Remote Reset Problems
Resetting doesn’t always go as planned. The remote can stubbornly refuse to reset, or you might not get the blinking lights you expected. Here’s where patience and a little troubleshooting come in.
First off, double-check that you’re holding the correct button and for the right amount of time. If you let go too early, the reset might not “stick.” If the lights don’t flash, swap in *new* batteries—weak ones can cause all sorts of weird glitches. Make sure you’re pressing firmly but gently, especially with a paperclip in those little holes (no need to Hulk it).
Other problems and fixes:
- If the remote won’t pair after resetting, unplug your Nest device for a minute, then plug it back in.
- Still nothing? Make sure your TV or streaming stick is on the correct input—sometimes it’s not your remote, but the wrong HDMI slot.
- If you see a code or error, jot it down. Some Nest models use blink patterns or codes to signal what’s wrong—check your manual for details.
- If the reset button is stuck or jammed, use a soft-tipped object instead of a sharp pin.
Half the game is simply slowing down and working step by step. Rushing usually leads to missed signals or skipped steps.
How To Pair Your Nest Remote Again After Reset
So, you’ve reset the remote—now what? You need to re-pair it with your Nest device (streaming stick, TV, etc.). Pairing is when the remote and device learn to talk to each other again, kind of like reintroducing two friends after a falling out.
Here’s how pairing usually goes:
- Ensure the Nest device is powered on and within range (honestly, a few feet away is best).
- Put the remote into pairing mode. This usually means holding down the pairing/reset button until the LED blinks rapidly.
- Look for a pairing request on your TV screen. Sometimes you’ll need to press “OK” or enter a code shown on-screen using the remote.
- Wait for a confirmation message or a steady light on the remote. That’s your signal it worked.
If nothing happens, repeat the process. Sometimes it takes a couple tries for the sync to go through, especially if there’s interference.
Pairing is like making a handshake between the remote and device. Each one learns the other’s “secret code” and can communicate again.
Checking Battery Health and Remote Performance
Batteries are sneakier than you’d think. Even if they’re not totally dead, weak batteries can cause lag, missed button presses, or failed resets. In my experience, 9 out of 10 “broken” remotes are just hungry for new batteries.
Pop in a fresh set every time you reset. Always use good-quality batteries—cheap brand ones can leak or fade faster. If your remote still lags or dies quickly after new batteries, it could be a sign of a faulty battery compartment or worn electrical contacts inside.
Tips for maintaining your Nest remote’s battery health:
- Change batteries as soon as you notice weak response or dim lights.
- Clean the battery terminals gently with a dry cloth if you see corrosion (never use liquids).
- Avoid mixing old and new batteries—it messes with voltage and performance.
The right batteries make all the difference—a reset works best when your remote is running at full power.
Comparing Nest Remote Reset To Other Smart Remotes
You might be wondering how resetting a Nest smart remote stacks up to other brands like Roku, Fire Stick, or universal smart remotes. Good question—there are some subtle differences.
Nest remotes usually offer a straightforward, physical reset—no need for WiFi or the app, which is a relief when tech fails you. Some competitors require syncing over Bluetooth or demand a full app login, which can get tricky if you’re setting things up for a parent or roommate without a smartphone.
Universal remotes sometimes have complex code-entry steps to reset or re-sync, which can be confusing if you’re not used to the process. The Nest approach, with a single button and clear feedback, feels simpler by comparison.
If you ever switch to a different brand, keep the following in mind:
- Some remotes use a combination of buttons (e.g., power + home + mute) instead of a dedicated reset button.
- Universal remotes may require you to re-enter codes for every paired device after resetting.
- WiFi or Bluetooth-based pairing can take longer to re-establish, especially in busy households or crowded networks.
Honestly, Nest shines when it comes to “no app needed” troubleshooting. That’s one less password to remember—or lose.
Keeping Your Nest Smart Remote Working Smoothly Long-Term
Resetting and re-pairing fixes most issues, but let’s talk about keeping your Nest remote in good shape afterward. Think of it like regular maintenance for your car—you want everything running smoothly, not waiting for the next breakdown.
Steps for ongoing remote health:
- Store your remote in a spot where it won’t get dropped, wet, or covered in couch crumbs.
- Swap batteries at least twice a year, even if the remote seems fine. Fresh batteries help prevent unexpected outages.
- Give the buttons a gentle wipe with a soft, dry cloth every few weeks to clear away dust and stickiness.
- If your remote starts acting up again, repeat the reset process before getting stressed out—it’s quick and non-destructive.
If you share your home with kids or pets, consider labeling or taping a reset-pairing “cheat sheet” somewhere handy. It makes life easier for everyone the next time tech gets fussy.
The best smart remotes are the ones you can fix yourself, whenever and wherever you need to.
Final Thoughts: Mastering the Reset Without the App
Resetting your Nest smart remote without the app isn’t rocket science—you just need a little know-how and a dash of patience. By using the physical reset or pair button, changing the batteries, and following the step-by-step pairing process, you’ll get things back on track fast. It’s empowering to know you don’t have to rely on an app or call tech support just because your remote’s being moody.
Stay calm, work through the reset steps slowly, and you’ll soon have your Nest devices responding like they should. When in doubt, a simple battery swap and a few extra seconds on the reset button solve most troubles. Here’s to fewer tech headaches and more time enjoying your smart home setup.