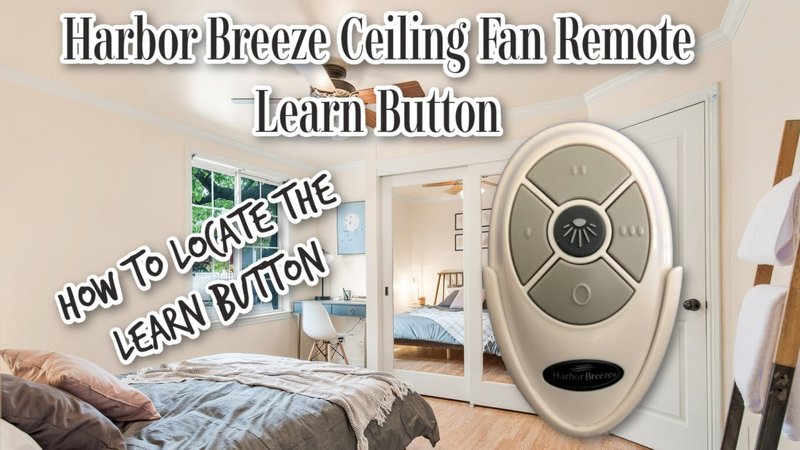
Harbor Breeze remotes are pretty common in homes, with models ranging from basic fan-and-light remotes to the fancier programmable versions. The trouble is, when these remotes lose their connection, replacing the battery or frantically pushing every button isn’t always enough. If you’re staring at your remote wondering where to even start, let me walk you through it. You’ll have that breeze back in no time.
Understanding Your Harbor Breeze Ceiling Fan Remote
Before jumping into the reset, it helps to get familiar with what you’re actually holding. Harbor Breeze ceiling fan remotes come in a few flavors, but most share some basic features: an on/off switch for the fan, light control, speed settings, and sometimes a “reverse” button or a dimmer. What trips people up is the small *code switches* (or DIP switches) usually hidden inside the battery compartment or the receiver unit in the fan itself.
Let me explain. DIP switches are like little binary locks—they make sure your remote only talks to *your* fan and not your neighbor’s. If they get out of sync (maybe after changing batteries or moving the fan), your remote loses its mind. That’s where a reset comes in: you’re basically telling both the remote and the receiver, “Hey, let’s start fresh and talk to each other again.”
Most Harbor Breeze remotes use radio frequency (RF) signals rather than infrared (IR), which means you don’t have to “point and shoot”; but if the “code” or pairing gets scrambled, nothing works smoothly. Knowing which type you have—universal or brand-specific—may slightly change the reset process, but the basics stay the same.
Common Reasons You May Need to Reset Your Remote
Remotes aren’t exactly sturdy little soldiers. Sometimes, all it takes is a battery swap or a random power outage to throw everything off. You might be wondering: why do remotes need resetting in the first place? Here’s the thing—these remotes are more sensitive than they look.
- Batteries get loose or corrode: If the battery contacts aren’t solid, the code can get scrambled.
- Power outages or surges: When your home’s power blips, the receiver in the fan might forget its pairing.
- Interference from other devices: If you or your neighbor installs a similar fan, the signals might cross, especially if you haven’t changed the DIP switches from the default.
- Physical drops or damage: Remotes that hit the floor sometimes need re-pairing, just like a shocked phone needing a reset.
All of these scenarios can mess with the “handshake” between your Harbor Breeze remote and its receiver. Resetting the connection puts everyone back on speaking terms.
How To Reset a Harbor Breeze Ceiling Fan Remote: The Step-by-Step Process
Here’s where the magic happens. You don’t need a manual—just a bit of patience, a Phillips-head screwdriver, and maybe a flashlight for peering inside the fan canopy.
Important: Always turn off the power at the breaker before working inside the fan to avoid any accidental shocks.
- Step 1: Remove the battery cover on your Harbor Breeze remote. Take out the batteries and look for tiny switches (the so-called DIP switch “code”).
- Step 2: Access the fan’s receiver. You’ll usually find this in the mounting bracket at the ceiling. Carefully lower the fan canopy (the “hood”) using a screwdriver. Locate the receiver—a black or white rectangle with its own bank of DIP switches.
- Step 3: Set the DIP switches. Make sure the pattern of on/off positions matches between the remote and the receiver. Use a pen or small tool to move the switches—it’s a bit like dialing in a combination lock. If you want to be extra safe, change the pattern to something unique, then match both units.
- Step 4: Replace the batteries in your remote, close everything up, and turn the breaker back on.
- Step 5: Test the remote. Try the fan and light controls. If nothing happens, double-check your DIP switch matching and the battery orientation. Sometimes, it helps to “reboot” by turning the breaker off and on again, then retrying the sync.
Troubleshooting When the Reset Doesn’t Work
Sometimes, you do everything right—and the remote still stares at you like it’s on vacation. Here’s what I do when a reset seems to fail. First, check the basics: fresh batteries, proper orientation (positive and negative ends aligned). Even the fanciest Harbor Breeze remote can’t do much with a dying battery.
Next, make sure the DIP switches aren’t loose or stuck between settings. Those little toggles are finicky. I’ve found that gently nudging each one into place can make a difference. If you changed the codes, be sure both the remote and receiver *exactly* match—one wrong switch can ruin the pairing.
If you’re still having trouble, try pairing the remote with the fan again by turning the power off at the breaker, waiting a few minutes, and turning it back on while holding down the fan’s main power button on the remote for about five seconds (if your model allows this). Some newer Harbor Breeze models require a “learning code” method—where you hold a specific button as the power returns to sync up the remote and receiver.
And if all else fails, the receiver unit in your fan might be faulty. Before replacing anything, though, try the remote with another compatible Harbor Breeze fan (if possible) to rule out a deeper issue.
How Pairing Works: A Quick Look Inside the System
Ever wonder what’s actually happening when you “pair” a ceiling fan remote with its fan? The process is a little like giving each device a unique handshake. The DIP switches act as a “secret code”—if both sides have the same code, the remote’s signal gets accepted, and your fan does what it’s told. If the codes don’t match, the receiver ignores the remote entirely.
Pairing is all about matching codes, not magic. It’s simple electronics meeting a bit of old-school logic.
With Harbor Breeze ceiling fans, this system works well—unless you have multiple fans nearby or use a universal remote. Then, codes matter more than ever. I’ve seen people accidentally make their neighbor’s fan spin all night because they left the DIP switches on the default setting. Don’t be that person—set a unique combination if you can.
Some newer remotes use “learning codes” instead of DIP switches. In these, pressing a sync button or holding a specific button as power restores causes the fan and remote to create a fresh handshake automatically. If you’re not sure which system you have, check for visible switches, or look for a “pairing” or “learn” button on your remote.
Battery Issues and Remote Sync Problems
You might be surprised how many remote issues start with a simple battery problem. Sometimes, it isn’t just about swapping old for new. Weak batteries can create “dead spots” where the remote sends a partial signal—a little like a low-power flashlight barely lighting up the room.
Here’s what I always check:
- Check battery type: Harbor Breeze remotes usually use AAA, AA, or a 9V battery. Make sure you’re using the right one, and that it’s a fresh, quality brand.
- Inspect contacts: If you see any rust, grime, or odd buildup in the battery compartment, clean it gently with a cotton swab and alcohol.
- Test after battery install: After putting in new batteries, always try the remote before reassembling everything. If the remote still won’t sync or operate the fan, move on to checking the DIP switches or pairing functions.
A lot of people panic when the remote doesn’t work, but honestly, battery issues are the easiest to fix. Get the power right first, then worry about codes and pairing.
Differences Between Harbor Breeze and Universal Ceiling Fan Remotes
Not all remotes are created equal. If you lost your Harbor Breeze remote and picked up a universal model from the hardware store, you might run into some extra challenges. Universal remotes *can* work, but you’ll need to program them to your specific fan, which sometimes requires knowing the original remote’s DIP code or using the fan’s receiver “learn” feature.
The best match is always the original Harbor Breeze remote, but universal options are a solid backup if your model is compatible.
If you’re using a universal remote, look for a programming or pairing button, usually hidden under the battery door. Follow the instructions to enter a pairing mode, then power-cycle the fan to sync it up. In some tricky cases, you may need to open the fan’s canopy and access the receiver just like with the original Harbor Breeze remote.
Keep in mind, a universal remote might not support every function (like reverse or dimming), depending on its design. If you’re missing a feature you need, consider hunting down the correct Harbor Breeze replacement—your fan will thank you.
When to Replace, Repair, or Call Support
Sometimes, despite your best efforts, a remote reset just doesn’t work. Here’s when to throw in the towel (temporarily) and explore your next move. If you’ve matched the DIP switches, tried new batteries, checked the receiver, and attempted a power-cycle reset—without any luck—something deeper might be wrong.
- Receiver failure: The receiver inside the fan might be fried, especially after power surges. Replacements are available online and from home improvement stores.
- Remote hardware damage: If you’ve dropped the remote in water, or it’s taken a serious beating, the circuitry may be damaged.
- Outdated models: Some older Harbor Breeze fans may no longer have compatible parts available, making repairs tricky.
- Manufacturer support: Harbor Breeze (sold mostly through Lowe’s) offers support and can sometimes send replacement remotes or recommend next steps—especially if your fan is still under warranty.
Honestly, most reset issues sort themselves out with a patient, step-by-step approach. Still stuck? Support resources exist for a reason—don’t let a silent fan spoil your summer.
Wrapping Up: Getting Your Harbor Breeze Remote Back On Track
A Harbor Breeze ceiling fan remote might seem mysterious at first, but resetting it is mostly about matching codes, checking batteries, and being a little persistent. Even without the manual, you can handle most fixes with a steady hand and a bit of curiosity. Just remember: always start with the simple things—power, batteries, DIP switches—before diving deeper. If you need to pair a universal remote or deal with a finicky receiver, take your time and double-check each step.
The good news? Most issues are fixable without fancy tools or a call to an electrician. And hey, next time, consider snapping a photo of those DIP switches or tucking a note somewhere safe. Future you will thank you. Until then, enjoy the breeze—reset, sync, and spin that fan back to life.
