These remotes come in a few styles, but most use a basic coin cell or AAA battery. No matter which model you have, you’ll want your remote working so you can keep the breeze going without hauling yourself off the couch. Here’s the thing: a dead remote isn’t a disaster. Replacing the battery can usually be done in just a few minutes, and you don’t need any fancy tools. Let me walk you through how to do it, and I’ll break down a few pitfalls to steer around, too.
Getting To Know Your Westinghouse Ceiling Fan Remote
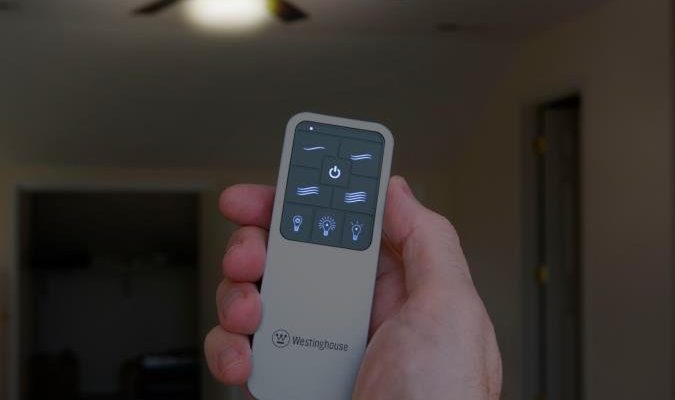
You might be wondering, “Which Westinghouse remote do I even have?” Fair question, because there are a few different types out there. Most Westinghouse ceiling fans use either a **universal remote** or a **brand-specific remote**. The universal remotes often look a little chunkier, and they might have extra buttons for things like setting fan speeds or even a light dimmer. Brand-specific Westinghouse remotes usually have slim, simple designs and fewer buttons.
The first thing to do is flip your remote over and look for a model number. Sometimes it’s hidden under the battery cover, which is… slightly annoying, but that’s how it goes. If you can’t find a number, just take note of the button layout and size. This comes in handy if you ever need to look up instructions or a replacement.
Why does identifying your remote matter? Not all Westinghouse ceiling fan remotes use the same type of battery. Some take a coin-style CR2032 or CR2025 battery, while others use AAA or AA batteries. If you’re not sure what you need, checking the model or peeking at the battery inside is the safest bet. Honestly, it saves you a trip back to the store when you grab the wrong battery by mistake.
Signs It’s Time To Change The Battery
At first, a dying battery doesn’t announce itself with fireworks. Instead, you might notice your remote becomes a little moody—sometimes the fan turns on, sometimes it ignores you. Maybe you have to press the button two or three times before it responds, or you have to stand right under the fan holding the remote at a weird angle.
Let me explain: when your Westinghouse remote starts having “off days,” it’s usually a sign the battery is weak. Unlike TV remotes that can hang on forever with low power, ceiling fan remotes are pickier because they have to send a code to sync with your fan. Random little hiccups, like the light flickering or the fan not responding to speed changes, can also be battery-related. Don’t immediately assume your fan is broken or the remote needs to be reset—most often, it’s just the battery giving out.
If your remote completely stops working, don’t panic. **Testing the remote** with a fresh battery is much easier (and cheaper) than calling in an electrician. And if the new battery doesn’t do the trick, that’s when it’s time to troubleshoot further.
What Battery Does My Westinghouse Fan Remote Use?
So you’ve popped off the back cover and you’re staring at a little silver disc or maybe a couple of AAA batteries. Here’s what you need to know:
- Most slim Westinghouse remotes use a CR2032 coin battery.
- Some older or chunkier models use AAA or, less commonly, AA batteries.
It’s tempting to just grab whatever battery you see in your junk drawer, but not all batteries are created equal. If your remote takes a coin cell, always check the number—CR2032 and CR2025 look similar but aren’t the same power. Using the wrong type might make your remote act strangely or not work at all. If you’re not sure, the battery itself will have the number printed on it.
Pro tip: Always use a fresh, brand-name battery. Off-brand or old batteries sometimes don’t have enough juice, and you’ll end up repeating this whole process sooner than you’d like.
How To Open a Westinghouse Ceiling Fan Remote
Here’s the part that can feel a little nerve-wracking, especially if you’re worried about breaking something. Most Westinghouse remotes have a battery compartment on the back with a small latch or sliding cover. Sometimes, it’s just a matter of using your thumb to slide off the cover—and honestly, that’s the best case.
But what if it’s stuck? Here’s what has worked for me:
- Put the remote flat on a sturdy table, buttons facing down.
- Look for the direction arrow—usually, the cover slides downward.
- If it won’t budge, use a coin or your fingernail to gently push the latch or cover open.
- Avoid using anything sharp, like a knife, which can crack the plastic.
Some remotes have a tiny Phillips screw holding the compartment shut. If that’s the case, grab a small screwdriver (the kind you’d use for eyeglasses works perfectly) and remove the screw. Set it somewhere safe—they’re easy to lose.
Step-by-Step: Replacing The Battery In Your Westinghouse Remote
Let’s get down to it. If you want your ceiling fan remote working again, swapping out the battery is usually all it takes. Here’s my go-to method, broken down so anyone can follow:
-
Remove the battery cover.
Use the sliding latch, gentle pressure, or the screwdriver method I described earlier. -
Take out the old battery.
For coin cells, just pop it out with your finger or a plastic tool. For AAAs or AAs, tip the remote to slide them out. -
Check the orientation.
You’ll see a (+) and (–) inside the compartment. Make sure your new battery lines up exactly or your remote won’t work. -
Insert the new battery.
Gently press the coin cell into place or pop in the correct size AAA/AA. -
Replace the cover (and screw, if needed).
Make sure it snaps or slides back securely. -
Test your remote.
Point it at your ceiling fan receiver and try turning the fan or light on. If it responds, you did it!
It’s usually this simple, but if you skipped the battery orientation step, nothing will work. Double-check that (+) and (–) match up.
Troubleshooting After Battery Replacement
So you’ve followed every step, but your Westinghouse remote still isn’t working. Frustrating, right? Here’s what I’d check next:
First, make sure your new battery actually has power. (I’ve been burned by brand-new batteries that were dead out of the package.) Try a second battery if you have one. Next, ensure the battery is sitting firmly in place—sometimes remotes won’t make contact if the battery is slightly off-center.
Still nothing? You might need to **reset or pair** your remote to the ceiling fan. Most Westinghouse remotes automatically sync, but some models need an extra step. You’ll usually find a tiny “code” button inside the battery compartment. Holding it down for five seconds after installing the battery can reset the connection. If your fan receiver has a “learn” button, press that too.
If nothing works, try unplugging your ceiling fan at the breaker for a minute, then plugging it back in. This resets the receiver and sometimes fixes communication issues. Only after all that should you suspect a faulty remote or receiver.
When To Replace Your Westinghouse Remote (Or Try Alternatives)
If your remote still won’t work, even with a brand-new battery and a reset, it might be time to think about alternatives. Westinghouse replacement remotes can be ordered online, but honestly, consider whether a **universal ceiling fan remote** would be easier. Universal remotes work with most major brands, and they’re usually easier to find at local stores.
The cost difference isn’t huge, but universal remotes sometimes come with extra features—like advanced timing, dimmers, and even Bluetooth control. Just make sure the remote is compatible with Westinghouse fans before buying. On the flip side, if you’re attached to your original remote (maybe you like the button layout), it’s worth hunting down the exact replacement.
Here’s the thing: if you’ve tested your remote with new batteries, reset everything, and tried all the troubleshooting, there’s no harm in upgrading to a new remote. It can solve mysterious problems that are otherwise hard to diagnose.
Making Your Remote—and Battery—Last Longer
You might be wondering how to squeeze more life out of your Westinghouse remote’s battery. The principles are simple but easy to overlook:
- Store the remote away from direct sunlight and heat.
- Don’t mash the buttons unnecessarily—each press uses a bit of battery power.
- If you’re going away for weeks, pop out the battery to prevent leaks.
With coin cell batteries, shelf life matters. Even unopened, they lose power over time, so check the expiration date before buying spares. And if your fan requires coding or pairing after every battery change, jot down any code settings so you don’t have to start from scratch next time.
Keeping the remote’s battery door clean and dry also helps with long-term reliability. I’ve seen remotes get sticky or corroded inside from spills or humidity—just one more reason to avoid setting it next to drinks or leaving it in the bathroom.
Final Thoughts: Quick Fixes, Fewer Headaches
A dead Westinghouse ceiling fan remote doesn’t have to spell trouble. Swapping out the battery is a straightforward fix—no tech skills needed, just a careful hand and a little attention to detail. Remember, the big keys are matching the battery type, watching the orientation, and double-checking everything before you close up. And if the remote still acts up, a quick reset or fresh pairing usually does the trick.
Keeping your ceiling fan and remote in good shape means more comfort and fewer “why won’t this work?!” moments. Next time your remote’s acting lazy, you’ll know exactly what to do—and you can impress anyone watching with your low-key repair skills.