
Now, Google’s Nest remotes often feel sleek and high-tech, sometimes even a little intimidating. But don’t worry—underneath all that smart design, the basics are simple. This isn’t like rewiring a spaceship; it’s more like changing the battery in a watch, but with an extra splash of modern design. Swapping out that battery is absolutely doable for anyone, whether you’re techy or not. Let’s walk through it, step by step, so you feel confident and set up for success.
Understanding Your Nest Smart Remote Model
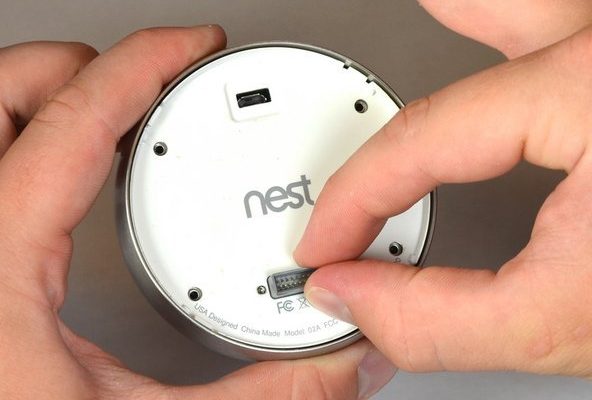
Knowing which Nest remote you have makes a real difference here. The most common is the slim, white remote that comes with devices like the Nest Learning Thermostat or Nest Audio. This isn’t your typical TV zapper; it’s got a minimalist vibe—usually, just a few buttons and a circular navigation pad. The battery compartment is cleverly tucked away so you won’t spot a door or obvious latch at first glance.
Nest remotes mostly use coin cell batteries, usually the CR2032 or CR2025 type. These look like thick silver coins and are widely available. You won’t need any fancy tools, but the exact method to open the remote can vary slightly depending on the model or generation. If you’re not 100% sure which remote you’ve got, check for a model number on the back or inside the battery compartment (once opened), or even just match it visually to a product photo.
If you’re comparing a Nest remote to a universal one, you’ll notice that Nest’s is built specifically for its own ecosystem. Universal remotes often have bigger battery compartments and use AA or AAA batteries, while the Nest remote sticks to compact, efficient coin cells, making the design more discreet—but also a bit trickier to open if you’ve never done it before.
Gathering Tools and Preparing For Battery Replacement
So, you’ve got your Nest remote in hand. Here’s the thing: replacing the battery is a gentle operation, not a wrestling match. You won’t need a toolbox, but a few essentials will make things smoother:
- Replacement coin cell battery (usually CR2032 or CR2025) – Double-check your exact model first.
- Small flathead screwdriver – Or even a stiff plastic card, for prying open the battery compartment.
- Soft cloth or towel – To protect your remote and keep things clean.
Find a well-lit, clutter-free space (nobody wants to drop a tiny battery between cushions). It’s a good idea to wash your hands or wipe them clean, since skin oils or crumbs can sometimes cause issues with tiny electronics. Set everything out before starting—you don’t want to be holding half an open remote while hunting for a new battery.
*Honestly, the setup is half the job. Once everything’s ready, the actual battery swap usually takes less than five minutes.*
How To Open The Nest Smart Remote Battery Compartment
Here’s where people get stuck: where’s the door? Unlike classic remotes, there’s no sliding plastic cover. Instead, the battery compartment is on the back, tucked behind a smooth panel. Most Nest remotes use a snap-on or twist-to-open design.
To open it:
- Look for a small groove or notch along the back seam. Sometimes there’s a subtle icon showing a battery.
- Insert the edge of your plastic card or flathead screwdriver gently into the notch.
- Apply gentle upward pressure. Don’t force it—use small wiggles rather than brute strength to avoid cracking the plastic.
- Once you feel the cover lift, work around the edges, gradually prying it up until the battery compartment is exposed.
If your remote has a twist-lock battery door, rotate the cover counterclockwise, then lift. If nothing seems to budge, double-check the manual for your specific model—sometimes there’s a hidden latch or a firmer snap needed.
It’s normal to feel hesitant here, but taking it slow keeps everything safe. Never pry so hard that the plastic flexes dramatically; if it’s not opening, you might have missed the right spot.
Removing the Old Coin Cell Battery Safely
With the compartment open, you’ll spot the battery tucked inside: a shiny silver disk sitting in a recessed slot. You might be wondering, “How do I get this thing out without scratching it up or breaking anything?” Luckily, it’s pretty straightforward.
Use your fingernail or a small flathead screwdriver to gently pop the battery free. Most Nest remotes have a tiny notch on one side of the battery holder; that’s your access point. Press carefully against the edge of the battery, and it should tilt up so you can lift it out.
If you meet resistance, double-check for small plastic tabs holding the battery in place. Don’t dig deep with metal tools, and never pry on the circuitry below the battery—that’s electronics, not leverage. Dispose of the old battery responsibly; these coin cells are recyclable and shouldn’t go in the trash.
Tip: If the battery looks corroded (white or green powder on the contacts), gently wipe the area clean with a dry cloth before installing the new one.
Installing the New Battery In Your Nest Remote
Before popping in the new coin cell, take a close look at the markings. The positive side, marked with a +, always faces up (visible when the remote is assembled). Get the battery lined up over the holder, and gently press it into place. You should feel a soft click or a solid fit—never force it in crooked.
Here’s something people sometimes overlook: avoid touching both sides of the new battery with your bare fingers. Oils and moisture from your skin can leave a thin film, which may cause long-term connection problems. If you’re feeling extra careful, use a tissue or the end of your t-shirt to handle it.
Once the battery is seated, line up the compartment door with its original orientation. Snap or twist it back into place. You might hear a soft click. Double-check that the door is flush and secure; if it’s sticking out or wobbly, open and try again.
Testing The Nest Smart Remote After Battery Replacement
The moment of truth: time to check if your fresh battery has done the trick. Point the remote at your Nest device (thermostat, speaker, whatever you use it with) and press any button. Most Nest remotes show a small LED flash behind a button or on the front edge. If the light blinks, you’re good.
If your device doesn’t respond—don’t panic. The remote may need to re-sync or pair with your Nest hub, especially if it’s been sitting dead for a while. Look for a small “sync” or “pair” button hidden inside the battery compartment or on the device itself. Hold it down for a few seconds while keeping the Nest device awake. Within a few seconds, you should see it reconnect.
Still nothing? Try removing and reinstalling the battery, making sure it’s the correct type and seated firmly. Sometimes a code reset is necessary, but most battery swaps work on the first try.
Troubleshooting Common Battery Replacement Problems
So, what if things get weird? Maybe your remote still won’t work, or it works—then stops again. Here’s what helps:
- Double-check the battery orientation. Sounds obvious, but it’s a classic mistake: flipping the coin cell the wrong way means no power flows.
- Try a different new battery. Occasionally, brand-new batteries are duds or lose charge from long shelf life.
- Inspect for dirt or corrosion. If the battery contacts look dirty or corroded, gently clean them with a dry cotton swab. Avoid using water or chemicals.
- Confirm you’re using the right battery type. CR2032 and CR2025 look almost identical but differ in thickness and voltage. The wrong one might not fit securely or work reliably.
If those don’t solve the issue, your remote’s internal code or pairing settings might have reset during the swap. In that case, try syncing or pairing the remote again using the steps from the last section. Persistent problems may mean the remote itself is faulty—rare, but possible.
Maintaining Battery Life and Remote Performance
Let me explain why coin cell battery life can be so unpredictable. With regular use, a fresh battery in a Nest smart remote should last up to a year—sometimes longer if you’re not using it for voice commands or frequent adjustments. But heavy use, high humidity, or storing the remote somewhere hot or cold can shorten battery life dramatically.
Here are a few real-world tips to extend its lifespan:
- Store the remote indoors and away from direct sunlight or heaters.
- Remove the battery if you plan to pack up the remote for a long time—no need for a slow, silent drain in a drawer.
- Wipe down the battery and contacts lightly if you ever open the compartment for cleaning.
Honestly, it’s smart to keep a spare coin cell battery in a kitchen drawer or tool box, so you’re never caught off guard by a dead remote. And if you ever notice the range or responsiveness drop, swap the battery early—that’s usually all it takes to restore things to normal.
Alternatives and When To Consider A New Remote
Sometimes, the battery’s not the problem—it’s the remote itself. If yours has been dropped, gotten wet, or just refuses to hold a connection even with a fresh battery, you might need a replacement. Nest remotes are designed to last, but electronics have limits.
You might be tempted to try a universal remote. Here’s the catch: Nest uses proprietary signals and code, so most universal remotes can’t pair directly. That’s why replacing the battery or the actual Nest-branded remote is usually your best bet for full functionality, including syncing, code input, and troubleshooting features.
If you need a new remote, order it directly from Google or an authorized dealer. Avoid third-party imitations—they often lack certain features and may not pair at all.
*Bottom line: A working battery fixes most issues, but if your remote is truly out of commission, go official for peace of mind.*
Final Thoughts: Quick, Simple, and Totally DIY
Changing the battery in your Nest smart remote feels intimidating at first, but honestly, it’s one of those short, satisfying tasks anyone can do. Take your time, use the right tools, and don’t be afraid to look closely at how things fit together—Nest remotes are built with precision, but the process is far from complicated. If you keep a spare battery handy, you’ll never miss a moment of convenience when you need to tweak your thermostat or fire up a speaker. And if something seems off, just retrace your steps slowly; almost every issue has a straightforward fix. Happy swapping!