Let me explain: swapping out a remote battery is one of those simple home fixes that feels intimidating—until you’ve done it once. The good news? You don’t need special tools, an engineering degree, or even much time. Harbor Breeze remotes are designed with beginners in mind, but there are a few quirks and details worth knowing, especially if this is your first time opening up a fan controller.
Identifying Your Harbor Breeze Ceiling Fan Remote Model
Here’s the thing: not all Harbor Breeze ceiling fan remotes look the same. Some are slim and modern, others chunkier with lots of buttons. The main difference, though, is how you access the battery compartment. Most Harbor Breeze remotes are wireless, controlling your fan’s speed and light with a single click. Depending on the model, you might need a different size battery—usually a 12-volt A23 or a flat CR2032 coin cell. But before you run to the drawer hunting for batteries, check your specific remote.
You’ll usually find the model number stamped inside the battery compartment or sometimes hidden on the back label. Harbor Breeze sometimes uses codes like “CHQ8BT7030T” or “UC7083T.” If you don’t spot anything obvious, compare your remote’s shape and button layout with photos online—it honestly works just as well. Trust your eyes here; manufacturers aren’t always consistent with stickers.
There’s a reason I’m slowing down on this step: using the wrong type of battery or prying open the remote incorrectly can damage it. Once you’re confident you’ve identified your Harbor Breeze remote model, you’re ready for the battery swap.
What Battery Does Your Harbor Breeze Remote Need?
You might be wondering, “Why can’t I just throw any old battery in there?” Ceiling fan remotes are a bit picky. Most Harbor Breeze models use one of two battery types:
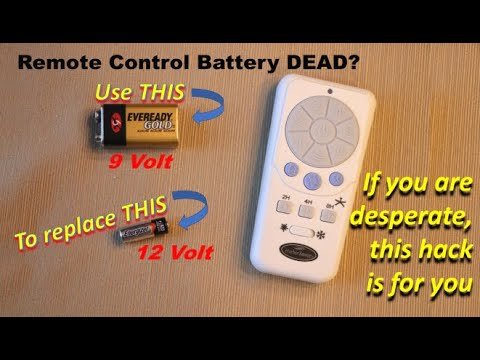
- A23 12V battery: Looks like a short, stubby AA battery. These are common in remotes with sliding battery doors.
- CR2032 coin cell: This flat, round battery looks like a thick nickel and is often found in slimmer, modern remotes.
If you try to use a AA or AAA battery, it simply won’t fit. Likewise, stuffing a coin cell into a slot built for an A23 doesn’t do anything except waste your time. Double-check before buying—Harbor Breeze remotes are usually consistent, but there’s always that oddball model. I keep a couple of both batteries in my junk drawer, just in case, because you never know when a ceiling fan remote will decide it’s time to retire its power source.
Some Harbor Breeze ceiling fan remote kits will list their battery type in the manual—if you’ve still got one tucked in a kitchen drawer or storage box, now’s the time to dig it up. Otherwise, a quick pop of the battery compartment reveals all.
How To Open The Harbor Breeze Remote Battery Compartment
Opening a Harbor Breeze ceiling fan remote shouldn’t feel like a wrestling match. If you’re pushing, pulling, or prying and nothing’s happening, stop and check for hidden latches. Here’s how most models work:
- Sliding battery door: Look for a groove or small tab on the back or bottom edge. Gently press and slide it off in the direction indicated—usually downward or toward the battery symbol.
- Screw-secured door: Some remotes use a tiny screw (think eyeglass size) to secure the door. Grab a precision screwdriver, remove the screw, and the cover should lift off with zero force.
- Coin cell compartment: For ultra-slim models, there’s often a small round slot. Use your thumbnail or a coin to twist the compartment open counterclockwise.
A quick tip: Don’t yank or force anything. If it feels stuck, double-check for a hidden screw or latch. Harbor Breeze remote cases can crack if you muscle them, and let’s be honest—nobody wants to tape up their remote. Take your time and remember, patience is cheaper than a new remote.
Step-By-Step: Replacing The Battery In Your Harbor Breeze Ceiling Fan Remote
Swapping out a battery shouldn’t be stressful, even if you’ve never done it before. Here’s a simple step-by-step process to get your Harbor Breeze ceiling fan remote back in action:
- Remove the battery cover: Use the method described above (slide, unscrew, or twist open) depending on your remote model.
- Take out the old battery: Pop it out gently. If it’s an A23, it should slide out easily. For a coin cell, use your fingernail to nudge it loose.
- Check for corrosion: If you see white or greenish gunk on the contacts, use a cotton swab and a drop of rubbing alcohol to clean the area. Don’t skip this step; it helps prevent future issues.
- Insert the new battery: Match the + (positive) and – (negative) ends to the markings inside the compartment. It sounds obvious, but even pros mess this up sometimes.
- Replace the cover: Snap or screw it back in place, double-checking that it fits snugly.
Power up your Harbor Breeze remote and press a button. If your ceiling fan starts whirring or the light flashes, you’re golden. If not, don’t panic—there are a few more things to troubleshoot.
Troubleshooting: What If Your Harbor Breeze Remote Still Doesn’t Work?
You popped in a brand-new battery, but the remote’s still silent. Frustrating, right? Here’s where a few extra checks come in handy.
First, make sure the battery is installed correctly. Harbor Breeze remotes won’t work if the battery is backward—those tiny + and – signs really do matter. If that checks out, try pressing a few different buttons to see if any function works. Sometimes, only the fan or light responds if the remote has lost its pairing with the receiver.
Still nothing? Here are other things that can go wrong:
- Battery contact issues: The metal tabs inside the compartment can get bent or dirty. A gentle wiggle or a quick clean can help.
- Interference: Wireless remotes sometimes get confused if a neighbor’s fan uses the same frequency. If two fans are fighting for control, you’ll need to reset or re-sync the remote.
- Remote code mismatch: Some Harbor Breeze remotes have tiny DIP switches (little white switches inside the battery compartment) that must match the fan receiver. If you’ve fiddled with these, check your manual or look online for the correct code settings.
If all else fails, try resetting and pairing the remote again. On most models, this means turning off power at the circuit breaker for a minute, then turning it back on and holding the remote’s “fan” or “light” button for 10 seconds. When the fan responds, you know you’ve nailed it.
Understanding How The Harbor Breeze Ceiling Fan Remote Works
Let’s take a moment to appreciate what’s actually happening when you hit a button on your Harbor Breeze remote. It’s not magic—though it can feel that way when you’re quietly adjusting fan speed from bed. Inside the remote, a battery powers a tiny transmitter. When you press a button, it sends a code to the receiver inside your ceiling fan, telling it to turn on, dim the light, or spin faster.
Sometimes you’ll see talk about “pairing” or “syncing” a Harbor Breeze ceiling fan remote. That just means making sure the remote and the fan receiver are using the same signal. If you ever replace your remote or the receiver in the fan, you might need to set the code switches to match. Don’t worry: for most homeowners, this isn’t something you’ll have to fuss with—unless you’re troubleshooting deeper issues.
The batteries inside your remote are the only real maintenance you’ll ever do. And honestly, swapping a battery every couple of years is a fair trade for remote-controlled comfort.
Alternative Solutions: Universal Remotes and Manual Control
You’re probably happy sticking with your original Harbor Breeze remote, but sometimes things go sideways. Let’s say you lost your remote, or the battery leakage ruined the contacts. What now?
It turns out, you’ve got options. Universal ceiling fan remotes can often be programmed to work with Harbor Breeze fans. They’re usually found at big box stores and online, with instructions for syncing or pairing using simple code switches. Some even offer extra features, like timers or temperature sensors.
Personally, I recommend sticking with a Harbor Breeze-branded remote if you can. Universal remotes are handy, but there can be minor headaches with setup and compatibility—especially for less techy folks.
Of course, every Harbor Breeze fan still works the old-fashioned way: with pull chains. It’s not as convenient, but if your remote is giving you a headache, you can always keep cool the analog way until you sort things out.
Best Practices: Extending The Life Of Your Harbor Breeze Remote Battery
Here’s a little secret: batteries last longer when you treat them gently. If you want your Harbor Breeze ceiling fan remote to keep working for years, a few habits help:
- Store the remote in a cool, dry spot. Heat and humidity shorten battery life.
- Remove the battery if you won’t use the remote for months. This prevents leaks and corrosion.
- Use quality batteries. Cheap batteries don’t last as long and are more likely to leak or lose sync with your remote.
- Keep the contacts clean. A once-a-year check with a cotton swab helps, especially if you live in a humid area.
A bit of prevention can save frustration down the road. It’s a tiny investment for smooth ceiling fan control every time you kick back on the couch.
Closing Thoughts: Enjoying Reliable Comfort With Harbor Breeze
Replacing the battery in your Harbor Breeze ceiling fan remote isn’t just a fix—it’s a little victory. You restore comfort and control to your living room, bedroom, or patio in just a few minutes. The steps are simple, the tools are basic, and the confidence boost? Surprisingly big. If you run into any hiccups, don’t sweat it. Pairing, resetting, or even trying out a universal remote are all totally normal routes. With a fresh battery and a little patience, your Harbor Breeze fan will be spinning (and your light shining) reliably again—no more waving, clicking, or muttering under your breath. Enjoy the breeze!