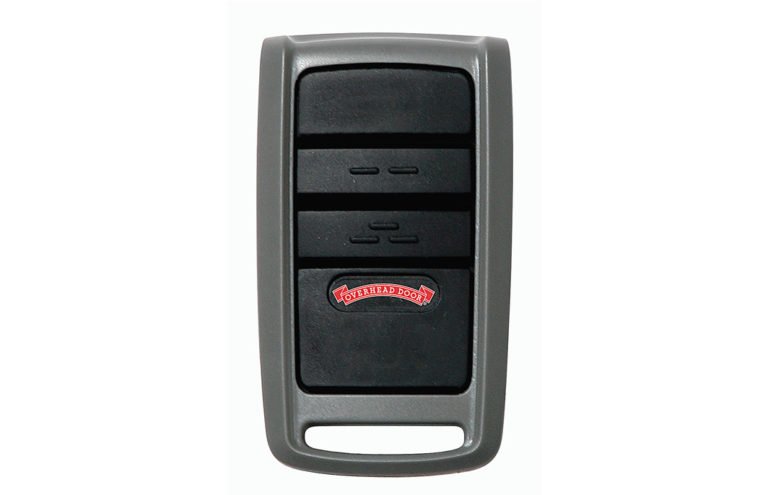
Think of your garage remote like your car’s steering wheel—intuitive when it’s set up, but unsettling if something feels off. Reassigning a button sounds techy, but it’s really just about teaching the remote which door to talk to, and when. If you’re holding an Overhead Door remote (especially their popular CodeDodger® or O3T-BX), you’re in the right place. Let me walk you through rewiring those button functions so your clicker works like magic again.
Understanding How Overhead Door Garage Remotes Work
Before you pop the battery cover or jab buttons, it helps to know what’s actually happening when you press that clicker. Garage remotes like those from Overhead Door operate with a rolling code system. That means every time you press a button, it spits out a different, encrypted signal. This keeps your garage secure—it’s nearly impossible for a neighbor or a would-be burglar to “guess” the code.
Each button on your Overhead Door remote can be set to control a specific garage door opener. The remote is basically a mini programmer, and the opener acts like a friendly bouncer. If they don’t recognize each other’s handshake (the code and sync process), nothing happens. When you want to reassign a button, you’re telling the garage opener, “Hey, listen to this button now, not the old one.”
You might be wondering why this matters. For starters, if you install a new opener or switch garages, you’ll want to avoid pressing the wrong button and opening your neighbor’s garage (awkward). Or maybe you just want to reorganize which button controls what, so you don’t get confused in the dark. The good news: the process isn’t magic, but it does require careful steps.
When Should You Reassign Button Functions?
There’s a handful of situations where you need to reset or reassign your garage remote buttons. Maybe you bought a universal remote and now want to sync it to your Overhead Door opener. Or you’ve got a multi-button remote, but one button opens the wrong garage. You might even need to re-code after a battery change—sometimes things just get out of sync.
Let me give you an example. I once helped a friend who had two garages and one remote—Button 1 and Button 2 got accidentally mixed up after he replaced the battery. Every morning he’d hit Button 1 expecting his main garage to open, but the side garage would rumble instead. It drove him nuts until we sat down with the remote and carefully reassigned the buttons.
Another common reason: security. If you lose a remote or lend one out, it’s best to reset and re-pair your buttons. This keeps former roommates, exes, or contractors from having cozy access to your place. And if you ever upgrade or change your garage door opener, you’ll need to re-teach your remote which button does what.
Essential Tools and Safety Tips Before You Begin
Here’s the thing—reassigning remote buttons doesn’t require a toolbelt, but you do want to be prepared. Grab a small Phillips screwdriver if your remote has screws on the back. You’ll also need a fresh battery, especially if your remote is sluggish or non-responsive. It sounds basic, but a weak battery can ruin the pairing process.
Always keep your garage area clear while working on remotes. The last thing you need is for the door to close on a bike or bump your car because of a mis-tap. If your opener has a “lock” or vacation mode, enable it for extra safety (just remember to turn it back off!).
Here’s a quick list of what to have handy:
- Your Overhead Door garage remote (any O3T-BX, CodeDodger®, or standard model)
- New battery (usually CR2032 or 3V round type)
- Screwdriver, if needed
- A step stool for reaching the garage opener’s “Learn” or “Smart” button
And here’s some advice from experience:
If you’re not sure which opener is yours, look for the Overhead Door logo or model sticker on your garage ceiling motor unit. It’ll usually be a red, white, or gray box with a learn button on the side or back.
Step-by-Step Guide to Reassign Button Functions
Okay, let’s break this down (no rushing—slow and steady wins here). You’ll need to “teach” the opener which button on the remote it should respond to. Most Overhead Door units use a similar process. If you get stuck, check your user manual, but these steps work for most recent models.
Step 1: Clear the Old Code (if needed)
If the button is already paired to the wrong door, press and hold it until the LED light fades (about 10 seconds). This wipes the old code from that button.
Step 2: Access the Learn or Smart Button on the Opener
Climb up and find the “Learn” button on your Overhead Door opener (usually behind a light cover or side panel). Press it until the LED next to it starts blinking. This puts the opener in sync mode.
Step 3: Pair the New Button
Within 30 seconds, press the button on your remote you want to reassign. Hold it until the opener’s light blinks, clicks, or the LED turns solid. That’s the opener saying, “Got it—new code received!”
Step 4: Test the Button
Hop down and stand clear of the door. Press your reassigned button once—if the door moves, you’re golden. If not, repeat steps 2 and 3. Sometimes it takes a couple of tries if you pressed too slow or fast during syncing.
Step 5: Repeat for Multiple Doors or Buttons
If you have a three-button remote and two garages, just start again for each button. Each button can be individually assigned to a separate door.
And pro tip: If your remote has more than three buttons or supports up to four doors, label the remote or jot a quick note to avoid confusion later.
Troubleshooting: When Reassignment Doesn’t Work
You might be wondering, “What if the remote still won’t sync?” It happens more than you’d think. Here’s what to check:
- Dead or Weak Battery: If the LED light is dim or not lighting, swap in a fresh CR2032.
- Out of Range: Most remotes only work within 25-50 feet. Stand closer to the opener during pairing.
- Wrong Learn Button: Some garages have multiple openers or buttons. Double-check you’re using the Overhead Door unit’s correct learn/sample button.
- Interference: LED light bulbs and metal objects can mess with the signal. Move away from large metal racks or swap LED bulbs for testing.
If you’re still stuck, it might be time to reset the opener itself and start fresh. Hold the learn button for 6–10 seconds until the light goes out, which wipes all paired remotes. Yes, you’ll have to re-pair any other remotes from scratch, but sometimes a clean slate is best.
Comparing Overhead Door Remotes with Universal Options
Let’s have an honest moment here: Overhead Door remotes are great, but universal remotes do exist, and sometimes they’re easier to find at the hardware store. Universal remotes can be programmed to work with a ton of brands—useful if you have different openers in one garage.
But here’s the catch. Universal remotes don’t always pair as smoothly with security-focused Overhead Door systems. Some models skip the rolling code tech, or require a specific pairing code. They’re a strong backup, but if you want seamless syncing and maximum security, stick with a genuine Overhead Door remote.
So, should you buy a universal remote? If you absolutely need one remote for multiple brands, it’s an option. Just keep your Overhead Door remote as a backup, especially if you ever run into pairing problems or need to reset your system.
Resetting Your Overhead Door Remote: How and Why
Sometimes reassigning a button just doesn’t do the trick. Maybe your remote keeps acting up, or you want to clear out every connection and start over. Here’s what you do:
First, press and hold the “Learn” button on your garage opener until the LED light turns off (about 6–10 seconds). This erases all current remote pairings—think of it as wiping your garage door’s memory clean. After this, none of your remotes will work until you re-sync them using the steps above.
Now, pair each button again, just like you’re setting up from scratch. Yes, it’s a little repetitive, but a full reset can solve weird issues, like doors opening at random or old remotes still working after you thought you deleted them.
Don’t forget: If you have more than one remote or multiple households have access, let everyone know they’ll need to re-pair their own remotes after a full reset.
Maintaining Your Garage Remote For Reliable Performance
This might sound boring, but a little routine care keeps your Overhead Door remote dependable. Replace the battery every year—even if it’s not dead. Low battery power can cause weak signals, failed syncs, or dropped connections that are a pain to troubleshoot.
Keep the remote clean and dry. If it rides around in your car cupholder, wipe off any sticky spills. If you ever drop it in snow or water, open it up, pop out the battery, and let it dry completely before reusing.
Lastly, store your remote somewhere safe—not dangling off your keychain, where keys or coins can press buttons accidentally and mess up the sync or code. A secure spot inside your car (or mounted on the visor) minimizes accidental presses and helps you remember which button does what.
Bringing It All Together: A Reliable Remote, Your Way
Reassigning button functions on an Overhead Door garage remote isn’t rocket science, but it does help to slow down and work step by step. Getting every button paired to the right garage means less confusion, better security, and fewer “oops” moments. If you treat your remote like a trusted tool—keeping batteries fresh, learning how to reset, and troubleshooting calmly—you’ll avoid most headaches.
Remember, every click is a little handshake between your remote and your garage. A proper setup means your home stays secure and convenient, just the way you want it. If you ever get stuck, don’t stress—every garage geek has had a mis-coded button at least once. You’ve got this.
