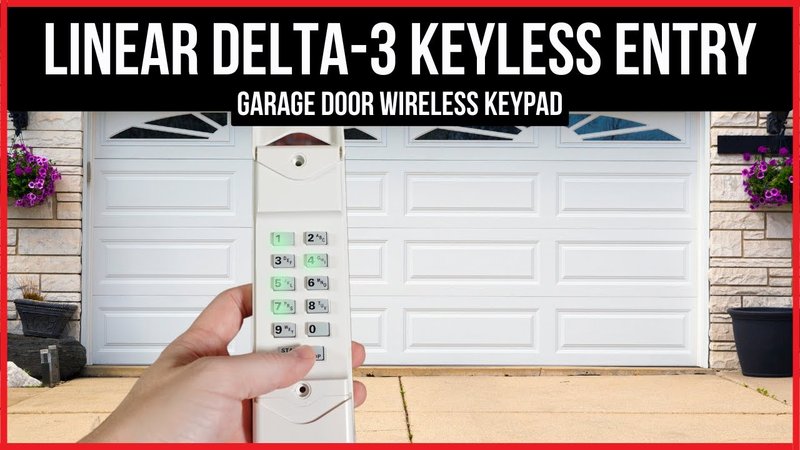
Here’s the thing: these remotes aren’t just dumb clickers. They hold memories, pairings, and special codes that talk to your garage door like secret passwords. Over time, you might want to change which button opens which door, or maybe you got a new opener and want to sync things up. The good news? With a little patience, you can reassign button functions without calling in a pro or getting lost in a sea of blinking lights.
The Linear brand is one of those classic names in home access. Their multi-button remotes let you control several doors—or even gates—by assigning each button to a different opener. But figuring out how to make these changes isn’t always obvious. Let’s walk through the process together, step by step, and help untangle those button mysteries once and for all.
What Does “Reassigning” a Linear Garage Remote Button Actually Mean?
Picture a remote with three buttons. Maybe Button
This process involves *clearing* the old code from that button, then *pairing* it (or syncing it) with the garage door opener you want. It doesn’t mean you’re resetting the whole remote—just giving one button a new job. People sometimes need to reassign buttons after moving homes, replacing openers, or combining multiple remotes.
Honestly, if you’ve ever felt stuck with the way your remote is set up, you’re not alone. Many homeowners just live with it, assuming it’s complicated. The reality is, with Linear remotes, reassignment is pretty straightforward once you know the steps and a few troubleshooting tricks.
Preparing Your Linear Garage Remote For Button Reassignment
Before you start mashing buttons, it’s smart to get the basics in order. A fresh battery is essential—trust me, nothing’s more frustrating than getting halfway through a code sync and having your remote drop dead. Most Linear remotes use a small coin-style battery. If yours has been sluggish or inconsistent, pop in a new one.
Next, decide *which* button you want to reassign and to *which* garage door opener. It helps to label things with sticky notes or even a bit of painter’s tape, especially if you have several remotes or multiple doors. Place your remote and step ladder nearby, since you’ll likely need to reach the garage door motor unit (that box on the ceiling).
One more tip: If your opener or remote is very old, check for a “Learn” or “Program” button on the opener itself. This is the magic button we’ll use to pair codes. On some models, it’s under a light cover or behind a small panel. Grab the manual if you’re unsure. Having everything set up before you begin makes this a five-minute task, not a half-hour headache.
Step-By-Step Instructions: How To Reassign Button Functions On Linear Garage Remote
Let me explain the typical process, but keep in mind: Linear has a few different remote models. The method is almost always the same, but if a step seems off, check your specific manual. Here’s the usual flow:
- Locate the Learn Button: On your garage opener motor (inside the garage, attached to the ceiling), look for a small button labeled “Learn,” “Program,” or with an icon of a remote. It’s often next to an LED light. Press this button until the light blinks—this puts the opener into pairing mode.
- Press the Desired Button: On your Linear remote, press and hold the button you want to reassign. Hold it for about 2 seconds. You should see an LED on the remote blink or light up, confirming it’s sending a code.
- Wait For Confirmation: The garage opener’s light or LED will usually blink or click, confirming it “heard” the code. That’s it! Release the button. Your remote button is now paired to the opener you programmed.
- Test The Button: Go on, give it a press. The garage door should move. If not, repeat the process. Occasionally, you might need to clear the button’s old code first—see the troubleshooting section below.
Sometimes, if you want to completely wipe a button’s old memory, you can *reset* the remote by holding down a combination of buttons (often the one you want to reassign, plus a “learn” or “program” button) for several seconds. This step isn’t always required but can help if things feel “stuck.” Check your remote’s manual for any model-specific tips.
Understanding Codes, Syncing, and Pairing With Your Garage Opener
You might be wondering, what’s happening behind the scenes when you press those buttons? Here’s where it gets interesting. Each time you pair a Linear remote with an opener, the devices exchange a *rolling code*. This is a kind of digital handshake—like changing the password every time, so no one can “steal” your remote code from the air.
The opener remembers which code is assigned to each button, and the remote keeps track of which button talks to which opener. That’s why you can have three or four buttons on one remote, each controlling a completely different door—even if those doors are on different buildings.
Syncing, pairing, and resetting are all about getting these codes aligned. If something goes wrong (for example, you accidentally pair a button to the wrong opener), it’s easy to repeat the process. Just “teach” the opener the new code from the remote button you want. This flexibility is what makes the Linear system so convenient for families, property managers, or anyone with multiple entrances.
Common Problems When Reassigning Linear Garage Remote Buttons
Honestly, even with a solid step-by-step, problems can pop up. The most common culprit is a low battery in the remote. If the light on your remote is dim or doesn’t blink when you press a button, replace the battery before you pull your hair out.
Another tricky issue? Accidentally erasing *all* codes from the opener. Don’t panic—if you hold the “Learn” button too long, some openers forget every paired remote. You’ll just need to re-pair each one. It’s a pain, but not the end of the world.
Sometimes, interference from other wireless devices can block the signal. If you’re standing way across the garage or your opener is surrounded by metal shelves, move closer and clear the area first. And remember—not all remotes work with all openers. Universal remotes can sometimes replace Linear models, but you’ll need to check compatibility, especially for older units.
Comparing Linear Remotes With Universal Garage Remotes
Let’s say you’re tired of juggling three different remotes. Universal garage remotes can be a life-saver. These remotes claim to work with many brands, not just Linear. But here’s the honest truth: while most universal remotes can be programmed to work with Linear openers, the button reassignment steps are sometimes less intuitive.
With a Linear-branded remote, the process is pretty much what we’ve covered: press the “Learn” button on the opener, then the button you want to use. Universal remotes often add extra steps—like entering a code for your opener brand, or fiddling with dip switches. If you’re tech-comfortable, that’s fine, but for most homeowners, sticking with an original Linear remote keeps things simple.
Still, if you’re managing multiple door brands, a universal might be worth a try. Just know you’ll need to read the (sometimes tiny) instructions carefully and keep track of which button does what.
Troubleshooting Tips If Your Linear Remote Won’t Work After Reassignment
If you’ve followed every step and the button still won’t cooperate, it’s time for some troubleshooting. Here are a few things to check:
- Double-check the battery. Even new ones can sometimes be duds.
- Make sure you’re pressing the “Learn” button just once. Holding it too long can erase all remote codes.
- Try re-pairing with the opener cover removed. Sometimes a plastic or metal cover can block the signal.
- Clear the button’s memory. Some remotes store old codes. Look up your remote’s reset steps and try again.
- Check for compatibility. If you’ve bought a new remote or opener, make sure they “speak the same language.” Not all Linear models use the same frequency or code system.
If you’re still stuck, don’t be shy about calling Linear’s customer support or asking a neighbor for help. Sometimes a second pair of eyes catches something you missed.
How To Keep Your Linear Garage Remote Organized and Working Smoothly
Once your buttons are assigned and working, a little organization goes a long way. Here’s a personal tip: use labels or a tiny sticker dot system to remind yourself which button controls which door. It sounds silly, but during a rainy night or a frantic morning rush, you’ll be grateful for the cue.
Another way to keep things smooth is to change your remote’s battery yearly—even if it’s not dead yet. Weak batteries are a leading cause of random malfunctions or lost codes. Store remotes somewhere safe, away from car sun exposure, to extend their life span.
Lastly, make a note of your opener and remote models (just snap a pic with your phone), and keep any pairing instructions handy. That way, if you ever need to reassign buttons again, you won’t have to start from scratch.
When Professional Help Might Make Sense
Most people can reassign a Linear garage remote button without much fuss. But there are times when calling a pro is worth the money—and saves a whole bunch of frustration. If your remote still won’t sync after repeated tries, or your opener itself seems glitchy, it might be time for expert help.
Garage opener systems can be surprisingly fussy if they’re old or have been repaired before. Sometimes, internal wiring issues or outdated code technology mean a new remote just won’t “take.” A technician can diagnose these deeper problems, recommend replacement options, or even install a new opener if needed.
Here’s my advice: Try it yourself first. Most issues are minor and fixable in minutes. But if you’re banging your head against the wall, don’t waste your whole weekend. Call someone who’s done it a hundred times—they’ll have you up and running fast.
Wrapping Up: Why Reassigning Linear Garage Remote Buttons Is Worthwhile
Tweaking your Linear garage remote might seem daunting, but honestly, it’s about giving yourself control. Once you know how to reassign a button, you can adjust, upgrade, or reorganize your garage access any time. No more extra remotes, no more pressing the wrong button out of habit.
The flexibility is a real perk—whether you’re handing out remotes to family, adding a new garage door, or just simplifying your life. Remember, start with good batteries, be patient with the “Learn” button, and double-check each step. With a little knowledge, you’ll turn your garage remote from a source of confusion into a tool that fits your needs exactly.
And hey, if you ever move or get a new opener, you’ll have the skills to sync things up in minutes—no magic wands required.
