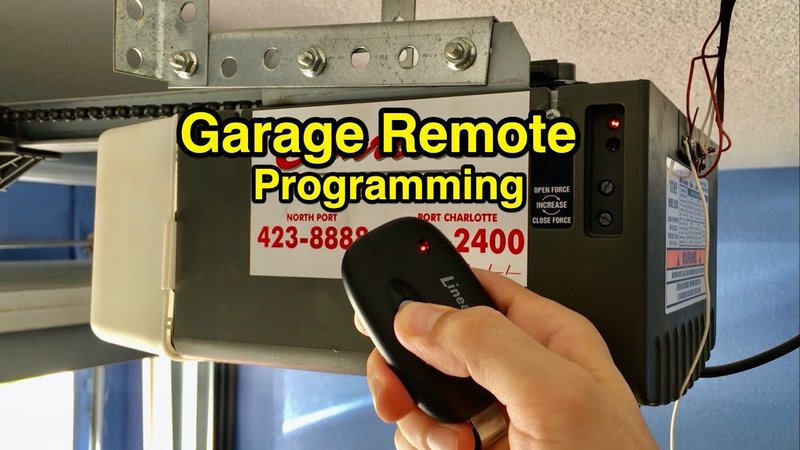
Here’s the thing: there’s a certain logic behind most of these remotes. Once you understand a few key steps and what your garage opener “wants,” you won’t need that little paper booklet at all. Today’s Overhead Door remotes share a lot in common with other brands, but they do have some unique quirks. Don’t worry—if you can press a button and climb a stepstool, you’ve got this.
What Kind of Overhead Door Garage Door Remote Do You Have?
Before you touch anything, it helps to know a bit about your remote. Overhead Door is a longstanding brand, but not all their remotes are created equal. Depending on your model, the way you sync or program it can vary.
Look at your remote: is it a newer, modern remote with rounded buttons? Or more of an older, chunky rectangle with a sliding cover? Sometimes there’s a model number on the back. If you spot something like “OCDTR-3” or “G3T-R,” you’re dealing with a popular Overhead Door remote. If you see a strange number or no number at all, no stress—the steps below work for most Overhead Door models.
You might be wondering why the specific remote matters. Well, some newer Overhead Door systems use rolling code technology, which makes them more secure but also a bit pickier about programming. Others are more old-school, using fixed codes (those tiny dip switches inside the remote). You’ll need to know which camp you’re in, as it changes your next steps.
Understanding How Overhead Door Remote Programming Works
Let’s break it down. Programming your garage door remote is mostly about convincing your door opener to recognize a unique code sent out by your handheld remote. The opener itself is like a stubborn bouncer outside a club: unless you’re on the list—or, in this case, have the matching code—you’re not getting in.
Modern Overhead Door remotes use a “learn” or “smart” button on the garage opener unit hanging from your ceiling. When you press this button, you’re basically telling the opener, “I want to let someone new in—listen up.” You then press your remote, sending out a signal. The opener stores this code, and voilà, the remote should work.
Older remotes might need you to match small dip switches inside both the remote and the opener. Honestly, it’s a little low-tech, but it still works in plenty of garages. If your remote has a tiny battery cover you can pop off to reveal a row of switches, that’s a clue.
How To Find the “Learn” Button on Your Overhead Door Opener
The “learn” button is truly the star of this process, but it can be annoyingly shy. You’ll usually find it on the back or side of the overhead door opener mounted on your garage ceiling. Sometimes it’s hiding behind a light cover you need to slide off or swing open.
Here’s what it commonly looks like:
- A small, colored button (often red, orange, yellow, or purple).
- Labeled as “Learn,” “Set,” or sometimes just a mysterious dot.
- Near a tiny LED light that blinks when you press it.
Be gentle—no need to jam a screwdriver at it. If you do need to open a light lens, it should pop off with a little pressure. Not seeing a button? Double-check for a sticker or diagram. If all else fails, using your phone’s flashlight can make a big difference.
If you’re up on a stepladder, keep one hand free for balance. We want working remotes, not twisted ankles.
Step-by-Step Instructions: Programming Overhead Door Remote Without the Manual
Ready for action? Here’s a straightforward way to sync your Overhead Door remote, even if you’ve never done this before. No technical jargon—just practical steps.
Step 1: Clear the Area
Make sure nothing’s blocking your garage door. Give yourself some elbow room. If you have multiple remotes already programmed, be aware that most systems let you add up to seven, but not unlimited.
Step 2: Locate and Press the “Learn” Button
Climb up so you can easily reach the opener’s learn button. Press and release this button quickly (don’t hold it down unless your model specifically says that resets everything—more on that in a bit). The LED next to the button should start blinking.
Step 3: Press the Button on Your Remote
Within 30 seconds of pressing the learn button, press and hold the main button on your remote—the one you want to use for your garage. You should see the opener’s light blink or hear a soft click. This means your remote’s code has been stored.
Step 4: Test It Out
Hop down and try your newly programmed remote. Press the button and see if the garage door moves. If it does, congrats—you’ve just programmed your opener without a manual!
If nothing happens, don’t panic. Sometimes it takes a couple of tries, especially if the timing’s off. If the remote still doesn’t respond, check the battery—is it running low, or possibly installed backwards? Small details make a big difference.
What If Your Remote Uses Dip Switches?
Some Overhead Door remotes (especially those from the 90s and early 2000s) use a row of tiny switches inside. Here’s how to program these:
Step 1: Open the Remote’s Back Cover
Slide or pop off the back of your remote. You’ll see a row of 8-12 little switches.
Step 2: Find the Dip Switches on the Garage Opener
Look for a similar row of switches on the overhead unit (usually under a small cover or the side panel).
Step 3: Match All Switches
Set the switches in your remote to exactly match those in the opener. Up means up, down means down. It’s a straightforward code—no fancy syncing required.
Step 4: Test the Remote
Try the remote. If the switches match, the opener recognizes the signal and the door should move.
Here’s the thing: dip switch remotes aren’t as secure as rolling code versions. If security matters (say, you’re in a busy neighborhood), consider upgrading your remote or even the opener. But for many folks, the old-school approach is just fine.
Common Problems and Troubleshooting When Programming Your Remote
You might be wondering: what if it’s just not working? Garage door remotes aren’t always as intuitive as a TV remote, but most problems have simple fixes.
Remote Isn’t Working At All
Check the battery first. Even brand-new remotes can have a loose battery connection or a tiny plastic pull tab you forgot to remove. Try pressing the button while standing right under the opener (range can be surprisingly short with weak batteries).
Opener Light Doesn’t Blink
If you press the learn button and the LED doesn’t flash, your opener might not have power. Double-check that it’s plugged in and the outlet works (try another device). If you have a wall button, see if that operates the door.
Too Many Remotes Already Programmed
Most Overhead Door openers can remember up to seven remotes or keypads. If you’ve hit the limit, you might need to erase all remotes and start fresh (hold the learn button until the LED blinks, then reprogram everything).
Don’t forget: If your neighbor’s remote suddenly works on your door, someone’s dip switches might be set the same way. That’s one program you’ll want to rewrite!
Tips for Pairing Universal vs Overhead Door Brand Remotes
Let me explain: not all remotes are created equal, even if they claim “universal.” Overhead Door brand remotes are the easiest to pair with Overhead Door openers. They’re designed to work together, and instructions generally line up with what’s above.
Universal remotes? They’re a bit wild. Some universal remotes let you select the manufacturer and model, often using switches or holding specific buttons in a sequence. These can work with Overhead Door openers, but you’ll need to reference the universal remote’s programming chart (often tucked behind the battery cover or available online).
- Universal remotes: Follow their pairing instructions, but you’ll still need access to the learn button on your opener.
- Brand remotes: Simple, direct, and more likely to work on the first try.
If you’re stuck choosing between the two, I’d lean toward an Overhead Door remote for simplicity and reliability. Universal remotes make sense if you have multiple garage doors of different brands.
Resetting Your Overhead Door Remote or Opener
Sometimes, it’s easier to wipe the slate clean instead of troubleshooting for hours. Resetting your Overhead Door opener means clearing all programmed remotes, then adding back the ones you want.
Here’s how to reset:
- Press and hold the learn button on the opener for about 10–15 seconds, until the LED turns off or blinks rapidly.
- Release the button. All remotes and keypads are now erased from memory.
- Reprogram each remote using the steps above. It’s a fresh start, just like rebooting your phone.
Why bother resetting? If you’ve lost a remote, moved into a new house, or want to make sure only people you trust can control your garage, this is the way to go.
Final Thoughts: No Manual, No Problem
Programming your Overhead Door garage door remote without the manual might seem intimidating at first. But once you know where to look—the learn button, the battery compartment, the dip switches—the process falls into place like matching puzzle pieces. You don’t need to be a tech wizard. Patience and a stepstool are usually all it takes.
So next time you’re standing in your driveway stuck outside, remember: the answer’s almost always a press, a blink, and a bit of trial and error. Once you’ve done it, you’ll wonder why you ever thought you needed that little folded manual in the first place. Your garage is back in business—and so are you.
