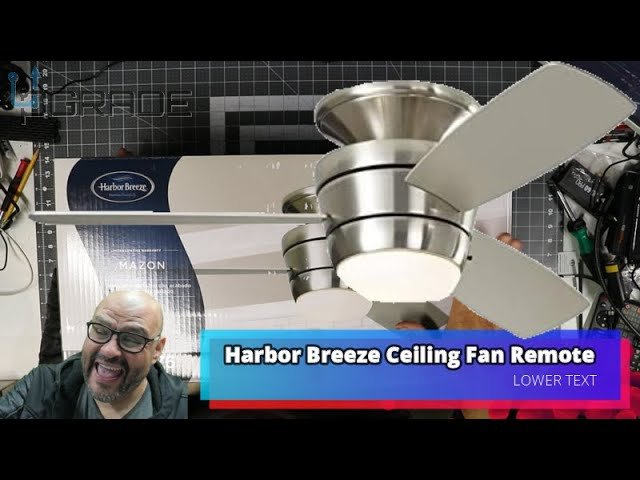
It’s not as mysterious as it seems. Harbor Breeze remotes don’t stay magically paired forever; a sudden loss of power can scramble their connection with the fan’s receiver. Think of it like old friends losing each other in a crowd—sometimes you just need to reintroduce them. The “pairing” process is basically getting the fan and remote back on speaking terms. If this sounds daunting, don’t worry: you don’t need a degree in electrical engineering or secret codes. A few minutes, a ladder, and some patience will get your fan spinning (and lights dimming) again.
Why Power Outages Break the Remote Connection
First, let’s dig into why a power outage can send your Harbor Breeze fan remote into a silent funk. Your ceiling fan and its remote aren’t just passively connected—they’re in constant quiet communication. Inside the fan housing, there’s a small receiver board that “listens” for the remote’s signal. When the power cuts out abruptly, that receiver can lose its memory of the remote’s unique “handshake” sequence.
You might be wondering: “Shouldn’t it just remember?” In theory, yes. But these fan receivers often use simple, low-cost chips that trade expensive memory retention for affordability. If you have kids, it’s a bit like a child forgetting a friend’s voice after a long summer apart. The remote hasn’t changed, but the receiver needs a reintroduction.
After a power outage, especially one with more than a quick blip, the receiver may reset. That’s why the fan suddenly ignores its remote and only works via the wall switch. In rare cases, the remote itself may have drained batteries or suffered a glitch, but nine times out of ten, it’s the pairing that needs to be re-established.
Identifying Your Harbor Breeze Ceiling Fan Remote Type
Before you can fix anything, let’s make sure you know what you’re working with. Harbor Breeze has used a few different remote systems over the years. Some fans use a simple handheld transmitter with manual dip switches inside. Others use “smart sync” or code-based pairing, which usually involves pressing and holding buttons in a specific order. It’s a bit like owning a car from different model years—features change, but the basics are similar.
Here’s the thing—most modern Harbor Breeze ceiling fans use either:
- A remote with numbered dip switches under the battery cover.
- A remote with “Learning” or “Pair” buttons, sometimes also labeled as “Reset”.
- A universal Harbor Breeze remote bought as a replacement.
Check your remote by popping off the battery cover. If you see a bank of tiny switches—these are *dip switches*, and they need to match the settings inside the fan’s receiver. If there are no switches, look for a pairing or “learn” button (usually tiny and inside the battery compartment).
Don’t worry about remembering all the options. You just need to know which type you have: dip switch or learning/pair button. Each requires a slightly different process to get things talking again.
Step-by-Step: How To Pair Harbor Breeze Remote After Power Outage
Alright, time to roll up your sleeves. Pairing the Harbor Breeze remote is usually straightforward once you’ve figured out your remote type. Here’s a step-by-step guide for each method:
1. Dip Switch Remotes
With these, both the remote and the receiver inside the fan must have matching dip switch positions—think of them as secret handshakes. Here’s the process:
- Turn off the fan using the wall switch or circuit breaker for safety.
- Remove the fan canopy (the part that attaches to the ceiling) to access the receiver. Most just require unscrewing a few screws.
- Locate the dip switches inside the receiver and note their positions.
- Open your remote’s battery compartment and match the switches to the receiver’s positions exactly. Use a small screwdriver or pen tip.
- Reassemble the fan canopy. Turn the power back on.
- Test the remote: fan and lights should now respond to every button press.
If nothing happens, double-check you matched every switch correctly. A single wrong setting and the “handshake” won’t work. Honestly, most pairing fails are just one dip switch off. It pays to go slow here.
2. Learning or Pair Button Remotes
This type skips the switches and uses a button combo instead. Here’s how it usually works:
- Turn power off to the fan using the wall switch or circuit breaker.
- Wait about 30 seconds (this clears the receiver’s memory).
- Turn power back on. Within 30 seconds, press and hold the “Pair,” “Learn,” or “Reset” button inside the remote (often behind the battery cover).
- Hold until the fan light blinks or you hear a beep (usually 5–10 seconds). That’s the sign the code is synced!
If you miss the timing window, no worries. Just turn the power off and try again. Fans can be picky about this exact timing, almost like a stubborn old computer that needs just the right combination of button presses.
Troubleshooting: When The Harbor Breeze Remote Still Doesn’t Work
Sometimes the fan and remote are stubborn—pairing just doesn’t take. You might be wondering if the remote or receiver is broken. Start by ruling out simple stuff:
- **Batteries**: Old or weak batteries make the signal too weak. Always use fresh ones.
- **Obstructions**: Furniture, thick walls, or even metal light fixtures can block signals. Try standing directly under the fan for testing.
- **Distance**: Most remotes work best within 10-15 feet.
If you’ve checked all this and still no luck:
Here’s the thing: If your remote and receiver both light up or blink but don’t control the fan, it’s probably a *pairing issue*—repeat the steps, paying attention to precise timing and switch settings.
In rare cases, a power surge during the outage can damage the receiver or remote. If the fan works perfectly from the wall switch but ignores the remote entirely, it’s time to consider replacing one or both units. Genuine Harbor Breeze replacement remotes are usually the best fit, but a universal remote can sometimes do the trick—more on that next.
Harbor Breeze Universal Remote vs. Original Remote Pairing
People often ask: “Can I just use a universal ceiling fan remote if pairing fails?” The short answer is yes—but with a few caveats. Harbor Breeze fans can usually be paired with a universal remote kit, but you’ll need to replace the receiver inside the fan as well.
Here’s what to consider:
- Original remotes are always a perfect handshake for the fan’s built-in receiver. Pairing is smoother, no compatibility worries.
- Universal remotes require installing the matching receiver that comes with the kit inside the fan canopy. The process is a little more involved (wiring for power and fan), but it can revive an older fan if the original remote or receiver is dead.
- When you use a universal remote, all fans paired to that receiver will respond—so in a household with multiple fans, keep codes unique to avoid cross-control.
Honestly, original is easiest if you can find it. Universal is plan B if the pairing steps just don’t work, or if the original remote is lost or broken beyond repair.
Resetting Harbor Breeze Remote: When and How
Resetting isn’t the same as pairing, but sometimes it helps clear up weird bugs. If your remote is acting glitchy—maybe lights flicker, the fan changes speed by itself, or buttons don’t seem to register—a full reset can help.
To reset most Harbor Breeze remotes:
- Remove the batteries from the remote and wait 60 seconds.
- Press and hold every button for a second or two (this drains any leftover power and resets internal circuits).
- Reinstall batteries and try to pair again using the steps above.
Some models also have a “reset” or “sync” button near the battery bay. Pressing this after a battery reinstall can sometimes nudge a stubborn remote back to life. Just remember, if the receiver inside the fan is the problem, no amount of remote resets will help—you’ll need to address that directly.
Keeping Your Harbor Breeze Ceiling Fan Remote Synced Long Term
After you’ve finally re-paired the fan and remote, a big question is: “How do I keep this from happening again?” While you can’t always prevent power outages, you can reduce remote headaches:
- Try not to flip the breaker or wall switch off and on repeatedly. This can confuse the receiver.
- Use whole-home surge protectors to protect electronics—including your ceiling fan—from power spikes that can corrupt memory.
- Change the batteries in your remote every year, even if they still “sort of” work. Weak batteries make the receiver “hear” less well.
- If you have multiple fans, label your remotes and keep a note of your dip switch settings or “pairing” routines. This makes future outages less stressful.
Think of your Harbor Breeze fan system as a tiny, loyal robot—it works beautifully until its memory gets zapped. Keeping things simple, powered, and labeled makes life easier the next time a thunderstorm starts flipping the lights.
Final Thoughts: Regaining Control After a Power Outage
Power outages always seem to strike at the worst time, but your comfort doesn’t have to go out the window. Pairing a Harbor Breeze ceiling fan remote after an outage is a little dance—sometimes finicky, but definitely doable. Once you know your remote’s type and you walk through the steps with patience, you’ll have your cool breeze and remote control peace of mind back in no time. Hang onto your setup info, keep those batteries fresh, and your Harbor Breeze fan will stay as obedient as ever—even when the power plays tricks on you.
