Let’s slow things down and look at the problem like a simple puzzle. You’ve got your Westinghouse ceiling fan, and the remote is the only thing standing between you and ultimate comfort. If you don’t mount or store it smartly, you’re signing up for endless searching and that tiny (but infuriating) panic when the room gets stuffy. Honest truth? A bit of planning and a few minutes with a screwdriver can save your sanity. Westinghouse includes some clever options, and there’s more flexibility than you might think.
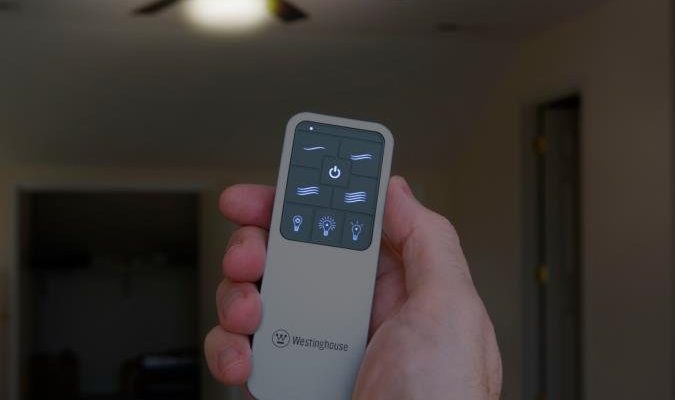
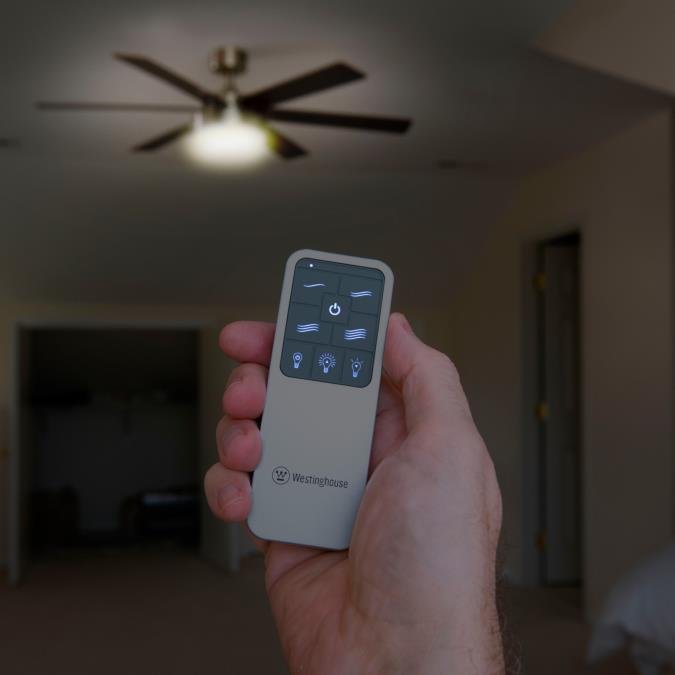
You might be wondering what kind of remote we’re talking about. Most Westinghouse ceiling fans use a compact, battery-powered remote with a few simple buttons: on/off, speed settings, maybe a light toggle, and sometimes a reverse function. If you’ve reset, synced, or even cracked it open to change the battery before, you know it’s built to be accessible. The trick is keeping it accessible—and not lost. Here’s how to mount or store your Westinghouse ceiling fan remote so it’s always right where you want it.
Understanding Your Westinghouse Ceiling Fan Remote
Before you even think about mounting or storing, it pays to really get to know your remote. Westinghouse designs their fan remotes to be slim and lightweight, something you can carry in one hand without any fuss. What you’ll usually see is a white or gray plastic shell, a handful of labeled buttons, and a battery compartment that opens with a gentle push or slide. Inside, there’s usually a coin cell battery or a pair of AAAs—nothing complicated.
Here’s the thing: knowing your remote’s build makes everything else easier. For example, if your remote came with your fan, it’s almost always paired and synced at the factory. If you bought it after the fact, you might’ve had to enter a code or do a quick reset to pair it up. Either way, the design is meant to blend into your living space, so you don’t need to worry about clashing with your room’s look.
Honestly, the more familiar you are with the remote, the less likely you’ll be to lose or damage it during mounting. It’s like befriending a tool before you start swinging it around—always a good idea.
Westinghouse remotes are usually universal within a certain generation, but if you’re dealing with a special “smart” remote or one with extra features (like digital readouts or programmable scenes), its shape might be a little different. Double-check the model number if you need replacements or want to get fancy with your mounting style. If the remote feels “off” in size or layout compared to guides online, you’re probably not alone—Westinghouse tweaks their designs every few years.
Why Mounting Your Ceiling Fan Remote Actually Matters
You might be tempted to just toss the remote on the coffee table and forget about it. But from years of watching people lose remotes (and doing it myself), I can say mounting is more than a neat-freak move—it’s practical. Every moment you spend searching is one you can’t spend enjoying a cool breeze. Over time, remotes that aren’t stored properly often get dropped, stepped on, or chewed up by pets. Not pretty.
Let me explain why a mounted remote pays off. When your Westinghouse remote has a “home base,” it’s less likely to vanish. You also avoid misplaced batteries, accidental drops, and the whole code and sync rigmarole that comes with a lost or broken remote. Mounting takes just a couple of minutes, but the payoff is real: instant access, less clutter, and fewer interruptions to your day.
Ever had company over and turned the house upside down searching for the fan remote? Embarrassing, right? Keeping the remote in a predictable spot turns your living room into less of a scavenger hunt and more of a relaxing space. Plus, if the remote needs a reset or battery swap, you’ll always know exactly where to look.
A mounted remote is like your house keys—never lost, always ready, and a huge relief when you’re in a hurry.
Some folks skip mounting because they think it’s permanent or damaging to walls. But Westinghouse remotes usually come with a gentle cradle or bracket that’s easy to install and remove. No worries about commitment—you can put one on a side table, by the entryway, or near the light switch without any drama or ugly holes.
Where To Mount or Store Your Westinghouse Remote for Best Results
Picking the right spot to mount or store your remote can make a world of difference. It needs to be somewhere natural—a place you already reach for when you walk in the room or want to turn on the fan. Think of it like hanging your favorite mug on the perfect hook in the kitchen: it just feels right.
Most Westinghouse remotes come with a wall cradle or holder that attaches with screws or strong adhesive strips. The back of the remote clips in easily, pops out smoothly, and stays snug when you need it to. Here are the best spots to consider:
- Next to the Light Switch: This is a classic. You’re already trained to reach for the wall when you want to adjust the room, so mounting the holder right next to the switch feels almost automatic.
- On a Bedside Table or Nightstand: Especially for fans in bedrooms, attaching the cradle to a nightstand or even the side of your bed frame keeps things cozy and convenient for late-night adjustments.
- On a Coffee Table or Shelf: If you prefer not to deal with walls, a table-top mount using adhesive works well and saves you from having to cross the room every time.
Here’s an extra tip—avoid spots too close to heat sources, direct sunlight, or vents. These spots can drain your battery or confuse the remote’s signal. And if you have kids or pets, replace “eye-level” with “adult eye-level” so curious hands and paws don’t nab your remote every chance they get.
The right storage spot feels almost invisible—it’s there when you need it, and never in the way. Find that sweet spot, and you’ll wonder how you ever lived without it.
Step-by-Step: How To Mount Your Westinghouse Ceiling Fan Remote
Mounting your remote isn’t rocket science. Even if you’re not the “handy” type, you’ll get it done in less than ten minutes—quicker than brewing a pot of coffee. Here’s the step-by-step, spelled out simply:
- Check Your Kit: Most Westinghouse fans include a wall cradle or remote holder plus a couple of short screws and wall anchors. If not, you can buy a universal remote cradle online.
- Choose Your Spot: Hold the cradle in the location you want—by the switch, on a nightstand, wherever. Make sure the remote slides in and pops out easily, and that it isn’t blocking drawers or outlets.
- Mark the Holes: Use a pencil to mark where the screws will go. If you’re using adhesive strips, just clean the surface well so the cradle sticks tight.
- Screw or Stick It On: For screws, use a small screwdriver or drill to secure the cradle. If you’re using adhesive strips, press the cradle in place for 30 seconds, then give it an hour to fully set before using.
- Dock Your Remote: Slide the Westinghouse remote into its new home. Give it a test—make sure it doesn’t wobble or fall out with a light tap.
Double-check the remote’s battery compartment is still easy to access before you mount it. There’s nothing more annoying than having to unscrew the whole cradle just to replace a battery.
Mounting is truly that simple. If you’re nervous about screwing into drywall, adhesive is a solid alternative—just don’t overload it with weight, and you’ll be fine.
Alternatives To Wall-Mounting: Creative Storage Ideas
Wall-mounting isn’t for everyone. Maybe you’re renting, love to rearrange furniture, or just hate the idea of putting holes in the wall. You’ve got options—trust me. Storing your Westinghouse ceiling fan remote can be just as effective if you get a little creative.
Small decorative trays or bowls are a classic move. Set one on your coffee table, entryway, or TV stand and always drop the remote there. It’s like a landing pad for your phone, wallet, or keys. Another option is a magnetic strip (like a knife rack) hidden in a discreet spot—that way, your remote just snaps on and stays put.
If you have a universal remote that controls both your fan and other devices, you might want to store it with your TV remotes or in a caddy near your main seating area. Want to get extra organized? Use a labeled basket or drawer divider so everyone in the house knows where it goes.
The big takeaway? The storage method doesn’t matter as much as consistency. Pick a spot, let everyone know, and stick with it. You’ll save time, avoid headaches, and maybe even prolong your remote’s life by keeping it out of harm’s way.
Let your personality shine—if you want to mount the remote in a bright, funky holder or store it in a vintage teacup, the only rule is that you’ll use it.
Dealing With Lost, Broken, or Unresponsive Remotes
Here’s that gut-drop moment: you go to adjust the fan, and the remote is gone—or worse, it’s there but completely unresponsive. It happens. Don’t panic. There are steps you can take before rushing to buy a new one.
First, check common hiding places—under cushions, in drawers, even under furniture. If the remote still doesn’t show up, look for a reset button on your fan (sometimes hidden near the motor or inside the light fixture). Some Westinghouse fans let you pair a new remote by pressing a sync button after installing fresh batteries.
If the remote is acting up, pop open the battery compartment and try a new battery. Weak or dead batteries are the most common cause of “my remote won’t work” panic. Still not working? Sometimes remotes lose their code and need to be re-synced. Look for instructions in your fan’s manual about how to pair or reset the remote.
If you can’t revive it, you have two choices: replace it with the exact Westinghouse model (check the model number) or try a universal fan remote, which works with many brands. Universal remotes often need you to enter a sync code or follow a pairing process—nothing you can’t handle with a bit of patience and your favorite screwdriver.
Losing—or breaking—a remote might feel catastrophic, but most Westinghouse fans are built with these problems in mind. The fix is rarely as dramatic as it feels.
Battery Care and Long-Term Maintenance
You might not think about your ceiling fan remote’s battery until the moment it lets you down. Here’s the thing: batteries—whether coin or AAA—have a shelf life, and improper storage can shorten it further.
If you’ve mounted the remote in a spot that gets too hot, cold, or is hit by direct sunlight, your batteries could drain faster. Always store your Westinghouse remote in a spot that’s dry and protected from the elements. Change the battery at least once a year, or right away if you notice the remote lagging, dropping sync, or acting hit-or-miss. Don’t leave dead batteries in, as they can leak and corrode the compartment.
When you swap batteries, check the contacts inside the remote for any buildup or rust. A quick swipe with a dry cotton swab solves most issues. If your remote needs to be reset after a battery change, just follow the pairing instructions in your manual.
A little bit of battery TLC keeps your Westinghouse ceiling fan remote working perfectly—no drama, no unexpected surprises.
Universal Remotes vs. Brand Remotes: Which Is Best For Your Fan?
Sometimes you find yourself choosing between the official Westinghouse remote and a universal remote. Each has its pros and cons, and honestly, it comes down to how much you value convenience versus features.
Brand-specific Westinghouse remotes almost always work straight out of the box with your fan. They’re pre-paired, labeled for your exact functions, and don’t require you to mess with codes or sync steps (unless you’re replacing a lost remote). The big advantage here is simplicity and peace of mind.
Universal remotes, on the other hand, can replace several devices at once—great if you’re running out of table space or just hate clutter. They’re a little trickier to set up, often needing a pairing code or reset sequence. Sometimes, certain features (like reverse mode or special lighting effects) might not transfer over perfectly.
If all you want is plug-and-play ease, stick with the Westinghouse remote. If you love having control over every gadget in one hand, universal could be worth the trouble.
Just remember, whichever remote you choose, mounting or storing it well is still the secret sauce. A remote’s only useful if you can actually find it when you need it.
Final Thoughts: Keeping Your Westinghouse Fan Remote Visible, Charged, and Ready
Living with a ceiling fan remote doesn’t need to be a game of hide-and-seek. Whether you mount it on the wall, tuck it in a tray, or stash it with your favorite gadgets, a little planning saves you hassle down the line. The best approach? Pick a spot you’ll use day in and day out, keep batteries fresh, and make sure everyone in your home is in on the plan.
Westinghouse made these remotes to be easy, not mysterious. With the right mounting or storage method, your fan stays at your fingertips and life just feels a bit breezier. No more frantic searching, no more sweaty afternoons—just cool, convenient comfort, every time.