
Honestly, the remote is more than a gadget; it’s the magic wand for your ceiling fan. With its buttons for speed, light dimming, and sometimes even a “reverse” mode, it’s the command center of comfort. But unless you make a habit of putting it in one safe spot, it’s easy for the remote to vanish behind a stack of magazines—or even in your kid’s toy box. Let me explain how you can keep your Harbor Breeze remote handy, organized, and out of harm’s way, whether you want to mount it on the wall or simply create a smart little storage spot.
Understanding Your Harbor Breeze Ceiling Fan Remote
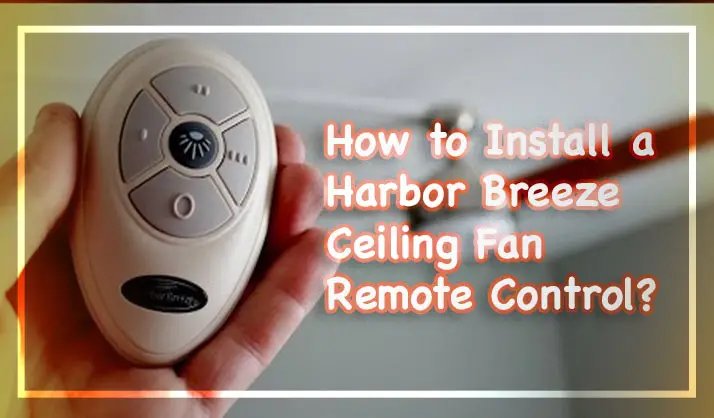
Here’s the thing: not all ceiling fan remotes are created equal. If you hold one in your hand, you’ll notice Harbor Breeze remotes tend to be slim, lightweight, and often a bit more elegant than your average universal fan controller. These remotes usually run on a simple battery—often a 9V or a pair of AAAs—and come with basic buttons: fan speed, light on/off, maybe a dimmer, and sometimes a “reverse” function for changing airflow direction in winter.
But what sets the Harbor Breeze remote apart is how it “talks” to your ceiling fan. Most use a built-in RF (radio frequency) code, allowing you to control the fan from across the room. Some models even need to be synced or paired after a battery reset or during installation. That’s why, if you ever misplace this remote, you can’t just grab any old controller from another room and expect it to work. You need the right one—or, at least, one that’s been properly paired with your fan.
Knowing the type of remote you have (universal vs. model-specific) is your first step before you start mounting or storing it. Some remotes include a wall bracket right in the box, while others don’t. If yours didn’t come with one, don’t worry—you still have plenty of mounting and storage options.
Why Mounting Your Harbor Breeze Ceiling Fan Remote Matters
You might be wondering, “Do I really need to mount this thing?” Honestly, unless you love the daily hide-and-seek routine, having a dedicated spot for your remote pays off in peace of mind. It’s a bit like giving your car keys a hook by the door—saves time, stress, and a few muttered words nobody needs to hear.
Mounting your Harbor Breeze ceiling fan remote does more than prevent it from getting lost. It keeps the remote safe from accidental drops, spills, and even pet-related disasters. (Speaking from experience: dogs don’t understand the value of electronics.) Plus, if you live in a busy household, it stops family members from wandering off with the remote and forgetting where they put it.
Another reason to mount your remote is battery longevity. Remotes tossed loosely into drawers or baskets might accidentally have buttons pressed, draining the battery faster. A secure wall mount prevents this, saving you from that annoying “Why won’t my fan turn on?” moment when you need it most.
How To Choose The Best Spot For Mounting Or Storing
Let’s talk location. If you’re mounting your remote on the wall, pick a spot that’s easy to reach but not right in the way. You don’t want it hidden behind a plant or somewhere the kids or guests will miss. A common choice is right next to the light switch for the room, so it’s second nature to grab the remote as you walk in or out.
If wall-mounting feels too permanent, consider storing the remote on a handy flat surface—maybe a small tray on the coffee table or a special pocket on the side of your couch. The only “rule” here is consistency. Wherever you choose, use it every time so the remote becomes as predictable as the sun rising in the east.
Here are a few practical mounting or storage spots to consider:
- On the wall near the entrance, using the included bracket or a self-adhesive holder.
- Attached inside a kitchen cabinet door if you want to keep it hidden but handy.
- In a dedicated basket on your coffee table or entertainment center.
- With Velcro strips to the side of a nightstand or end table.
You don’t have to overthink it. Just pick a place that suits your routine and doesn’t create obstacles for family, guests, or your own sanity.
Step-By-Step: Mounting Your Harbor Breeze Remote With The Wall Bracket
Most Harbor Breeze ceiling fan remotes arrive with a lightweight, usually white plastic wall bracket. It’s designed specifically for the shape of the remote, so you can dock it like a charging station—no worries about mismatched sizes. Here’s how to mount it for easy access.
- Gather the right tools: You’ll likely need a small screwdriver, the included screws, a drill if mounting into drywall, and the wall bracket that came with your remote. Haven’t got the bracket? Don’t panic—skip down for bracket alternatives.
- Decide on your location: Hold the bracket against the wall in your chosen spot. Make sure it’s within reach and not too close to any heat or moisture sources (like the stove or a window that gets direct sunlight).
- Mark and drill: Use a pencil to mark where the screws will go. If you’re drilling into drywall, use anchors to keep it sturdy. Drill small pilot holes, insert the anchors, and screw the bracket into place.
- Test the fit: Slide your Harbor Breeze remote into the bracket. It should click in smoothly and remove easily. Give it a gentle tug to make sure it’s secure but not stuck.
If you’re like me and can never find the drill when you need it, many folks use strong double-sided tape or Velcro strips instead. Just check the weight and make sure your remote isn’t too heavy—no one wants it crashing down in the middle of the night.
Alternative Storage Tips (If You Don’t Want To Wall-Mount)
Mounting isn’t for everyone. Maybe you’re renting and don’t want holes in the wall, or you have a fancy wallpaper you’d rather not damage. You’ve got options—plenty of them.
First, those self-adhesive Velcro strips you can pick up in any big-box store can do wonders. Stick one side to your remote, the other to a corner of your nightstand, TV stand, or even the side of a bookshelf. The remote stays put, but you can peel it off anytime for battery swaps or syncing.
Another easy option? Create a designated “remote zone” using a compact tray, bowl, or small decorative basket on a table (just don’t use something too deep—you want to see and grab the remote without digging). Some people even repurpose unused phone holders or small magnetic hooks attached inside a cabinet. Just make sure nothing will scratch the remote or block its buttons.
For parents worried about little hands hiding or breaking the remote, keep it stored well above toddler reach, maybe on a high shelf—but not so high you forget about it yourself.
When it comes to storing your Harbor Breeze ceiling fan remote, the best solution is the one you’ll actually use every day. Don’t overcomplicate it—just create a habit.
Battery and Maintenance: Keep Your Remote Ready
Let’s talk batteries. Even the best-mounting spot won’t save you if the remote’s battery runs dry when you desperately want some airflow. Harbor Breeze ceiling fan remotes usually use simple batteries (AA, AAA, or sometimes a smaller disc-shaped one). If you’re not sure, just slide off the battery cover and take a look.
Make it a habit to check the remote’s battery every few months, especially if you notice the fan isn’t responding like it used to. If you’ve just changed the battery and things still aren’t working, don’t panic. Sometimes the remote needs to be synced, paired, or even reset. There’s usually a tiny button inside the battery compartment labeled “Learn” or “Sync.” Hold it down for a few seconds, then try using the remote again.
Pro tip: If you keep the remote mounted or stored in the same spot, you’re less likely to have accidental button presses, which can drain the battery faster. And, if you have a backup battery stashed nearby, you’ll never be caught sweating in the summer waiting for the fan to turn on.
Pairing, Syncing, and Troubleshooting Your Remote
Sometimes, the remote just won’t cooperate. Maybe you’ve replaced the battery, or someone pressed a weird combination of buttons, and now the fan is ignoring all your commands. In those cases, knowing how to sync, pair, or reset your Harbor Breeze remote can save you from frustration.
Most remotes feature a “Learn” or “Code” button inside the battery compartment. Here’s a simple step-by-step for syncing:
- Turn off power to the ceiling fan at the wall switch or circuit breaker.
- Press and hold the “Learn” or “Sync” button on the remote for a few seconds.
- Turn the power back on while still holding the button.
- The fan should respond (usually with a beep or a quick movement) to confirm pairing.
If you have a universal remote or a replacement, syncing can be a little trickier. Always check your Harbor Breeze remote’s manual for model-specific instructions; the process can vary a bit.
Strong radio frequency connections mean you can store or mount the remote anywhere in the room—it doesn’t have to point directly at the fan. But if you’re having trouble, try moving any electronics or metal objects that could interfere with the signal.
Troubleshooting your Harbor Breeze ceiling fan remote doesn’t have to be intimidating. Take a deep breath, check the battery and the sync code, and most issues can be solved in a few minutes.
Universal Versus Brand-Specific Remotes: What To Know
Let’s settle an age-old debate—can you use any remote with your Harbor Breeze ceiling fan? Here’s the honest answer: sometimes yes, sometimes no. Harbor Breeze ceiling fan remotes are usually designed for their own fans. They use specific radio frequency codes and sometimes even unique sync methods.
Universal ceiling fan remotes are available, and some will work with Harbor Breeze fans—especially if your model uses common frequencies. But pairing and syncing can be hit or miss, and you may not get every function (like light dimming or reverse) to work perfectly.
If you’re buying a replacement: Look up your Harbor Breeze fan model and get a compatible remote, preferably made by the same brand. You’ll save yourself a lot of troubleshooting headaches.
That said, if you do grab a universal remote for convenience, mounting and storing it works the same way. Just remember to keep the manual handy for any pairing instructions, and check battery specs—universal remotes sometimes use different types.
Keeping Your Remote Safe: Storage Ideas For Busy Homes
Life gets chaotic, especially in homes with kids, pets, or lots of guests. I’ve seen ceiling fan remotes wind up in the most unlikely places—inside toy boxes, under couch cushions, and once, inexplicably, in the fridge. Creating a *routine* is your best defense.
For busy families, try mounting the Harbor Breeze ceiling fan remote up high, away from little hands. If guests are frequent, a clearly labeled wall bracket (maybe with a tiny sticker or tag) helps everyone know where to put it back. In homes with pets, avoid storage spots low to the floor—chewing and slobber are no friends to electronics.
Some people create a “command center” by their main door: keys, mail, and the remote, all within easy reach. Others prefer storing the remote in their bedroom or an office if that’s where the fan lives. The main goal is always the same—pick a place, use it every time, and make it a no-brainer for everyone in the house.
Wrapping Up: Make Your Harbor Breeze Remote Work For You
At the end of the day, mounting or storing your Harbor Breeze ceiling fan remote is about making your home run just a little smoother. No more mad dashes around the living room or arguing over who had it last. Choose a mounting or storage method that makes sense for your space and your routine. Think of it as giving your comfort “magic wand” a proper home—one that’s as practical as it is convenient.
By putting just a small bit of planning into where your Harbor Breeze ceiling fan remote lives, you’ll save time, avoid headaches, and keep every breeze and light setting right at your fingertips. Simple habits, big payoff—that’s the real secret to keeping your cool.