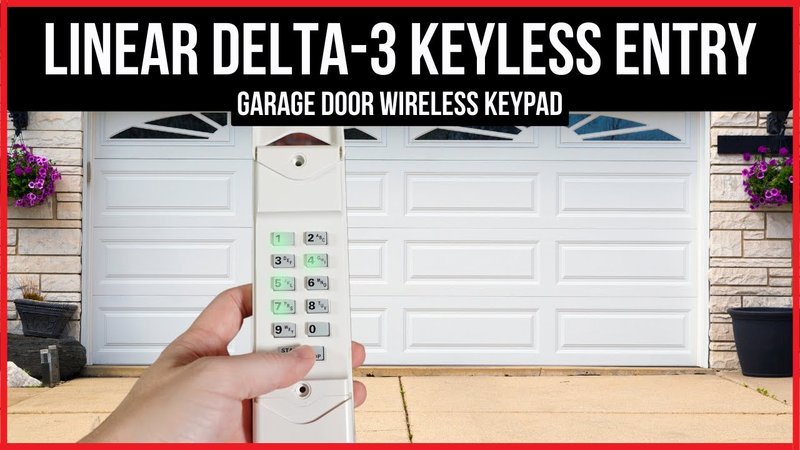
Here’s the thing: every Linear remote speaks to your garage door opener in a special “language”—a unique code or signal. If the code gets out of sync, or you get a new remote, you’ll need to make sure both devices understand each other again. Sounds easy, but if you’ve never done it before, the process can raise a lot of questions. Let me walk you through what that code is, why you need it, and how to find (or reset) the right programming code for your Linear garage remote—step by step, mistake-proof, no jargon.
Understanding Linear Garage Remote Codes
Let’s start by breaking down what a programming code for a Linear garage remote actually is. These remotes use either a set of tiny switches inside (called DIP switches) or built-in rolling code technology. DIP switches are like toggles that you set to “on” or “off,” creating a unique pattern—think of them as the old-school secret handshake for your garage opener. Rolling codes, on the other hand, create a new encrypted code every time you press the button, making things more secure.
If your opener and remote don’t agree on the code, nothing happens when you push the button—that’s the classic “Why won’t my garage open?” moment. So, the code is what makes your remote exclusively yours. This also means if you misplace your remote or someone else tries to use theirs nearby, your door stays safely closed. When troubleshooting, knowing which code system your device uses is half the battle.
Different generations of Linear remotes use different systems. Older models rely entirely on DIP switches, while modern ones tend to use rolling code technology. You’ll usually find the model number on the back, which helps you look up the instructions if you’re feeling stuck. Either way, the code is the key ingredient to syncing and programming—a must-have for pairing a new remote, replacing batteries, or fixing common issues.
How To Locate the Programming Code in DIP Switch Linear Remotes
If you pop open the back of your Linear remote and spot a little row of switches, congratulations—you’re working with a DIP switch model. Here’s how to find (and set) the programming code:
- Open the battery compartment: Gently slide or pry off the back panel. Don’t force it—some models have a tiny screw.
- Count the switches: Most Linear DIP switch remotes have 8, 9, or sometimes 10 little switches. Each can be flipped up or down.
- Write down the pattern: The unique up/down pattern here is your programming code. This pattern must match the one inside the garage opener’s receiver (usually found on the ceiling unit in your garage).
Matching the DIP switch pattern is everything. If even one switch is off, the remote can’t communicate. Sometimes the switches are tiny, so use a pen or small screwdriver to set them. Honestly, this step can test your patience—the switches love to blend into the plastic. But once you’ve found and set the correct pattern, you’ll have your exclusive “code” nailed down.
For those who inherited their garage opener from a previous homeowner, it’s common to discover the switches already set. Still, it’s never a bad idea to reset all switches and choose your own combination for extra security.
Programming a Rolling Code Linear Garage Remote
Now, let’s talk about the newer Linear garage remotes with rolling code technology. If you don’t see DIP switches, don’t panic—these remotes are actually easier and safer to program. Instead of switches, these remotes sync up to the opener using a “learn” or “program” button.
Here’s what you typically do:
- Locate the Learn button: On your garage door opener’s main unit (up above in your garage), look for a button labeled “Learn” or “Program.” Sometimes it’s behind a plastic cover.
- Press and release the Learn button: Don’t hold it down too long—usually just a firm press until you see an indicator light.
- Press the remote button: Within 30 seconds, press the main button on your Linear remote. If the code is accepted, you’ll hear a click, a beep, or see the light blink.
This process programs the rolling code, so both devices now share a fresh, secure “password.” No need to manually find a code—the opener and remote figure it out together. This is why rolling code remotes are such a step up in security; even if someone tries to clone your signal, the code changes every single time.
You might be wondering—what if you make a mistake? Not to worry. Just repeat the process. There’s no harm in starting over, and these systems are pretty forgiving.
How To Reset or Change the Programming Code
There will be times when you need to reset the programming code on your Linear garage remote and opener. Maybe you lost a remote, moved into a new home, or want to wipe out old codes for peace of mind. Here’s how that’s usually done:
- Clear old codes: Hold down the Learn button on your garage opener for 6-10 seconds until the light goes out. This erases all paired remotes. Think of it as resetting the locks on your house.
- Reprogram remotes: Follow the same programming process as before—press the Learn button, then the remote.
- Update DIP switches if needed: For DIP switch models, you’ll want to set a new pattern on both the remote and opener for extra safety.
A lot of folks skip this, but honestly, resetting old codes is a smart habit if you’re worried about lost remotes or previous owners still having access. Updating your code puts you in control and keeps your garage locked down.
If you’re ever stuck or something just won’t sync, double-check battery strength—weak batteries cause the weirdest phantom problems during the programming process.
Troubleshooting Linear Garage Remote Coding Issues
Programming a Linear garage remote doesn’t always work on the first try. The most common mistake? Not matching the codes exactly, or missing a step in the sync process. If you’re standing there, clicking away, and nothing’s happening—let’s look at some typical hiccups and how to fix them.
- Batteries: Low batteries mean weak signals. Pop in new ones before you start any pairing or resetting.
- Remote distance: Stay close to the garage opener during programming. If you’re too far away, the signal might not reach.
- Obstructions: Metal, concrete, or electrical junk between you and the opener can block the signal.
- Switch positions: On DIP switch models, triple-check the pattern. Even a single switch out of place means no connection.
If you’re still stuck, try unplugging the opener for 30 seconds—sometimes a little “digital nap” clears up stubborn issues. If nothing else works, you might have a faulty remote or a garage opener that needs service, but honestly, that’s rare. Most of the time, it’s just a missed step or a tired battery.
Comparing Universal Remotes vs. Brand-Name Linear Remotes
You might be thinking, “Can I just grab a universal garage remote instead?” Here’s my take: universal remotes work for many openers, including some Linear models, but not all features may sync perfectly—especially rolling code security. Brand-name Linear remotes are designed to pair quickly, with full compatibility and support for all their security codes.
Universal remotes can be cheaper and handy if you’ve got several brands in one household. But their instructions can be tricky, and sometimes you’ll spend longer entering codes and checking switches than you’d like. If security is a top concern, or you have trouble syncing, stick with an official Linear remote for peace of mind.
Universal remotes are like a “one-size-fits-all” hat—great if it fits, but sometimes a custom fit just works better.
Maintaining Your Linear Garage Remote for Long-Term Reliability
Let’s be honest, no one enjoys re-programming a garage remote every few months. Good news: a little bit of maintenance goes a long way. Periodically check the battery. If your remote starts to lose range or acts finicky, it’s usually the battery calling for help—not the code. Keep the battery compartment clean and dry. Dust and corrosion can interfere with the contacts, making programming harder than it needs to be.
Try to avoid dropping the remote or getting it wet—a surprising number of coding issues trace back to hidden cracks or damp circuits. And keep the instruction manual handy (or at least snap a phone pic of the DIP switch pattern and your opener’s learn button location). That way, if you need to re-sync after a power outage or battery change, you won’t have to start from scratch.
A little preventive care beats an unexpected garage lock-out at 7 AM every time.
When To Replace, Repair, or Upgrade Your Linear Remote
Sometimes, no matter what you try, your Linear garage remote refuses to play nice. Maybe it’s old, cracked, or you dropped it one too many times. It happens. Here are a few signs you might need a new remote or repair:
- Buttons no longer click or feel mushy
- Remote doesn’t pair, even after several tries and new batteries
- Obvious damage to circuit board or casing
If your opener is more than 10-15 years old, you might also consider upgrading both the opener and remotes. Newer Linear models offer stronger rolling code security, quieter operation, and the ability to use smart features or even control your garage with your phone. But, for most people, simply replacing a tired remote and reprogramming the new one will solve almost every problem.
Final Thoughts on Programming Codes for Linear Garage Remotes
Programming your Linear garage remote isn’t rocket science, but I get why it feels that way the first time. The secret is knowing whether you’ve got a DIP switch or rolling code model, then matching the steps carefully. Take your time, double-check your code or sync, and don’t be afraid to reset and try again if things get off track. With a fresh battery and a little patience, you’ll ace the process and keep your garage safe and accessible.
The more you practice, the easier it gets. Save your code pattern somewhere, keep your remote clean, and don’t hesitate to switch to a newer model if yours is on its last legs. After all, a working garage remote can mean the difference between being stuck in the rain or breezing right into your cozy garage—no drama required.
