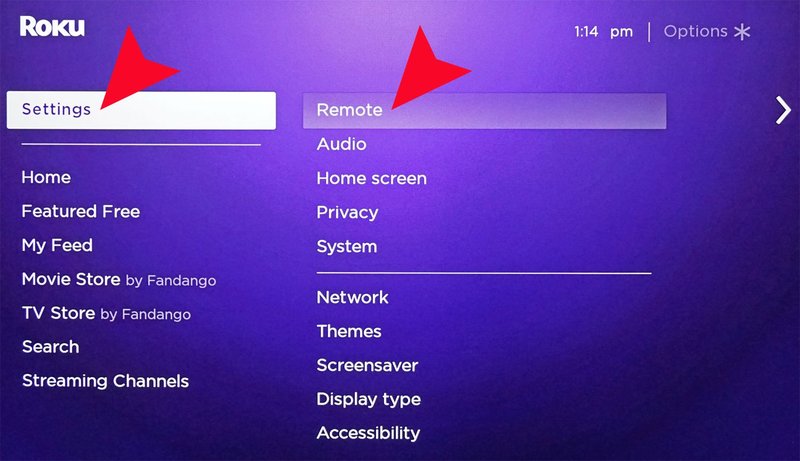
So, here’s the thing: Roku remotes are usually super-friendly, but sometimes they need a nudge (or, let’s be honest, a gentle shove) into setup mode before you can pair, sync, or reset them. Maybe your remote’s not talking to your TV anymore, or you’ve just replaced the batteries and it’s acting like it doesn’t know you. No worries! I’ve walked more than a few friends through this, and once you know the steps, you’ll wonder why it ever felt tricky in the first place.
Understanding Roku Remote Types
Before you dive in, it really helps to know which Roku remote you’ve got in your hand. Imagine asking for directions with only half the address—annoying, right? Roku makes two main remote types: simple infrared (IR) remotes and enhanced “voice” remotes (sometimes called point-anywhere remotes). They look similar, but how you enter setup mode is a bit different.
Simple IR remotes work like classic TV clickers—they need a clear line of sight to your Roku device and don’t do anything fancy like pairing or voice commands. Enhanced remotes, on the other hand, can control your TV volume, use voice search, and even hide behind cushions (kidding, but it sure feels like it). These often need syncing or pairing, especially if you’re setting up a new device or replacing batteries. Knowing which one you own saves a ton of guesswork down the line. If your remote has a microphone or a button with a speaker icon, you’ve got the enhanced type. If not, it’s probably the simple IR version.
When Should You Enter Setup Mode?
You might be wondering, “Do I really need to do all this every time?” Honestly, no. Most Roku remotes work straight out of the box. But there are some classic moments when entering setup mode saves you some serious hair-pulling.
- You just unboxed a new Roku streaming stick or player and need to connect the remote for the first time.
- Your remote suddenly stops working, even after a battery swap.
- You want to pair your remote to a different Roku device (maybe swapping rooms, or giving your old one to a friend).
- You’re troubleshooting lost connections after a power outage or software update.
In these cases, entering setup mode is the secret handshake. It tells your Roku remote and your streaming device to sync up again, kind of like reintroducing old friends after a long holiday.
How To Enter Setup Mode on Roku Enhanced Remotes
Here’s where things get hands-on. If you have a Roku enhanced remote (the one with a pairing button), entering setup mode is a specific but blissfully quick process. Let me break it down slowly so you can follow along—no rushing, no tech jargon.
First, pop the battery cover off the back of your remote. Inside, you’ll see a tiny button—this is the secret setup weapon, officially called the pairing button. To enter setup mode, press and hold this button for about 5 seconds, or until you see a flashing light—usually green—on the front of your remote. (If you’re like me: counting Mississippi-ones works.) Once the light blinks, your remote is now in setup mode.
Now, your Roku streaming device should automatically sense the remote is looking for a friend. If your TV is on and showing the Roku home screen, you’ll probably see a pairing message pop up in the corner. If nothing happens, make sure your Roku player is powered on and close enough for the remote to connect. Sometimes, especially if batteries are low, the remote might need a fresh pair to enter setup mode. And yes, I’ve learned that the hard way.
How To Enter Setup Mode on Roku Simple IR Remotes
If you’ve got a simple IR remote, the story is a bit different. Here’s the thing: there’s no explicit “setup mode” for these remotes, because they use basic infrared signals—think old-school TV logic. No pairing button, no flashing lights. If it’s not working, nine times out of ten, it’s a line-of-sight problem, dead batteries, or the remote’s blocked by something as innocent as a coffee mug.
To “reset” or troubleshoot, just make sure:
- The batteries are fresh and in the right way (positive to positive, negative to negative—yep, I’ve messed that up before).
- You’re pointing the remote directly at the Roku device—no walls or piles of books in the way.
- Your Roku device sensor isn’t dusty or covered.
If it’s still stubborn, try standing a little closer and removing any obstacles. There isn’t a setup mode to enter, but sometimes unplugging your Roku, waiting 10 seconds, and plugging it back in helps the remote “see” it once more. I know, not the most high-tech fix, but hey—it works.
Pairing Your Roku Remote After Entering Setup Mode
Okay, so you’ve entered setup mode. What happens next? This is where the magic (well, the tech magic) happens. The remote and the Roku streaming device start looking for each other, kind of like two walkie-talkies trying to find the same channel.
You’ll usually see an on-screen notification saying “Pairing remote…” or “Remote detected.” Don’t panic if this takes a few seconds—sometimes Roku devices need a moment to find your remote, especially if there are other wireless gadgets competing for attention. If you get a flashing light but no on-screen message, double-check that your Roku device is powered on and your TV input is set to the right HDMI.
Sometimes, you’ll need to repeat the pairing process, especially if the remote’s been sitting unused for a while or if the setup gets interrupted. Just repeat the steps above and keep an eye out for the on-screen confirmation. And once you’re paired? You’re ready to stream, search, and channel surf to your heart’s content.
Troubleshooting Common Roku Remote Setup Issues
Let me be real for a moment: sometimes tech just… doesn’t cooperate. If you’re trying to enter setup mode on your Roku remote and nothing’s happening, don’t toss the remote across the room (trust me, they don’t bounce well).
Try these troubleshooting steps:
- Swap out the batteries, even if you think the current ones are fine. Remotes can be surprisingly picky about battery levels.
- Restart your Roku streaming device by unplugging it for 10 seconds, then plugging it back in. Sometimes a simple reboot clears things up.
- Make sure your remote is in range. Enhanced remotes don’t need line-of-sight, but they can get a little grumpy if you’re too far away, or if there’s a Wi-Fi signal issue.
- If you’re still stuck, reset your Roku remote by holding the pairing button for 20 seconds, then releasing. Wait for the light to flash quickly, indicating a full reset.
If you’ve tried all of the above and still nothing, it’s possible your remote or device has a hardware problem. At that point, you might need to try a different remote or contact Roku support. I know—nobody wants to call support, but sometimes it’s the only way.
Resetting Your Roku Remote: What to Expect
So, you’re thinking about a full reset? Good call, especially if your remote is totally unresponsive or acting weird. Resetting basically wipes the slate clean, erasing any previous pairings or codes. It’s like hitting “refresh” on all the tech’s little arguments.
To reset, just hold the pairing button for 20 seconds. When you release, the remote’s light should start blinking faster—that’s its way of saying “Okay, I’m ready to start fresh!” After the reset, follow the usual steps to enter setup mode again and pair the remote with your device. Honestly, it’s much less dramatic than it sounds, but don’t be alarmed if it takes a minute for everything to reconnect.
Sometimes, starting from scratch is the fastest way to fix mysterious tech problems. I’ve saved hours just by doing a full reset, even when I thought nothing would work.
Comparing Roku Setup Modes: Universal vs. Brand Remotes
You might be wondering if you can use a universal remote to control your Roku streaming stick or box. Here’s the scoop: universal remotes *can* work for some Roku models, usually the ones with IR receivers, but you’ll miss out on cool features like voice search, app shortcuts, and private listening.
Universal remotes typically require entering a code to sync with your device. With genuine Roku remotes, entering setup mode is much simpler—just hit the pairing button! Universal remotes are great in a pinch (or if you’re always losing remotes), but if you want full access to setup, sync, reset, and troubleshooting features, the official remote is your best bet.
When To Replace or Upgrade Your Roku Remote
Let me explain why sometimes, despite all attempts at setup or troubleshooting, your Roku remote might just be ready for retirement. Tech wears out—buttons get sticky, batteries start leaking (yikes), or maybe you just want the latest features like voice control. If your remote refuses to enter setup mode, won’t sync even after a reset, or drains batteries suspiciously fast, it’s probably time for an upgrade.
Roku sells replacement remotes, and you can even upgrade to the enhanced “Voice Remote Pro” if you want neat extras like lost remote finder and rechargeable batteries. Weigh your options, and if you find yourself fighting with your remote more than actually streaming, it’s time to treat yourself to a new one.
Wrapping It All Up: Happy Streaming Awaits
Getting your Roku remote into setup mode doesn’t have to feel like decoding an ancient language. Once you know whether you’ve got a simple IR or an enhanced remote, it’s just a matter of pressing the right button, being a little patient, and occasionally swapping out batteries. Lost connections, weird glitches, or forgotten codes? They’re all part of the modern streaming adventure—and now you’ve got the roadmap to handle whatever pops up.
So grab that remote, take a breath, and remember: streaming joy is only a few clicks away. And if your remote ever acts up again, you’ll know exactly how to nudge it back into line. Happy streaming, and may your binge-watching never be interrupted by stubborn tech!
