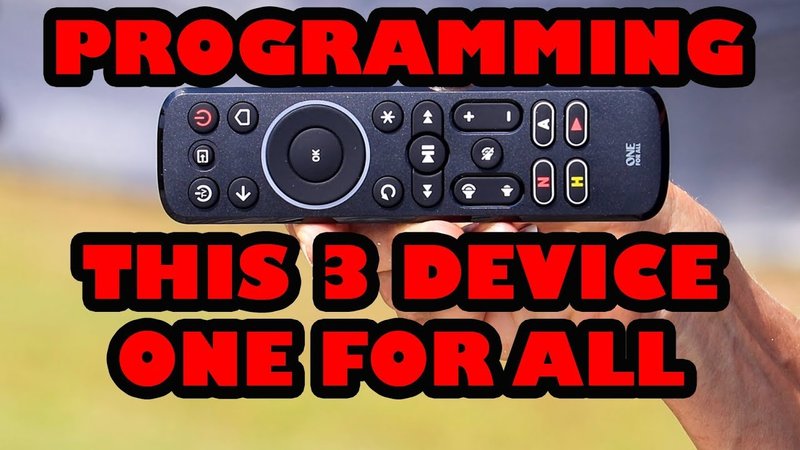
Picture it like this: setup mode is kind of like the orientation day for your remote. This is where it learns who it’ll be working with (your devices), what language to speak (the right codes), and how to follow orders (those handy buttons). A lot of people find the idea a little intimidating — maybe you’re worried about pressing the wrong thing or accidentally “breaking” your remote. Honestly, I’ve been there. But trust me, once you know what each button does and why, setup mode starts to feel a lot less mysterious and a whole lot more powerful.
What Exactly Is Setup Mode?
So, what *is* setup mode, anyway? In plain English, it’s a special state your One For All remote goes into when it’s ready to learn new tricks — like pairing with your TV or syncing with your streaming box. When you enter setup mode, the remote kind of takes off its “normal use” hat and puts on its “programming” hat. Imagine you’re making a new playlist on Spotify — you need to enter a special editor window, right? This is similar: setup mode is the editor window for your remote’s memory.
During setup mode, you’ll often enter codes or follow prompts. These codes tell the remote exactly what brand or type of device it should control. The cool part is, if you mess up, there’s usually a way to reset or try again. So, the stakes are low, and experimenting is totally allowed. I know plenty of people who get nervous about pressing the “magic” or “setup” button for fear of erasing something important, but honestly, you’re mostly just making your remote smarter — not breaking it.
With One For All Universal Remotes, setup mode is your golden key. It’s the gateway to unlocking all the cool features — from programming favorite buttons to pairing with new devices after an upgrade or battery swap. That’s why knowing exactly *how* to enter setup mode (and a few basic troubleshooting tips if things don’t go as planned) is pure gold for anyone with a cabinet full of remotes.
Types Of One For All Universal Remotes
Here’s where things get a little tricky: not all **One For All Universal Remotes** look or behave exactly the same. There are basic models with just the essentials, mid-range ones with a few more bells and whistles, and even high-end versions loaded with touchscreen displays and smart features. What they all have in common is that little “setup” or “magic” button — it’s your main tool for entering setup mode.
Let me break it down. On some remotes, you’ll find a button literally labeled “Setup.” Others might use a “Magic” button (I know, it sounds like something from Harry Potter, but go with it). There are even some models where you hold down a specific number key or a combo like “TV + Power” to kick things off. Knowing your exact remote model makes a huge difference here, because the steps can be slightly different even within the same brand.
Here’s a little cheat sheet:
- If your remote has a “Setup” button, that’s usually your starting point.
- If you see a “Magic” button (sometimes it’s shaped like a star), that’s your cue.
- Some older remotes use a hidden combo, like holding “TV” and “Power” together. Check the battery compartment or printed instructions for clues.
If you’ve misplaced the manual (come on, who hasn’t?), you can often find the exact setup method by searching for your model number online. That’s the number usually found inside the battery compartment. Knowing whether you’ve got an Essence, Smart Control, or Simple Series remote saves you a ton of guesswork.
Step-by-Step: How To Enter Setup Mode On One For All Universal Remotes
Let’s roll up our sleeves. Here’s a step-by-step walkthrough for the most common One For All Universal Remote setup methods. Put the TV remote down for a sec — we’re focusing on the universal remote now.
- Pop in the batteries. Seriously, this is the one step that gets skipped the most. If your remote isn’t lighting up or responding, nine times out of ten, it’s just dead batteries.
- Locate the “Setup” or “Magic” button. This is the button that starts the process. If it’s labeled “Magic,” it might have a little star, circle, or be a different color. If it says “Setup,” even better.
- Press and hold the button until the LED blinks. Usually, you’ll need to hold the button for around 3 seconds. Most remotes will flash a red or green light to say, “Okay, I’m listening.”
- Enter your device code. This is where you’ll need the right code for your TV, streamer, or whatever device you’re syncing. You can find these in the manual or look them up online.
If you’ve done it right, the remote usually flashes the LED twice or stays lit for a second. If it blinks quickly or nothing happens, check your code or start over. Don’t forget: if you make a mistake, you can reset and try again — no harm done.
Entering setup mode is like unlocking the remote’s “learning brain.” It’s not dangerous, and there’s no way to permanently break things by experimenting a little.
Troubleshooting Common Setup Problems
Let’s say something doesn’t go as planned (because, you know, real life). Sometimes the remote just sits there, blinking at you like it’s judging your every move. Other times, you tap in the code, and… nothing. This usually comes down to one of three things: wrong code, old batteries, or not holding the button long enough.
Honestly, the number one issue I see is using an outdated or incorrect code. Even if you’re sure it’s for your device, double-check — TV brands especially like to recycle names but change their internals. If your TV’s brand is off-the-wall or brand new, try a few similar codes or use the code search function (yes, some remotes have this built in). If the batteries are super old, swap ’em out even if the light *does* come on. Low battery can lead to weird glitches.
There’s also the “oops, I pressed the wrong thing” problem. If you ever get lost or the lights start flashing like a disco, just take the batteries out for a few seconds; most One For All remotes will reset themselves like nothing happened. If none of that works — and this is a real pro tip — check for a reset button, sometimes hidden in the battery compartment.
Why Entering Setup Mode Matters
You might be wondering: why care about setup mode? Well, think of it as the difference between having a remote that just *sort of* works and having one that works perfectly for your life. Entering setup mode is how you pair your remote with new devices, swap codes if you get a new TV, and customize features like volume control or input switching.
Without setup mode, your universal remote is basically a fancy paperweight. Also, it’s the only way to troubleshoot if, say, your streaming box suddenly stops responding after a battery change (yep, it happens). If you love the idea of a remote that just *works* — no more juggling or searching behind cushions — then mastering setup mode is the first step.
And if you ever upgrade your gear or move to a new place? Entering setup mode lets you wipe the slate clean and re-sync everything from scratch. That’s a superpower, honestly.
Comparing Universal Remotes To Brand Remotes
Here’s where things get a bit spicy: some folks swear by using only the remote that came with their device. But honestly, **universal remotes** like One For All can do almost everything a brand remote can — and often more. With a brand remote, you’re locked into one device and limited by that brand’s quirks. Lose it, and you’re ordering a replacement for (let’s be real) way too much money.
A universal remote, on the other hand, is all about flexibility. It can handle your TV, soundbar, DVD player, and streamer, often all at once. If you’re switching brands or adding a new gadget, entering setup mode is all it takes to update your remote’s “contacts list.” The only downside? You sometimes need to enter codes or troubleshoot, but as we’ve seen, that’s honestly pretty simple once you get the hang of it.
In my own house, we ditched the tangle of remotes a while ago. Now, when visitors come over, they’re always surprised how easy it is — no complicated button combos, just one remote that *knows* what to do thanks to setup mode.
Best Practices For Hassle-Free Remote Setup
If you want your **One For All Universal Remote** to work smoothly, here’s some friendly advice from someone who’s been through the pairing rodeo a few times:
- Write down your codes. After syncing, jot down the device codes and stick them somewhere safe (inside the battery compartment is genius).
- Keep batteries fresh. Weak batteries cause all kinds of random setup issues — better to swap them before a big “movie night” rather than during.
- Test after each step. Don’t just fly through the process; check each device to make sure the remote is actually working before moving on.
- Bookmark the manual online. Manuals get lost but online PDFs are forever. Save your model’s instructions in your phone or cloud drive.
These little habits save you loads of frustration and mean you’ll rarely need to reset or sync from scratch. They’re also super handy if you help friends or family with their remotes (prepare for “tech support” status at every holiday gathering).
Wrapping Up: Enjoy The Power Of Setup Mode
Setting up a universal remote might sound a bit geeky, but it’s really just about making your life easier. Once you know how to enter setup mode on your One For All Universal Remote — whether you’ve got a Magic button, a Setup button, or something else — you’ve got control at your fingertips. No more hunting for lost remotes, no more arguing over which one works for the soundbar, and way less clutter on the coffee table.
I honestly think learning this one little process saves you hundreds of tiny annoyances over the years. So grab your remote, pop in some fresh batteries, and give setup mode a go. Your future self (and your living room) will thank you.
