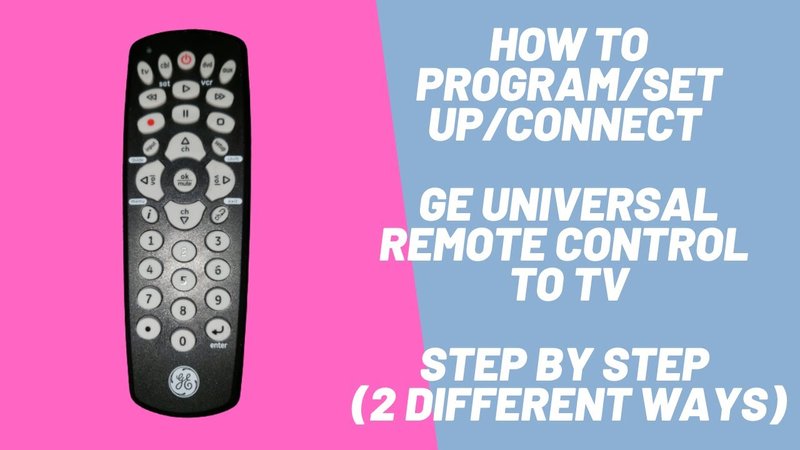
Here’s the thing: entering setup mode is the first big step. It’s not *hard*, but it’s easy to feel lost if you’ve never done it. Think of setup mode as unlocking the “programming door” for your remote. Kind of like switching a phone to airplane mode before a flight—nothing dramatic happens on the outside, but it changes how the device works on the inside. With a GE universal remote, setup mode is what lets you teach it who’s boss (spoiler: it’s you!).
I’ll walk you through how to enter setup mode on GE universal remotes, step by step, with zero tech jargon and plenty of real-life tips. We’ll talk code entry, syncing, troubleshooting, and why universal remotes are honestly more useful than most people realize.
What Is a GE Universal Remote, Really?
Let me explain: a GE universal remote is like a Swiss Army knife for all your other remotes. Instead of juggling three or four different controllers—one for your TV, another for your soundbar, maybe even one for an old DVD player—you just have one. Seriously, it’s a game-changer if your coffee table is drowning in remotes.
*Universal* means it’s designed to work with pretty much any brand, not just GE products. It does this through special codes you enter, so it can ‘speak the language’ of your TV, sound system, or streaming box. No more scouring the couch cushions for the “right” remote. GE’s universal remotes are some of the most common ones out there, probably because they’re affordable, reliable, and surprisingly easy once you get the hang of them.
But here’s the catch: before any magic happens, you’ve got to enter setup mode. This is where you “tell” the remote which device you want it to talk to and how.
Why Setup Mode Matters (And When You Need It)
You might be wondering, “Do I need setup mode every time I use the remote?” Thankfully, no. Setup mode is just for those moments when you want to pair (or re-pair) the remote to a new device or fix something that stopped working.
Here’s when setup mode swoops in to save the day:
- New device: Maybe you got a shiny new TV and want the GE remote to control it.
- Reset or re-sync: If your remote stops working out of nowhere, setup mode is often the fix.
- Switching brands: Upgraded your audio system? Time to teach the remote some new tricks.
Setup mode matters because it’s the “listening mode” for your remote. Until you put it there, it’s just a regular remote doing its old job. Once you flip it into setup, it’s ready to learn new codes and control new devices. That’s why learning to enter setup mode is the most important first step.
How To Enter Setup Mode On GE Universal Remotes
Honestly, GE kept it pretty simple, but there are a couple things to keep in mind depending on the model. Most GE universal remotes work the same way, though designs and button labels can differ (the process is usually printed tiny, somewhere on the back).
Here’s a slow, thorough breakdown:
- Find the “Setup” button: Look for a button labeled “Setup.” Sometimes it’s in the upper left, sometimes it’s its own color (red or black). On older models, it might just be a tiny button you press with a pen.
- Press and hold: Hold down the “Setup” button until an LED indicator (usually a tiny light above the power button) turns on and stays solid. Don’t let go until you see the light! This is the “I’m listening” sign.
- Select device type: Next, press the button for the device you want to program (like “TV,” “DVD,” or “AUX”). The light should blink once and then stay lit.
That’s it! Your remote is now in setup mode and ready for a code or auto-search. It seems almost too easy, but when you’re doing it for the first time, every button press feels like a leap of faith. If you mess up, just release the buttons and start again.
What To Do Once You’re In Setup Mode
Entering setup mode is just part one. Now, you need to actually program or pair the remote to your device. You do this by entering a specific code for the brand/model you want to control, or by using an automatic search if you don’t know the code.
Here’s how it usually goes:
- Code entry: Grab the code list that came with your remote, or look it up online (GE has PDFs for every model). Enter the first code using the number pad. If the code works, the indicator light should turn off. That means you’re golden.
- Code search: If none of the codes work, most remotes let you search automatically. Press a certain combination of buttons (it’s in the manual), and the remote will cycle through codes until your device responds.
- Test each button: Try turning the device on/off, changing volume, or switching inputs. If things are wonky, repeat the process with another code until it all works perfectly.
This part can take a little patience, especially if your device is a weird brand or old. But once it’s done, you rarely have to redo it.
Troubleshooting Setup Mode Problems
So what if you follow the steps and the remote just stares back at you blankly? Don’t panic—happens to the best of us. Here are some common problems and what you can do:
- Batteries: Old or weak batteries are the
- Stuck in regular mode: If the setup button doesn’t make the light come on, check if you’re really holding it long enough (some models take a solid five seconds).
- Wrong device button: If you skip selecting TV/DVD/AUX, the remote won’t know what you’re trying to program. Double-check that part of the process.
- LED doesn’t light up: Sometimes, the indicator bulb can burn out (rare, but it happens). If you’re following every step and nothing flashes, it might be a hardware problem.
If nothing’s working, unplug your devices for a minute, remove the remote batteries for a sec, and start from scratch. Nine times out of ten, that little “hard reset” does the trick.
Comparing GE Universal Remotes to Brand-Specific Remotes
Let’s say you’re wondering if it’s even worth going through all this. Can’t you just use the remote that came with your TV or soundbar? Sure, but there are tradeoffs.
- Universal remotes: One remote runs the whole show. No hunting, fewer batteries, and it’s perfect for guests or family members who don’t want to learn three different remotes.
- Brand remotes: Usually, each only works with one device. Sometimes the features are more specialized, but switching between them can be a pain (and they’re expensive to replace).
- Learning curve: Universal remotes have a slight learning curve (like entering setup mode!), but once you’ve done it, it’s massively convenient.
For most people, a GE universal remote is the best balance between price, simplicity, and control—especially if your household has multiple devices from different brands.
Resetting Your GE Universal Remote
Say you’ve entered setup mode a hundred times and nothing’s working, or you just want to start over from scratch. Good news: you can reset your remote to factory defaults. I’ve had to do this after a “helpful” toddler mashed every button at once.
Here’s how:
- Remove the batteries and press every button on the remote, one at a time, to discharge any lingering power (an old-school tip, but it *does* help reset the circuit).
- Pop the batteries back in while holding the “Setup” button for about 10–15 seconds.
- The LED should flash or turn solid, which means the remote has reset.
- Start the setup process from the top, using the steps above.
Resetting wipes all stored codes and programming, so only do it if you’re really stuck or ready to re-pair everything.
Tips For Keeping Your Remote Synced & Working Smoothly
Once you’ve conquered setup mode, you want everything to *stay* synced. Here are some real-world habits that make life easier:
- Fresh batteries = fewer headaches. Don’t wait for the death rattle—replace them every few months.
- Keep your code list somewhere safe. Tape it inside a drawer or snap a pic on your phone. You’ll thank yourself next time you switch out devices.
- Dust matters! Remotes get gross fast. A little rubbing alcohol on a Q-tip keeps the buttons from sticking (and personally, I just feel less icky handing it to guests).
- Don’t throw out your old remotes yet. Sometimes, a device won’t play nice with a universal code. Good to have the original as backup.
Honestly, once you get the hang of setup mode, you’ll wonder why you ever lived without a universal remote. It’s a tiny bit of effort up front for a whole lot of ease later on.
Wrapping It Up: Mastering Setup Mode On Your GE Universal Remote
Learning how to enter setup mode on GE universal remotes remote isn’t some advanced, hush-hush tech trick—it’s just a tiny, important ritual that gives you full control over your home entertainment. With the steps above, even if technology isn’t your best friend, you’ll be able to sync, pair, and reset your remote like a pro.
It might feel a little slow or awkward the first time, but honestly, that’s how most good habits start. Once you see your TV, soundbar, and maybe even that ancient DVD player all responding to one click, it’s like magic (or at least, like an organized adult for once). If you run into trouble, remember: fresh batteries, patience, and a quick reset will solve 90% of your issues.
Here’s hoping your couch stays clutter-free and your movie nights are 100% remote-hunt free from now on!
