
Let me explain it straight: the setup mode on a BenQ projector remote is where you unlock all the cool features. This is the gateway for syncing your remote, adjusting the code, resetting annoying glitches, pairing with new devices, switching sources, and a bunch of other hidden gems. If you’re new to this or just never had to tinker with “setup” before, don’t stress. We’ll walk through it together, one button press at a time, and by the end you’ll be the person everyone asks for help at the next office presentation—or movie night.
Getting Familiar With Your BenQ Projector Remote
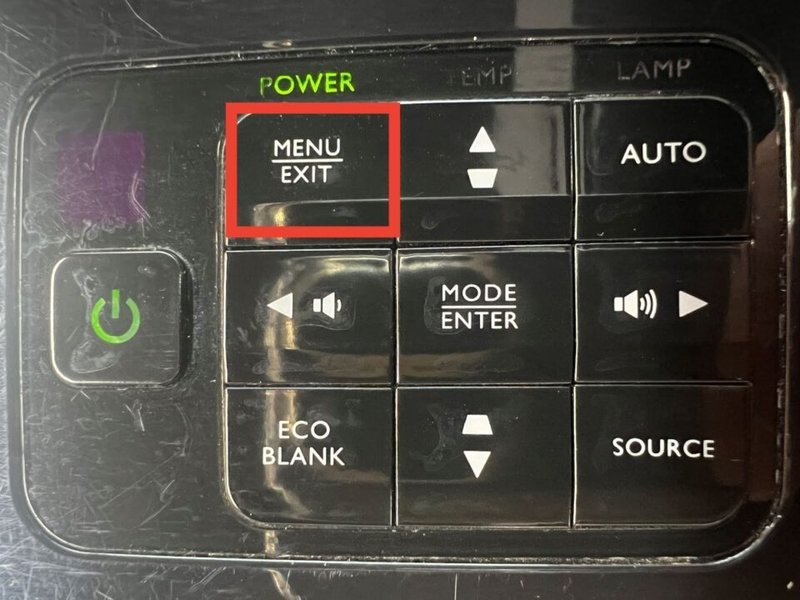
Before getting into setup mode, it’s worth spending a moment on the remote itself. BenQ gives their projector remotes a classic, no-nonsense design. You’ve got buttons labeled for source, menu, navigation (up, down, left, right), and of course, the all-important “setup” or “menu” button. Now, every model can look a bit different, but the core layout is usually similar.
It’s kind of like how every TV remote feels familiar, but the order of buttons might trip you up if you’re used to a different brand. If your BenQ remote is cluttered or intimidating, don’t worry—most functions are mapped logically. Grab the remote, check for clear battery placement (dead batteries are the
Familiarizing yourself with your specific remote’s layout, button symbols, and even the feel of the buttons means you’ll move faster and avoid mistakes once you’re inside setup mode. If you don’t have a manual handy, BenQ’s website usually has diagrams for each remote model. Worth a glance, trust me.
The First Step: Powering On and Getting Connected
Alright, so imagine you’re in a classroom or your living room—the projector’s on, the remote is in hand, but nothing’s happening. Here’s the thing: projectors can sometimes feel like a grumpy cat. If the remote’s not paired or the batteries are weak, setup mode remains locked away.
First, double check the projector is powered on. Most BenQ projectors have a small light or display that tells you they’re awake. Next, check your remote’s batteries. If pressing any button gives you nothing—no blinking LED, no response on screen—swap the batteries out for a new set. You’d be shocked how often this fixes everything.
Aiming directly at the projector, try pressing the “Menu” or “Setup” button (depending on your model). If you see an on-screen menu pop up, you’re already halfway there! If not, there might be a sync issue, or the remote may need to be paired again—a common hiccup after changing batteries or moving equipment around.
How To Actually Enter Setup Mode
You might be wondering, “Is there some secret button combo?” The truth is, for most BenQ projector remotes, entering setup mode is as simple as pressing the “Menu” or “Setup” button. But, of course, life isn’t always that easy. Some remotes require you to hold the button for a second or two. Others want the projector to be on a blank source (like HDMI with nothing plugged in) before allowing you in.
Here’s a general step-by-step flow that covers most scenarios:
- Turn on your BenQ projector. Wait until the splash screen or whatever you were last projecting appears.
- Point your remote directly at the IR sensor. (Look for a tiny glassy spot on the projector’s front.)
- Press and hold the “Menu” or “Setup” button for 2–3 seconds. If the menu doesn’t appear instantly, try releasing and pressing again.
- Navigate using the arrow keys. Once you’re in the on-screen menu, look for options labeled “Setup,” “Settings,” or sometimes a “Tool” icon. It depends on the model, and yes, it can be confusing.
If the menu still doesn’t come up, double-check your remote’s batteries or try moving closer to the projector. Interference from strong lights (especially fluorescent) can sometimes mess with the signal, so a quick lighting adjustment could help.
“Honestly, the first time I tried this, I pressed the button so hard I thought I’d break the remote—turns out, I just needed fresh batteries and a little patience.”
What You’ll Find Inside Setup Mode
Once you’re inside setup mode, it’s like entering a hidden control center. This is where you can tweak the picture, sync settings, manage remote codes, pair with new devices, or reset to factory defaults if things have gone totally sideways.
Most BenQ projectors present a simple, menu-driven interface. You’ll notice categories like:
- Picture: Adjust brightness, contrast, and aspect ratio.
- Audio: Tweak sound settings (if your projector has speakers).
- System/Setup: Change language, auto shutdown, or firmware updates.
- Information: Check your projector’s health, hours used, or firmware version.
Occasionally, you’ll see an advanced submenu where you can reset the remote, change the pairing code (useful if you have multiple BenQ projectors in one building), or even perform a full sync if you’ve replaced the remote or its batteries. Don’t be afraid to explore, but *maybe* write down any default values before changing things in case you need to go back.
Troubleshooting Common Remote and Setup Problems
If you’re banging your head trying to enter setup mode and nothing’s working, you are definitely not alone. Let’s walk through the most common trip-ups:
- Batteries are dead or inserted wrong. I know, it sounds obvious, but 50% of my remote problems have been battery-related. Double-check the + and – symbols in the compartment.
- The remote and projector aren’t paired. Some BenQ models need you to pair the remote. There’s usually a tiny “sync” button on the remote or projector (sometimes hidden in a pinhole!). Press and hold both until you see a confirmation on screen.
- Signal interference. Projector IR sensors can be blocked by dust or direct sunlight. Try moving the projector or cleaning the sensor gently with a dry cloth.
- Menu lock or password protection. Some setups are “locked” by IT for conference rooms or schools. If the menu just won’t open, check if you need a password or permission first.
“Once, I spent twenty minutes cursing at my remote—only to realize the projector had a plastic lens cap still on the IR sensor. Facepalm.”
For wild glitches, a hard reset (turning the projector off and back on, or using the reset option in the setup menu) usually sets things right. If your remote just isn’t responding at all, try a universal remote as a backup—just make sure it supports projector codes.
Syncing, Pairing, and Resetting Your BenQ Remote
Syncing and pairing sound like fancy tech jargon, but they’re just about making sure your remote and projector are speaking the same language. Imagine they’re old friends who occasionally need to check in with a secret handshake.
If your BenQ projector comes with a pairing (sync) button, the process usually goes like this:
- Press and hold the sync/pair button on both the remote and the projector. Sometimes the button is recessed—use a paperclip to press it if needed.
- Wait for the projector to display a pairing confirmation or a blinking light. This means the devices are communicating. Still nothing? Try rebooting both (yes, just like computers, this often helps!).
- Test the connection. Press “Menu” or another button to make sure everything works.
For resets, there’s often an option inside the setup mode labeled “Reset” or “Factory Default.” This will restore your projector’s settings and remote connections to what they were out-of-the-box. Handy if you’ve inherited a projector from someone else or if settings got scrambled by mistake.
Comparing BenQ Remotes With Universal Remotes
Here’s where things get interesting. Maybe you’re thinking of replacing your BenQ remote, or your original one’s gone missing (kids, pets, or the classic “lost in couch cushions” scenario). Universal remotes can be a lifesaver.
Most universal remotes support BenQ projectors—just look for the right code in the manual or online. If you go this route:
- Program the universal remote by entering the correct BenQ code (sometimes it takes a few tries to find the one that works for all features).
- Test the “setup” access. Not all universals map every BenQ button perfectly, so check you can still enter setup mode.
- Don’t expect every advanced feature—sometimes custom keys like “Eco Mode” or quick input selection aren’t easily available on universals.
Still, for basic tasks like entering setup, changing sources, and adjusting volume, a well-programmed universal remote gets the job done. It’s worth keeping the original BenQ remote safe if you want every feature, though—especially for firmware updates or deep settings that require special button combos.
Things To Remember For Next Time
Stepping into setup mode on your BenQ projector remote really isn’t rocket science, but it does require attention to small details. Next time you’re getting ready for a big presentation or some Netflix binging, do a quick check: batteries good, remote paired, and you know exactly which button to hold down.
If something feels stuck or unresponsive, remember, even tech pros sometimes have to pause and start from scratch—reset, re-pair, or just swap in new batteries. And if you’re ever in doubt, BenQ’s website and user forums are filled with people who’ve probably had the exact same problem before.
So there you have it—no more mysterious menu lockouts or panic when you can’t find the “setup” option. With a little patience and these steps, you’ll unlock every feature your BenQ projector (and its remote) has to offer. Happy projecting!