Overhead Door makes some solid, reliable garage door openers, but their remotes—like the popular CodeDodger models—can hang onto codes from old devices like a stubborn fridge magnet. Maybe you’re upgrading, maybe someone lost a remote, or maybe you just want to start fresh after moving to a new home. Either way, clearing all settings ensures that only authorized remotes get access. Let’s untangle the process, step by step, so you can reset your Overhead Door garage remote without breaking a sweat.
Understanding Garage Remote Memory and Codes
Before you start pressing buttons, it helps to know what’s actually happening inside your Overhead Door garage remote. These remotes aren’t just “on/off” switches—they store *codes* that sync with the opener’s receiver. Think of it like a handshake: your remote says, “Hey, it’s me,” and the garage agrees if the code matches. When you clear all settings, you’re telling the opener to forget those handshakes and require new introductions.
Older remotes used fixed codes, while modern Overhead Door models (like CodeDodger) use rolling codes for extra security. With rolling code, each time you press the button, both the remote and opener change their codes in sync. This helps prevent code theft, but it also means a reset wipes out all remote pairings at once. If you want to remove just one remote, you’re usually out of luck—clearing settings will affect them all.
Insight: Clearing your garage opener resets every paired remote. Be ready to re-sync any remotes you want to keep using!
The memory that holds these codes lives in the opener’s logic board—not the remote itself. That’s why the “reset” button is on the opener, not on the tiny remote. If you’re hoping to erase just one remote by flipping a switch on its back, you’ll be disappointed. So, let’s focus on how to clear the receiver and what that means for your household.
When Should You Clear All Remote Settings?
You might be wondering, “Why mess with this at all?” Here’s the thing—resetting your Overhead Door garage remote isn’t just for the tech-curious. There are solid, practical reasons to clear all stored remotes and start fresh.
- Lost or Stolen Remotes: If a remote is missing, it’s better to be safe than sorry. Anyone who finds it could open your garage.
- Moving into a New Home: Previous owners may have kept remotes or shared codes with others. Wipe the slate clean so only your family controls access.
- Upgrading or Replacing Remotes: Clearing old codes avoids confusion and keeps only your new remotes active.
- Troubleshooting Sync Issues: If your remotes stop working, sometimes a memory reset resolves odd pairing glitches.
Honestly, it comes down to security and control. You’d change your house locks after moving in, right? Clearing your garage opener’s memory is the digital equivalent. And if you’re fussy about keeping things tidy (no ghost remotes lurking in the system), a reset is the way to go.
How To Clear All Settings On Overhead Door Garage Remote: Step-by-Step Guide
Let me walk you through the exact process. You don’t need fancy tools—just the ability to reach your garage door opener (the main unit, not the remote in your hand). Most Overhead Door openers, including Odyssey, Legacy, and Destiny series, follow a similar process.
Step 1: Locate the “Learn” or “Smart” Button
This button is usually on the back or side of the opener’s main unit, rarely on the wall control or the handheld remote itself. Sometimes the button is labeled “Learn,” sometimes it says “Program,” and it’s often colored red, orange, or purple. You might have to remove a light cover to spot it. Don’t worry—it’s meant for users to access.
Step 2: Prepare for Reset
Once you find the button, make sure all remotes you want to keep will be available. You’ll need to re-pair them after this process. If you’re standing on a ladder, be careful—the button might be small and recessed.
Step 3: Hold Down the “Learn” Button
Press and hold the “Learn” (or “Smart”) button for about 6-10 seconds. You’ll usually see a small LED light next to the button. Keep holding until the LED turns off or blinks rapidly—this signals that the memory has been cleared. If you release too early, you might only erase the most recent code, not all codes.
Step 4: Test the Reset
Try using your old remotes. If everything went according to plan, none should work until you reprogram them. Success means your garage won’t open for any remotes until you authorize them again.
Bonus Tip: If your wall-mounted control is hardwired, it may not require reprogramming—but all wireless remotes will need to be re-synced.
Pairing Your Overhead Door Remote After Reset
Now that you’ve cleared the codes, the opener is lonely—it doesn’t recognize any remote. Re-pairing is just as simple as clearing, but it does require you to do it for each remote, one at a time.
- Tap the “Learn” Button Once: Press and release (don’t hold this time) the “Learn” button. The LED should light up.
- Press Remote Button: Within 30 seconds, press the button on your remote you want to pair. Hold it for a second or two.
- Confirmation: The opener’s light may blink, or the LED will turn off—this means pairing is complete. Try your remote to confirm.
Repeat these steps for every remote you want to add back to your system. Don’t rush—give each remote its own moment with the opener. I once tried to pair two at once, and the system got confused. Lesson learned!
You might also be wondering about keypad entry. After a full reset, you’ll need to reprogram your wireless keypad as well. The steps are usually similar: enter the PIN, press “Learn,” and sync. Check your specific model’s manual if you get stuck—each keypad has its quirks.
Troubleshooting Common Reset Issues
Things don’t always go perfectly, right? Here’s what you might run into when trying to clear or re-sync your Overhead Door garage remote.
- The “Learn” Button Won’t Respond: If pressing and holding the button does nothing, check if the opener has power. Sometimes a tripped breaker, dead battery backup, or loose wire is the real culprit.
- LED Never Turns Off: On some models, the LED light might not go out—it just blinks. Always double-check your opener’s manual if it behaves differently than expected.
- Remotes Still Work After Reset: You might’ve let go of the button too soon, or your model needs a special reset code sequence. Try again, and make sure you’re holding the button long enough (at least 6-10 seconds).
- Remote Won’t Pair After Reset: Double-check the remote’s battery—a weak battery can cause pairing to fail. Also check distance; remotes need to be close to the opener during sync.
Pro Tip: If you’re completely stuck, unplug the garage opener for 30 seconds and then plug it back in. It’s the classic “turn it off and on again” trick, and sometimes it helps a stuck logic board.
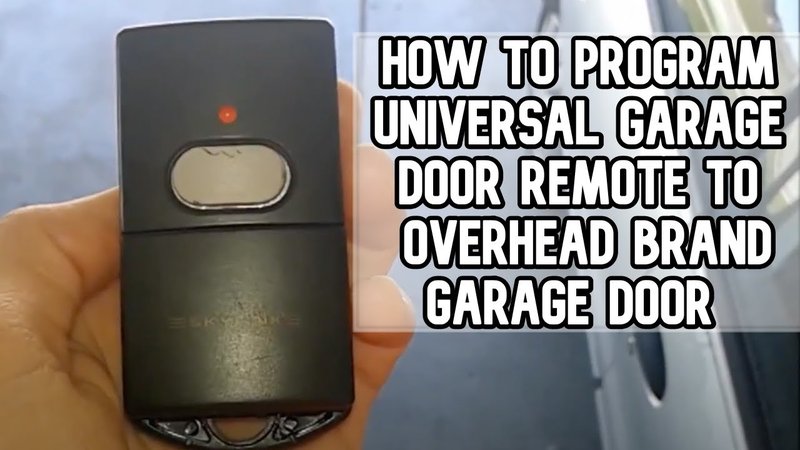
Comparing Overhead Door Remotes to Universal Remotes
You might be wondering if it’s worth sticking with your Overhead Door brand remote, or if you can switch to a universal remote. Here’s the thing: each has its perks (and pitfalls).
Overhead Door Remotes:
- Designed to work seamlessly with your opener—no guessing on compatibility.
- Secured with rolling code tech, especially in newer models.
- Instructions and support tailored to your exact opener.
Universal Remotes:
- Can control multiple brands and doors—a win if you’ve got different openers at home.
- Setup can be more complicated, with code searches or dip switches.
- Sometimes they lack advanced security features like rolling code.
If security and simplicity matter most, the Overhead Door remote is your friend. But if you want one remote for everything (and don’t mind a little setup headache), universal remotes are worth a look. Just remember, after clearing your opener’s memory, any remote you want to use—brand or universal—needs to be paired again.
Reset vs. Battery Replacement: What’s the Difference?
It’s easy to confuse clearing all settings with just replacing the battery in your garage remote, but they aren’t the same thing at all. Swapping out the battery only affects the handheld remote’s power—a dead battery means the remote won’t send its signal, but it doesn’t erase the code stored in the opener’s memory.
Sometimes, people think a remote needs to be reprogrammed after a battery change. Usually, you don’t—unless you’ve cleared the opener’s memory or the remote lost its internal data. If, after changing the battery, your remote won’t work, try re-pairing it to the opener before assuming something’s broken. And if you’ve just done a full reset, you’ll need to sync newly-batteried remotes as if they’re brand new.
Here’s a quick comparison:
| Battery Replacement | Clearing All Settings |
| Powers up the remote so it can send its code | Erases all stored codes from the opener’s memory |
| Does not affect which remotes are linked | Requires all remotes to be re-paired |
| Quick and simple | Takes a few minutes but vastly improves security |
Security and Peace of Mind After Clearing All Settings
Let’s be honest, most of us use our garage doors every single day, but rarely think about who might have access. Clearing all settings on your Overhead Door garage remote isn’t just a technical chore—it’s a smart move for your home’s safety. Once you’ve reset and re-paired only the remotes you want, there’s real peace of mind knowing that no one else has a secret key to your garage.
Also, if you’ve shared your remote code with guests, roommates, or service people in the past, a reset ensures access is limited to your trusted circle. That’s worth the hassle of holding down a button and re-pairing a remote or two, at least in my book.
Plus, you’ll be up-to-date with the latest security features your Overhead Door system offers. Rolling codes, limited pairing slots, and optional PIN keypads all add extra layers of protection.
Final Thoughts: Clearing All Settings On Overhead Door Garage Remote
Starting with a clean slate isn’t just for spring cleaning—it makes practical sense when it comes to garage security. Clearing all settings on your Overhead Door garage remote is straightforward once you know where to look and what steps to follow. You’ll be back in control, with no old codes or stray remotes hanging around.
If you’ve made it this far, you should feel confident handling a reset, pairing remotes, and troubleshooting any hiccups along the way. Remember: take your time, follow the steps, and check your model’s instructions if you hit a snag. After a reset, your garage is safer, your remotes are up to date, and you know exactly who can come and go. That’s a win for any homeowner—no attic cleaning required.