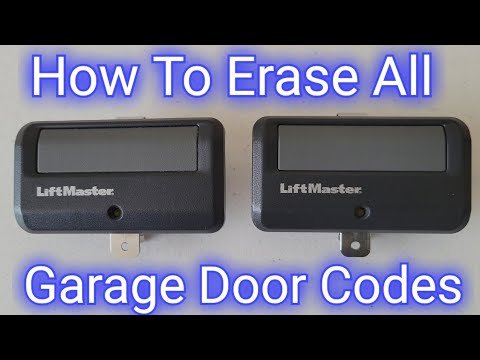
Here’s the thing: clearing all settings on a LiftMaster garage remote is a bit like wiping a messy chalkboard. It erases *everything*—every code or door that’s been synced before. This gives you a clean slate, making sure your remote only talks to the doors and openers you choose. If the idea of buttons, flashing lights, and “syncing” sounds intimidating, don’t worry. Honestly, I’ve been there, standing in the garage squinting at tiny buttons, hoping I don’t mess up the whole system. Let me walk you through this in plain English, like we’re troubleshooting over a cup of coffee.
Why You Might Need To Clear LiftMaster Remote Settings
The moment you notice your LiftMaster garage door remote behaving strangely—maybe it opens the wrong door, or doesn’t work after you try reprogramming—it’s tempting to just buy a new one. But often, it just needs a good reset. Clearing all settings is useful for a few situations:
- You moved into a new house. Who knows how many remotes are out there still connected to your garage?
- You bought a used remote. If it’s paired with another opener, it won’t work reliably for yours until you start over.
- Too many remotes are cluttered in the system. LiftMaster openers usually max out at 5–8 paired remotes. Clearing lets you remove old or lost remotes from memory.
- Remote troubleshooting. When the usual fixes—like changing the battery or re-syncing—don’t work, a full reset clears glitches out.
Think of it like tidying your contacts list: you only want people (or remotes) you trust to have access to the garage. Clearing the settings protects your home, keeps things organized, and lets you start fresh without lingering tech headaches.
Understanding LiftMaster Garage Remote Types And “Code” Memory
Not all LiftMaster remotes look the same. Some are chunky, classic gray clickers; others are slim, modern fobs with LEDs. But what matters is how they *store* codes and pair with the opener. Most use rolling code technology—a fancy way of changing the signal each time you press the button, making it tough for anyone to “sniff” and copy your code.
The remote itself doesn’t actually “remember” which door it opens; the opener holds a memory slot for each remote. Clearing the remote means clearing all codes and pairings from the opener—not just one specific remote. That’s why, if you want to wipe settings, you’ll do it at the wall-mounted opener unit in your garage, not just with the handheld remote.
Every time you clear the LiftMaster remote settings, you’re essentially telling the opener: “Forget everyone you know. Only new remotes I *pair* from now on are allowed.”
This step is universal across most modern LiftMaster models, whether you’re working with a universal remote or a classic brand remote. Still, double-check your opener’s model number—especially if it’s over 10 years old—because older units might have slightly different steps or reset buttons.
How To Clear All Settings On LiftMaster Garage Remote: Step-By-Step
Ready to wipe the slate clean? Here’s a step-by-step breakdown that should work for most LiftMaster openers (especially those made in the last 15 years):
- Locate the “Learn” button: This is usually found on the back or side of the garage opener motor (not on the remote!). Sometimes it’s behind a light cover. Common button colors: yellow, red-orange, purple, or green.
- Press and hold the “Learn” button: Hold it down for about 6 seconds. You’ll usually see an LED next to the button. Wait until that LED light turns off. This means the memory has been cleared.
- Release the button: Once the light goes out, let go. All remotes and keypads paired to this opener are now erased—totally reset.
- Test the remotes: None of your old remotes, keypads, or wireless controls should work right now. Don’t panic! That’s the goal.
Here’s a tiny story: Last week, my neighbor, Dave, accidentally erased all his settings trying to pair a new remote for his teenager. Oops. But after a quick sync, everyone’s remotes worked again—just with only the remotes *they* wanted.
Pairing Your LiftMaster Remotes After a Reset
Once you’ve cleared everything, it’s time to reconnect (or “pair”) only the remotes you actually use. This is the “add contacts” step after you’ve deleted all those unknown numbers from your phone.
- Press the “Learn” button again (just a quick press this time, not a long hold).
- Within 30 seconds, press the button on your remote that you want to pair. You should see the opener’s light blink or hear a click. That’s your sign the sync was successful.
- Repeat for every remote or keypad you want to add back.
If you have two or three different remotes for the same family, just repeat that process for each one. Honestly, it’s much simpler than it sounds. The trickiest part is usually balancing on a ladder to reach the opener, and keeping track of which remotes belong to who.
Troubleshooting LiftMaster Remote Problems After Reset
So what if something goes wrong? Here’s what usually trips people up after a factory reset:
- The remote won’t sync: Make sure the battery in your remote is fresh. Weak batteries can stop the code from transmitting.
- The opener light doesn’t blink when you try to pair: Double-check that you’re pressing the right button (sometimes remotes have more than one). Sometimes, you need to hold the button on the remote for a couple of seconds, not just tap it.
- Still not working? Check if you have a “lock” feature enabled on the wall-mounted opener panel. This can block remotes from syncing.
If you’re working with a universal remote instead of a branded one, be patient. Universal models sometimes need a few tries—or a particular button combo—to sync with the rolling code on LiftMaster openers.
Comparing Universal vs. LiftMaster Brand Remotes For Resetting Codes
You might be wondering, “Is it any different to reset a universal remote versus a regular LiftMaster one?” Good question. Here’s the simple answer:
- LiftMaster brand remotes use the standard “Learn” button process. They’re built to communicate perfectly with the opener’s rolling code tech.
- Universal remotes try to play nice with multiple brands—sometimes that means extra syncing or code-selection steps after a reset. The clearing process is the same from the *opener’s* side, but re-pairing might need a closer look at your universal remote instructions.
If you bought a universal remote from a hardware store or online, don’t be surprised if you have to try a couple of different code options or buttons. Still, the core idea is the same: clear the opener, then add only the remotes you trust.
Safety And Security: Why Clearing LiftMaster Remote Settings Matters
Here’s a bit of real talk. Leaving old remotes or codes programmed into your garage opener is a safety risk. Maybe the previous homeowner gave their neighbor a remote in the past. Maybe you lost a remote on vacation years ago. Clearing everything makes sure only *your* household can get in now.
Rolling code technology is great for preventing hackers, but if someone still has a synced remote, they can still get in—that’s just how the system works. Clearing all settings shuts the door (literally) on anyone you don’t want in your space.
Sometimes this step gets skipped in the chaos of moving or after you buy a used remote online. It shouldn’t. Clearing and re-syncing your remote is as important as changing the locks on your front door.
How Battery Replacement Affects Garage Remote Settings
You might think a dead battery would wipe out your programming, but actually, the codes are stored in the opener (not the remote). Replacing the battery in your LiftMaster remote won’t erase its pairing—unless you’ve cleared the opener on purpose.
Still, if your remote stops working after a new battery, double-check the sync. Once in a while, battery swaps can jostle the contacts inside and require a quick re-pair. The secret: Always use fresh, correct-size batteries, and be gentle when opening the remote. Those plastic tabs love to snap if you get too aggressive.
If your remote still isn’t working after you’ve changed the battery *and* re-paired it, the issue is probably with the remote itself (or, very rarely, with the opener’s memory chip).
Final Thoughts: Keeping Your LiftMaster Garage Remote Organized
Clearing all settings on your LiftMaster garage remote isn’t just some high-tech chore—it’s about making sure your home stays yours. Whether you’ve moved, upgraded, or just like the peace of mind that comes with starting fresh, knowing how to reset, pair, and troubleshoot your remotes is honestly worth a few minutes of your weekend.
Take it step by step, pay attention to which remotes you reconnect, and keep an eye on those batteries. With your LiftMaster garage remote reset and programmed exactly how you want, you can worry less about surprise visitors and more about what actually matters—like getting out the door on time. And if you ever forget the steps? Just remember: every “Learn” button and LED blink is your garage’s way of letting you call the shots.