
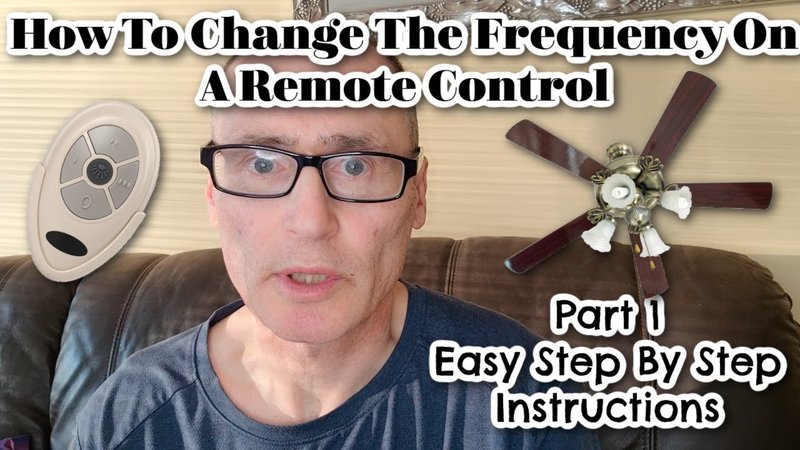
Lutron is one of those brands that’s both user-friendly and high-quality, but even the best remotes have their quirks. Maybe you’ve just installed a new fan, or you’re dealing with interference from another device across the house. Either way, figuring out how to change a remote frequency feels like solving a little mystery. The good news: once you understand how it works, it’s much less complicated than it looks.
Understanding Lutron Ceiling Fan Remote Frequencies
Here’s the thing about remote frequencies—they’re kind of like invisible walkie-talkie channels. Your Lutron ceiling fan remote sends a specific signal, and your fan listens for that signal alone. If two remotes are on the same frequency, you might get some cross-talk, like two people answering the same question at once. This is especially common in apartment buildings or houses with more than one ceiling fan.
Each Lutron ceiling fan and its remote are factory-set to a frequency. Usually, this works just fine. But if you move in, add a new fan, or your neighbor happens to have the same model, you might run into trouble. Suddenly, your remote changes the speed or turns on the lights in another room—or even the apartment next door. That’s a classic sign it’s time to change the remote frequency.
You might be wondering if there’s some sort of “reset” button for this. Not quite—changing the frequency means opening up both the remote and, sometimes, the fan canopy. Inside, you’ll find little switches or buttons. These are called “DIP switches,” and they control the code that syncs your devices. Don’t worry—they aren’t as scary as they sound.
When Should You Change the Remote Frequency?
So, how do you know it’s time to change your Lutron ceiling fan remote frequency? It usually comes down to interference or pairing issues. Maybe your remote isn’t responding, or you notice the fan seems to have a mind of its own. Sometimes, just replacing the battery or resetting the remote won’t cut it—especially if two remotes are fighting for control.
Here are some classic signs that changing the frequency is a good idea:
- Your remote controls multiple fans unintentionally.
- Your fan responds to the wrong remote (or vice versa).
- The remote stopped working after adding another fan to your home.
- You’ve tried battery changes and troubleshooting, but nothing helps.
Honestly, it’s amazing how often something so simple can fix a seriously annoying problem. Rather than tossing your remote or calling customer service, a quick frequency swap can restore sanity to your ceiling fan situation.
Let me explain—changing the frequency isn’t just about avoiding interference. It’s about making sure your devices talk to each other, and only each other. It prevents accidental syncing and gives you a sense of control over your gadgets, instead of feeling at their mercy.
What Tools and Safety Precautions Do You Need?
Before you dive into the process, take a second to gather the right tools. You won’t need much—no need for an electrician’s toolbox here—but it’s always better to be prepared. Most of what you need is probably already lying around your house.
You’ll want to have:
- A small Phillips-head screwdriver
- Your Lutron ceiling fan remote and new batteries (just in case)
- A step ladder, if your fan is mounted on a high ceiling
- Good lighting—trust me, those switches are tiny
Safety comes first, especially when you’re dealing with anything on the ceiling. Before touching the fan canopy, turn off the power at the breaker box. You don’t want any surprises, and you don’t want to risk a shock. If you’re unsure where your breaker is, ask for help or do a quick label check before starting.
Always double-check that the fan and light are off before opening the fan canopy. Even pros sometimes miss the obvious!
How To Locate the Frequency Switches on Lutron Fan Remotes
Finding the frequency switches is half the battle. On most Lutron ceiling fan remotes, the DIP switches hide behind the battery compartment cover. They look like tiny white levers or sliders, usually grouped in a neat row. Not all remotes are identical, but this is the most common setup.
On the fan itself, the receiver’s DIP switches are usually tucked inside the fan canopy—the part closest to the ceiling. This means you’ll need that step ladder, and a bit of patience to unscrew or slide off the canopy. Once inside, look for a small rectangular box, often with wires running in and out. That’s your receiver, and the DIP switches should be on one side.
Here’s a pro tip: Take a picture of the original switch settings before you change anything. It’s easy to forget the arrangement, and having a photo saves headaches if you need to revert. The switches are delicate—use your screwdriver or even a toothpick to nudge them into position.
Step-by-Step Instructions: Changing the Remote Frequency
Let’s break it down, slow and steady. Changing the remote frequency (the code) on a Lutron ceiling fan remote is less about tech wizardry and more about careful matching.
1. Turn off the power at the breaker.
Safety first. Make sure the fan won’t turn on while you’re working.
2. Access the DIP switches on your remote.
Remove the battery cover. You should see a set of tiny switches or levers—usually 4 or 5 in a row.
3. Choose a new frequency code.
Decide on a new pattern for the switches. It doesn’t have to be complicated, but avoid the same pattern as any other remotes in your home.
4. Set the same code on the fan receiver.
Climb up to the fan, remove the canopy, and find the receiver box. Match the DIP switch pattern exactly to the remote. A mismatch means they won’t pair or sync.
5. Double-check your work.
Look at your photo to be sure both sets of switches are identical.
6. Close everything up and restore power.
Reattach the fan canopy and snap the battery cover back in place. Turn your breaker back on.
7. Test the remote.
Try turning the fan on and off, changing speeds, and using the light function if available. If it doesn’t work, go back and verify both codes are identical.
That’s it. No fancy tools, no cryptic codes—just a bit of patience and attention to detail.
Troubleshooting Common Issues After Changing Lutron Remote Frequency
Sometimes things don’t go as planned. Maybe the fan doesn’t respond, or the remote only works part of the time. Don’t worry—most issues have simple fixes.
Common problems include:
- Remote and fan frequency codes don’t match—this is the number one culprit.
- Batteries in the remote are low or dead. Always try swapping in a fresh set.
- The receiver wires got jostled or disconnected while you were inside the canopy.
- The reset wasn’t completed fully—sometimes you need to power down and start again for a full sync.
If you’re still stuck, take another look at the DIP switch positions. Even one tiny lever out of place can break the connection. If the remote won’t pair no matter what, try resetting both devices (many receivers have a small reset button), or check for a “learn” button on newer models. Honestly, it’s usually something small—so don’t panic, just double-check the details.
Most pairing and frequency issues come down to matching codes and fresh batteries. If you keep hitting walls, a quick call to Lutron’s customer support can make a difference—they’ve seen every scenario.
Comparing Lutron Remotes to Universal Ceiling Fan Remotes
You might be wondering if it’s easier just to grab a universal remote and skip all of this. That’s a valid question—lots of folks end up with a pile of remotes and just want something simple that works.
Lutron ceiling fan remotes are designed specifically for their systems. The pairing process, DIP switches, and sync options are tailored for reliability and performance. Universal remotes, on the other hand, use broader codes that may not offer all functions (like dimming or specific fan speeds). They’re convenient, sure, but you might lose some features.
If you’re in a home with mixed fan brands, a universal remote can seem tempting. But for pure compatibility, sticking with the Lutron remote usually gives you better results—especially for troubleshooting, pairing, and long-term reliability. Save universal remotes for backup or secondary fans if you really want one-remote-to-rule-them-all simplicity.
Safety Reminders and Extra Tips for Lutron Remote Setups
Let me be honest: working overhead on a ladder isn’t the most fun part of DIY. Take your time, check your balance, and ask for help if you need it—especially when reattaching the canopy. The screws can be fiddly, and you don’t want to drop anything.
Store your remote somewhere safe. Tiny remotes love to get lost in couch cushions. Consider mounting the remote or using a wall holder if your model includes one.
And don’t forget, label your breaker after you’re done if it wasn’t already clear. Future you will thank you.
If you’re troubleshooting, give yourself a break if it takes more than one try. The DIP switches are so tiny, and sometimes just a speck of dust or a loose wire is all it takes to throw things off. Patience is your best friend here.
Wrapping Up: Enjoying Your Lutron Ceiling Fan Remote Again
Changing the remote frequency on your Lutron ceiling fan remote can feel a little intimidating at first—especially if you’ve never opened up a fan before. But once you see how it works, it’s just a matter of matching up two simple codes. No special tools, no secret technician skills required. Just a steady hand, some attention to detail, and the willingness to double-check your work.
When your remote and fan finally sync up, it’s a satisfying little victory. That quiet whir or soft light, back under your control, feels a lot like solving a puzzle. So take a breath, give yourself a pat on the back, and enjoy the comfort of a fan that listens only to you.