Picture it like tuning an old radio. If you’re not dialed in to the right station, you just get static. Intermatic’s remotes and receivers need to be on the *same frequency* to work together. This sometimes gets thrown off after a power outage, battery change, or even interference from other devices around your house. The good news? Fixing it is less intimidating than it sounds—no engineering degree or secret code required.
Most Intermatic pool systems use handheld remotes or wall mount panels that talk wirelessly to the main control box. If your remote isn’t working, or buttons seem delayed, changing or syncing the remote frequency can often bring your system back to life. Let’s walk through the process together in normal, everyday language.
Understanding Intermatic Pool Remotes and Frequencies
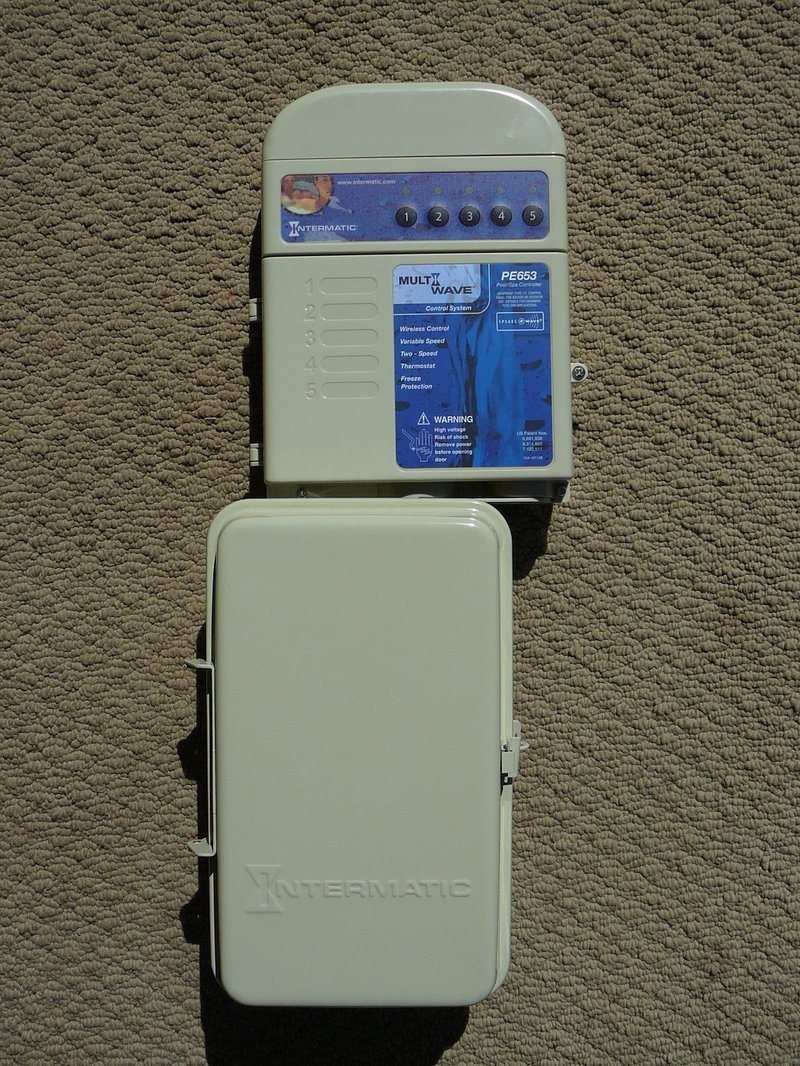
Let me explain what’s really going on under the hood. Your Intermatic pool remote works by sending out a *wireless signal*—almost like a walkie-talkie. The main control system (usually in a weatherproof box by your pool equipment) only listens on a certain frequency, sort of like listening for a friend’s voice in a crowd.
Sometimes, if too many devices in the neighborhood are on that same frequency, you get “cross-talk.” Imagine trying to have a private conversation in a crowded room. That’s when your pool remote might start acting up—maybe the lights won’t change, or your pump won’t respond. Other times, the remote and control box just drift onto different “channels,” especially after a reset or battery swap.
Why does this matter? Well, if they’re not speaking the same language (frequency), nothing works. With Intermatic’s most common remotes (like the PE953 or PE950), you can actually change the frequency or re-sync the code so the system starts listening again. This is a feature, not a bug—it keeps your pool remote secure and reduces interference.
When Should You Change the Remote Frequency?
Here’s the thing: Not every remote problem means you need to mess with the frequency. Sometimes, it’s just dead batteries or a stuck button. But if you’ve tried the basics—like replacing the battery and resetting the remote—and things still aren’t working, frequency is a likely suspect.
You might be wondering: Are there warning signs? Yes—here are a few:
- The remote suddenly stops working after a lightning storm or power outage.
- Other wireless devices (garage doors, neighbor’s pool, etc.) seem to interfere.
- Your remote responds only when it’s *very* close to the receiver.
- Random pool equipment turns on or off unexpectedly.
If any of these sound familiar, it’s time to check the remote frequency. Honestly, tackling this first can spare you hours of troubleshooting.
Getting Ready: What You’ll Need
Let’s make sure you have everything before you start. Don’t worry—no fancy gear required. Here’s what usually comes in handy:
- Intermatic pool remote (PE953, PE950, or similar)
- Access to the main control panel/receiver (usually poolside)
- Fresh batteries for the remote
- Small screwdriver (if you need to open the remote battery compartment)
If you’re not sure which Intermatic model you have, check the sticker on the back of the remote or the inside cover of the pool control box. Bonus: Having the user manual nearby can help, but honestly, the process is pretty standard across most Intermatic wireless systems.
A quick word of advice—safety first. If you’re ever uncomfortable opening up electrical panels, get a professional. But for frequency syncing and battery swaps, you rarely need to touch any high-voltage stuff.
Step-by-Step: How To Change Remote Frequency on Intermatic Pool System
Ready to roll up your sleeves? Here’s the simplest way I’ve found to change or pair the frequency on most Intermatic remotes:
1. Check and Replace the Remote Battery
Before diving into codes and syncing, make sure your remote’s battery is fresh. Weak batteries cause weak signals, which can make it seem like a frequency issue when really it’s just low power.
- Unscrew the battery compartment (usually on the back of the remote).
- Swap in a new battery (usually a 9V or AA, depending on model).
- Screw the compartment shut and try the remote—sometimes, that alone fixes things!
2. Access the Pool Control Panel
Now, head over to the main Intermatic control box by your equipment pad.
- Unlock and open the front panel.
- Look for a button labeled “Learn” or “Programming”—this is what lets the system accept new remotes or frequency codes.
3. Enter Programming Mode
Most Intermatic systems need you to press and hold the “Learn” or “Program” button for a few seconds. When you do this:
- You’ll usually see a blinking light or hear a beep—this means the system is ready for a new remote code.
4. Sync the Remote
With the panel in “learn” mode, grab your remote.
- Press and hold the ON or PAIR button on your remote (sometimes it’s just the “1” button) for about 5 seconds.
- The control box should recognize the signal—you’ll get a solid light or another beep.
Not seeing any lights or beeps? Double-check your battery and make sure you’re close enough to the receiver. Some models need you within a few feet for pairing.
5. Test and Exit
Try a few commands—turn a pump on, switch the light, or cycle the heater. If everything responds, you’re golden. Press the “Learn” button again to exit programming mode.
If something still isn’t working, don’t stress. Sometimes starting over (resetting both remote and receiver) is all it takes. And if you have multiple remotes, just repeat the pairing steps for each one.
Troubleshooting Common Problems
So, what if you follow all the steps and the thing *still* refuses to cooperate? Here’s where things get interesting—and a bit more detective work is needed.
- Remote won’t sync? Check that your remote is really compatible with your control panel. Some older and newer Intermatic models use different codes and can’t be paired together.
- Frequent “signal loss”? You might have interference from Wi-Fi routers, cordless phones, or other wireless devices. Try moving those away from your pool control area.
- Reset didn’t help? Sometimes, you’ll need to fully power-cycle the control panel (turn off all power to it, wait a minute, and turn it back on).
The trick is to tackle one issue at a time. If all else fails, a universal pool remote might be a workaround—but honestly, I always recommend using the brand-made remote for best reliability.
Understanding Codes, Syncing, and Security
You might be wondering: *Is this just about changing a number, or is there more to it?* The answer is—yes, there’s a bit more behind the curtain.
Every Intermatic remote and receiver has a *unique code* (kind of like a digital handshake). When you pair or sync the devices, they agree on a new shared code. This helps keep your pool secure—so a random remote can’t just hijack your setup.
That’s why the “frequency” isn’t a plain AM/FM frequency, but a specific wireless code. When you reset the remote or press “learn,” you’re telling the system to listen for a new handshake.
If your neighbor just installed a similar system and suddenly your pool light flips on every time they use their remote, it probably means you both need to change and re-sync your remotes. Technology is great—until it turns your backyard into a light show you didn’t want!
Comparing Universal and Brand Remotes
While it’s tempting to pick up a universal remote off Amazon, here’s what I’ve learned: nothing beats using a remote made specifically for your Intermatic pool system.
- Brand remotes (like the PE953) have the best chance of syncing easily.
- Universal remotes can sometimes pair, but features like advanced programming or multiple zone control might not work.
- Using off-brand remotes can also introduce security risks or make troubleshooting harder down the road.
If you’ve lost the original remote or it’s no longer available, check with Intermatic for approved replacements. In a pinch, some universal pool remotes do work, but expect a bit more setup and possible code syncing issues.
Keeping Your Intermatic Pool System Running Smoothly
Now that your remote and pool system are back on speaking terms, a little regular maintenance goes a long way. Here are some low-tech habits that make a real difference:
- Change the remote battery every pool season for best range and reliability.
- Keep the control panel area clean and free from spider webs, leaves, or anything that might block the antenna.
- Every once in a while, re-sync or test your remote—especially after storms or major power events.
- If you have multiple remotes, label them and make sure they’re all paired properly.
The more you treat your pool system like part of your home, the less likely you’ll be stuck with a dead remote on that first warm day in spring.
Final Thoughts
Tuning the frequency on your Intermatic pool remote sometimes feels like unlocking the secret level in a video game. But once you know the steps—fresh battery, “learn” button, quick sync—it becomes second nature. These simple fixes handle most remote troubles, and you’ll be amazed at how often it’s just a code or sync issue.
The right frequency keeps your pool system secure, responsive, and fun to use all summer long. And if you ever get stuck, remember: you’re not alone—nearly every pool owner fumbles with remotes at some point. Take it one step at a time, stay patient, and you’ll have your Intermatic system humming along in no time. Now, go enjoy your pool—remote in hand, and everything under your control.
