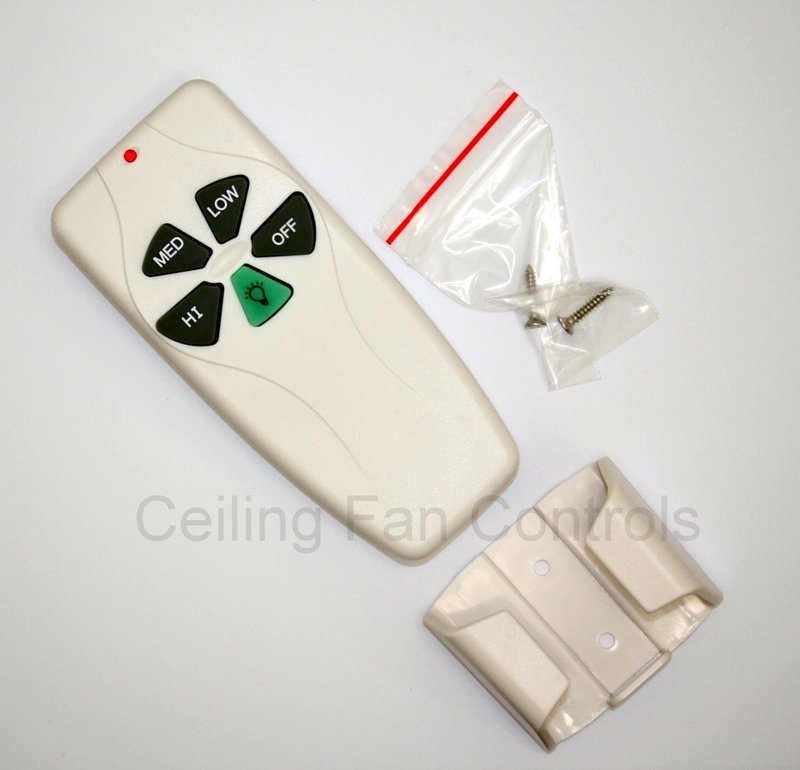
Here’s the thing—remote frequencies aren’t set in stone. In fact, changing them is a smart fix for interference and syncing issues. But if you’ve never peeked into the guts of your remote (or your fan, for that matter), the whole idea can seem about as complicated as reprogramming a spaceship. No worries. I’ll walk through how to change the frequency on your Harbor Breeze fan remote—step by step, with plain explanations and zero tech jargon.
Understanding Harbor Breeze Remote Frequencies
Let me explain what’s actually happening with your fan remote. Every Harbor Breeze ceiling fan remote uses a small internal transmitter. This device sends out a radio frequency (RF) signal, which is like a message in a bottle, telling your fan what to do—turn on, spin faster, dim the light, etc. The fan’s receiver catches this message, but only if it’s tuned to the same “frequency code” as the remote.
Why does this matter? Sometimes, multiple fans or remotes in your house—or even next door—are set to the same frequency. That’s when strange things start happening. Maybe you push a button and hear another fan whirring somewhere else. That’s your cue to consider a frequency change.
So, Harbor Breeze fans are designed with dip switches—a row of tiny sliders tucked inside both the remote and the receiver (inside the fan canopy). These let you “set” a unique code so your remote only talks to your fan. Think of it like setting a private Wi-Fi password. This keeps your fan from picking up anyone else’s remote commands.
When Should You Change Your Harbor Breeze Remote Frequency?
It can be tempting to leave things as they are—”if it ain’t broke, don’t fix it,” right? But here’s when you absolutely should consider changing the frequency:
- Random fan or light activity: You notice your fan or light turning on/off unexpectedly, especially when using other remotes at home or in your building.
- Multiple fans syncing up: Pushing your remote button activates more than one Harbor Breeze fan nearby—like a synchronized swimming team, in the worst way.
- Interference from other electronics: New gadgets, wireless devices, or even home renovations can sometimes create unexpected frequency clashes.
Honestly, if you want full control over your ceiling fan (and none of your neighbors want to share the remote), changing the remote frequency solves a surprising number of headaches. It’s not just about privacy; it also keeps your system running reliably, without mysterious zaps or hiccups.
What You’ll Need Before Changing the Frequency
Before you even touch a screwdriver, let’s get your tools lined up. Here’s what you should have:
- Harbor Breeze remote control (the handset)
- Access to your fan’s canopy (that’s the cover at the ceiling, where the wires live)
- Small Phillips screwdriver (or sometimes a flathead—peek at your remote first)
- A safe step stool or ladder (safety first!)
- Fresh batteries for the remote (just in case the old ones are weak)
You might be wondering: Do I need any electrical skills to do this? Thankfully, no major wiring is involved for the frequency code swap. Still, always turn off power to the fan at the breaker before opening any part of your ceiling fan. Safety isn’t optional here.
Pro tip: Take a photo of the original switch positions before you change anything, so you can revert if needed.
How To Change the Frequency Code on Your Harbor Breeze Remote
Here comes the core part—actually setting a new frequency. The logic is straightforward, but you’ll need to follow along carefully.
Step 1: Turn Off Power and Remove the Fan Canopy
To avoid any electrical surprises, switch off the ceiling fan power at your main breaker. Then, using your screwdriver, gently remove the screws holding the canopy (that cap at the ceiling). Set the screws in a cup or pocket (they’re easy to lose). Inside, you’ll see a small box—the remote receiver.
Step 2: Locate the Dip Switches on the Receiver
Look for a bank of four or more tiny white switches on the receiver. These are your dip switches. Sometimes they sit behind a clear plastic window or label, so you might have to nudge things aside. Each switch will be either up or down (on or off)—every combination sets a different frequency code.
Step 3: Change the Dip Switch Settings
Decide on a new pattern—there’s no right or wrong sequence, as long as it’s not the same as your neighbor’s (but how would you know, right?). Just don’t set all switches up or all down. Use a toothpick or pencil tip to slide each switch to your chosen positions. Remember, you’ll need to match this exact code inside your remote next.
Step 4: Open the Remote and Change Its Dip Switches
Pop open the battery compartment on your remote. You’ll find another row of dip switches—usually labeled and identical to the fan receiver’s. Change them to mirror the exact new pattern you set on the receiver. If you mess this up, the remote and fan won’t sync. Double-check—this is the moment that counts.
Step 5: Reassemble and Restore Power
Replace the remote battery. Secure the fan canopy back in place, making sure no wires are pinched. Restore power at the breaker. Now comes the fun part: test the remote. All functions—on, off, speed, light—should respond only to your remote. If not, recheck your dip switches for any mismatches.
Troubleshooting Harbor Breeze Remote Frequency Issues
So, what if your fan still isn’t listening? Or maybe the light flickers, but the blades won’t spin? Don’t panic—these quirks are common.
- If the fan/lights don’t work at all: First, check your breaker. Then double-check the dip switches—they must be perfectly matched between the remote and receiver.
- If the remote only works from very close up: Weak batteries or blocked signals could be the culprit. Try fresh batteries and make sure nothing’s blocking the receiver in the canopy.
- If another fan or light is still responding: Someone nearby might have the same switch code. Change your dip switch pattern more drastically, or consider a digital remote with rolling codes (more on that below).
Honestly, most issues boil down to mismatched dip switches or dead batteries. But if you’ve checked everything and it still won’t sync, there’s a small chance the receiver or the remote is faulty. In that case, replacement may be needed—Harbor Breeze parts are pretty available at home improvement stores.
Insight: Don’t underestimate the power of a fresh battery. Weak batteries can cause unreliable signal transmission, making you think it’s a code problem when it’s just low juice.
Difference Between Harbor Breeze Remotes and Universal Remotes
You might be wondering if you can just swap in any old remote when things go wrong. Here’s where the details matter.
Harbor Breeze remotes are built to speak the same “language” as their brand receivers—matching the dip switch codes. They’re reliable and usually simple to sync up, but if you lose the remote or the receiver fries, you’ll need either an exact replacement or a compatible universal remote.
Universal ceiling fan remotes can sometimes pair with Harbor Breeze fans, but not always. Check if the universal remote supports both the right RF range (usually 303.9 MHz for Harbor Breeze) and dip switch code matching. Some modern remotes use digital pairing or rolling codes—these are less likely to overlap with neighbors, but may require swapping out the whole receiver unit in your fan. That’s a bit more involved but can fix stubborn interference for good.
So, if you love a straightforward fix, stick with Harbor Breeze’s own remote or one you know is 100% compatible. If you’re upgrading to a universal remote, read the documentation closely—compatibility is never guaranteed, but can be a lifesaver when you want extra features.
Safety Tips and Best Practices for Remote Frequency Changes
Messing with ceiling fans isn’t a high-risk task, but a few safety habits still matter. Here’s my take on staying safe and making the job smoother:
- Always cut off power at the breaker before removing the canopy. Don’t trust just a wall switch!
- Use a stable ladder or step stool. Balancing on a chair is tempting, but… don’t.
- Be gentle with dip switches. They’re tiny and can break if forced—use soft tools, not metal screwdrivers or brute strength.
- Snap a photo before changing switches. That gives you a backup if you need to restore original settings.
- Keep remote batteries fresh. When troubleshooting, swap in new batteries before diving into more complicated fixes.
Think of it as building good habits—a little extra caution prevents most accidents and headaches. Harbor Breeze fans are designed for DIY-friendly maintenance, but don’t rush. A few extra minutes can save you an hour of frustration later.
Final Thoughts: Enjoying Smooth, Private Control of Your Harbor Breeze Ceiling Fan
Changing the remote frequency on a Harbor Breeze ceiling fan isn’t rocket science, but it does take a steady hand and a slow, careful approach. The real payoff? No more mystery fan movements, no more neighborly mix-ups, and a living space that responds only to your own remote commands.
Set your dip switches confidently, double-check your work, and don’t be afraid to experiment with new codes if you suspect interference. And if ever in doubt, spare a thought for your future self: snap a “before” picture, keep extra batteries handy, and treat those tiny switches with the respect they deserve.
Once you’ve got your remote and fan in perfect sync, you can finally relax and enjoy that perfect breeze—on your terms, with zero surprises.
