Now, I get it. The idea of poking around inside a Midea air conditioner remote might feel a little intimidating, especially if you’ve never done it before. You don’t want to mess up the code, lose the sync, or suddenly find yourself googling “Midea AC remote troubleshooting” at midnight. But honestly, swapping out those batteries is a breeze once you’ve done it once. It’s kind of like replacing the batteries in a toy—only the “toy” is keeping your living room from turning into a sauna.
Let’s walk through this step by step, just like you’d explain it to your little cousin—or, hey, maybe your grandma. You don’t need to be an engineer or a tech whiz. Just a little patience, the right batteries, and a bit of curiosity about how things click and snap together. Once you’ve seen inside one of these gadgets, you’ll realize there’s nothing magical about it—or, actually, maybe just a little.
What Type of Remote Does Midea Use?
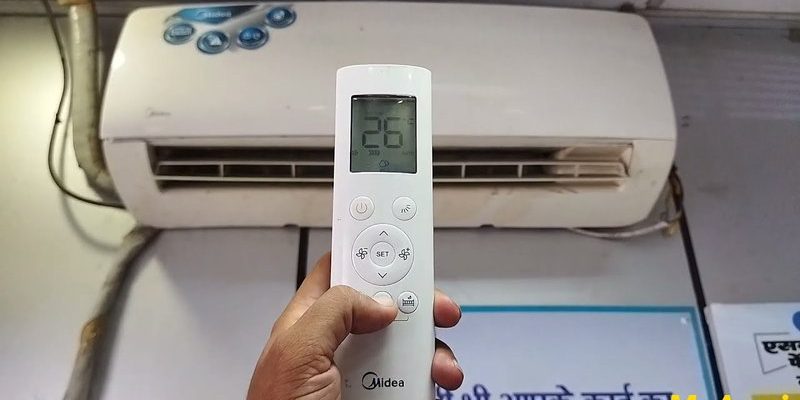
Before you even think about flipping open the back of your Midea AC remote, let’s take a second and talk about what you’re holding. Not every remote is built the same. Some are chunky, some are slim, and some have more buttons than you’ll ever actually use. But for most Midea air conditioner models, you’ll spot a long, slim remote with a small display and those classic rubbery buttons.
Midea uses its own branded remote controls, which pretty much all share a similar design language—white or gray plastic, a sliding back compartment, and sometimes a little reset or sync button tucked away. Most of them run on a pair of AAA batteries, though there are rare older models that take AA. Always worth a quick peek at your remote’s label or instruction booklet if you’re not sure.
Here’s the thing: These remotes are designed to be universal across most Midea split and window AC units. That means even if you lost yours, a replacement (or even some third-party universal remotes) can usually be paired up with a simple code or reset process. Still, nothing beats the original when it comes to seamless pairing and full access to features—like that very precise eco mode or turbo cooling button.
Honestly, if you can snap a Lego brick in half, you can open one of these remotes. If you’ve got an older Midea AC, your remote might look chunkier, but the battery compartment is almost always on the back panel.
How To Open Your Midea AC Remote Safely
You might be wondering, “Can I just yank the back off?” Well, you could—but unless you want a tiny plastic battle on your hands, I’d recommend the gentle approach. The battery compartment on a Midea remote usually has a little arrow or textured grip showing where it slides.
Gently hold the remote upside down in your palm. Using your thumb, press down on the textured cover and slide it away from the display end. It may take a bit of pressure, but don’t twist or force it. If it feels stuck, double-check—sometimes a bit of dust or stickiness gets in the way, or the plastic clips get a little stubborn after a year or two of use.
If you can’t move the panel easily, try using a plastic pry tool or even the edge of a credit card instead of something metal, just to avoid scratching or damaging the finish.
Once the cover is off, you’ll see two snug battery beds. If you see any signs of corrosion—like white or greenish gunk around the battery terminals—don’t panic. It just means an old battery leaked, and you can clean it up with a bit of rubbing alcohol and a dry cotton swab. Just don’t get the inside too wet!
Choosing The Right Batteries: Don’t Overthink It
This is the part that trips people up more than you’d think: which batteries should you actually buy? For the vast majority of Midea AC remotes, the answer is *plain old AAA alkaline batteries*. I know, seems obvious—but I’ve seen people try to jam in AAs or those little button cell types. Trust me, it won’t fit and you’ll just get frustrated.
Why AAA? Well, remote controls don’t draw much power, so these smaller batteries last surprisingly long—often six months to a year, depending on how much you use your AC. And while you *could* buy fancy lithium or rechargeable AAA batteries, honestly, for something this low-power, regular alkalines do the job perfectly.
- Alkaline AAA: Reliable, cheap, and found everywhere.
- Rechargeable AAA: Good for the environment, but you’ll need a charger and might get slightly less runtime.
- Super heavy-duty: They sound cool, but offer zero benefit over a quality alkaline.
Just be sure to insert the batteries the right way—look for the little + and – symbols inside the compartment, and line up the batteries so the positive nub matches the little spring. Otherwise, you’ll pop the cover back on and wonder why nothing’s working!
Step-by-Step Guide: Changing Batteries in Your Midea AC Remote
Okay, moment of truth. You’ve got fresh batteries, the cover’s off, and you’re ready to get your cool air (and sanity) back. Here’s how to do it, nice and slow:
- Hold the remote so the display is facing down and the back is exposed.
- Slide off the battery cover using your thumb or a plastic tool—never a knife or other sharp object.
- Remove the old batteries. If they’re stuck, gently tap the remote against your palm to loosen them. Don’t dig with anything metal, as it could bend the contacts.
- Check the terminals for any dust or corrosion. If you spot any, a Q-tip with a touch of rubbing alcohol (dry it afterward) helps clean things up. This prevents future battery issues or “phantom button” glitches from dirty contacts.
- Insert the new batteries, matching the positive (+) and negative (–) markings. It sounds silly, but double-check—backwards batteries equal zero power and maximum head-scratching.
- Slide the battery cover back on. You’ll feel a little click as it locks in place.
- Test the remote! Stand close to your AC unit, aim, and press Power. Listen for the beep or watch for the AC display light. If nothing happens, try reseating the batteries or checking that you bought fresh ones.
That’s it! No reset, no extra codes, no magic pairs—just fresh batteries and you’re done. If the remote still isn’t working, there could be another issue (more on troubleshooting below), but this fixes 90% of “won’t turn on” problems with Midea remotes.
Do You Need To Reset or Sync After Changing Batteries?
Here’s something that makes Midea remotes friendlier than some high-tech gadgets—you *don’t* have to do a complicated sync, code pairing, or reset after a basic battery swap. Once those batteries are in, the remote picks up right where it left off. Super refreshing, honestly.
But let me explain a little nuance: Some Midea AC models with more advanced remotes (like those with clock programming or smart features) may reset the clock or lose custom settings when the batteries come out. So if you notice the clock flashing, or your pre-set temperature is back to default, that’s normal. Just use the remote to reset the time or settings—no code needed.
If your remote and AC suddenly stop talking to each other after a battery swap—no beep, no light, no cool breeze—don’t panic. A quick power reset of the AC unit itself (unplug, wait 60 seconds, replug) plus trying the remote again usually sorts things out.
For anyone using a universal remote to control a Midea AC (maybe the original got lost or chewed by a pet), you may need to re-enter the pairing code or follow the sync instructions in your universal remote’s booklet. That’s rare for a simple battery change, but it can happen with certain third-party models.
Troubleshooting: When New Batteries Don’t Fix It
So you swapped fresh batteries and your remote still acts like it’s in a deep sleep. Before you start shopping for a replacement, let’s run through a few quick checks.
First, make sure the batteries are *actually* new and inserted correctly—look for that + and –. It’s such an easy thing to overlook, especially if you’re in a hurry. If you’re sure the batteries are fine, try these steps:
- Stand close to the AC unit and point the remote directly at the sensor (usually a little black window on the AC front panel).
- Check for any obvious physical damage. If a drop cracked the remote’s case, the internal circuit board might be loose or broken.
- Use your phone’s camera to test the infrared LED. Turn on your camera, point the remote at the lens, and press a button. You should see a little light flash on-screen. No flash? The remote’s probably the culprit.
- If the remote’s working, but your AC ignores it, try unplugging the AC for a minute and plugging it back in. Sometimes a hard reset helps them “see” each other again.
Still nothing? It *could* be that your remote or AC receiver has given up the ghost. Most appliance stores (and plenty of online shops) carry replacement Midea remotes, and you can usually sync them up just by installing batteries—some even have handy auto-pair features. If you’re using a universal remote, check that you’ve got the right code and mode selected. The right code is the difference between cool breeze and endless frustration!
Comparing Original vs. Universal Midea AC Remotes
You might be tempted to grab a universal remote the next time yours acts up. Here’s my honest take: Both get the job done, but the little differences will matter to some people more than others.
Original Midea remotes are, well, made for your Midea AC. They plug-and-play with no setup, all the buttons work, and the display lines up exactly. If your AC has special modes (like “Follow Me,” which makes the unit track the remote’s temperature sensor), only the original or an official replacement will support *everything*.
Universal remotes, on the other hand, are great if you’re in a pinch or your original is truly toast. The pairing process usually involves entering a code—sometimes a few tries if you don’t know the exact model. You might lose some advanced features, and the button labels won’t always match. But for basic cooling, heating, and mode switching, they’re a lifesaver.
If you’re troubleshooting constant remote issues and have already changed batteries, double-check that your universal remote is properly synced and hasn’t lost its code—sometimes the code resets when you change its own batteries.
At the end of the day, both get your AC humming again. But if you can find and afford the original, you’ll have fewer little headaches in the long run.
Keeping Your Midea Remote Happy: Tips & Battery Lifespan
You might be curious how long your new batteries will last, or if you can do anything to extend your remote’s life. Good news—it’s not rocket science. Midea AC remotes are pretty gentle on batteries, so with regular use, expect about six to twelve months from a good pair of AAAs.
Here’s how you can get the absolute most out of each set:
- Remove the batteries if you’re not planning to use the remote for months (like in winter).
- Avoid mixing old and new batteries—they’ll drain faster.
- Keep the remote dry and clean. Spilled drinks or sticky fingers can cause “ghost pressing” or button failures over time.
- Store your remote somewhere it won’t get sat on, dropped, or lost between couch cushions. (Easier said than done, I know!)
A little care goes a long way. And when you do need to change the batteries again, you’ll be a pro.
Wrapping Up: Enjoy the Cool, Without the Hassle
So there you have it—changing batteries in a Midea AC remote isn’t some mysterious code-breaking exercise. It’s a simple swap that keeps your comfort literally at your fingertips. Once you’ve done it, you’ll wonder why you ever hesitated. Next time your remote stops responding, you can skip the frustration, grab two fresh AAA batteries, and get back to lounging in cool, breezy bliss.
If you ever run into weird glitches, don’t forget: sometimes it’s just a matter of cleaning the contacts, checking the code, or giving your AC a quick reset. And if you’re using a universal model, a quick sync or reset is your best friend. Stay cool!