Honestly, adding a second remote can seem intimidating, especially if the pool technician always made it look easy. But this isn’t rocket science. Think of your Jandy controller as a clubhouse: only the remotes you invite can get in and start the party. Pairing another one means teaching the controller to recognize the new guest—just with a few button presses and a little patience.
Most Jandy pool systems use wireless remotes (like the AquaLink RS or PDA models), but the process to sync or pair a second one with your main controller is surprisingly doable, even if you’re not a techie. If the words “code,” “sync,” or “reset” make your eyes glaze over, don’t worry—I’ll break things down so even first-timers can follow along and feel confident doing this themselves.
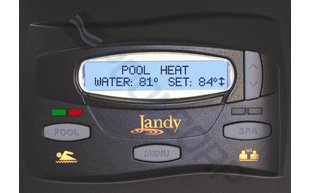
Understanding Your Jandy Pool Remote and Controller
Let me explain how these pieces actually talk to each other. The Jandy remote is basically a wireless handheld device that lets you control your pool’s features from just about anywhere nearby. The brain behind everything, though, is the Jandy controller—often called the AquaLink RS or PDA system. You might have a wall-mounted box in the house or a weatherproof unit outside by the pool equipment.
Here’s the thing: The controller and remote communicate using a special code—a sort of digital handshake. When you add a second remote, you’re essentially introducing a new friend to join the handshake. Each remote needs to be “paired” or “synced” with the controller, so the system knows to trust it. That’s where the process gets a little technical, but don’t worry, you won’t need to memorize codes or spend hours fussing with tiny buttons.
Most Jandy remotes are battery-powered and wireless, relying on strong but simple signals. You might be using a PDA-style remote, a waterproof handheld with a digital screen, or the classic OneTouch. The instructions below are general enough for most wireless Jandy models, but if you have a particularly old or new system, you may want to check your manual for any specific quirks.
Adding another remote is useful for big families, larger properties, or just having a backup if someone drops the original in the pool (don’t ask me how I know). When you’re ready to start, knowing which remote and controller you have will make the whole troubleshooting and pairing process much easier.
Before You Start: Prepping the Second Jandy Remote
You might be wondering, “Do I need to do anything before trying to pair the new remote?” Absolutely. A little prep work saves a lot of headaches. First, check that the second Jandy remote has fresh batteries. Wireless remotes are notorious for acting weird or refusing to sync if the battery is low. If you’re not sure, just pop in a new set—better safe than sorry.
Next, double-check that your new remote is the correct model for your controller. Jandy systems aren’t always “universal,” so a PDA remote won’t pair with an AquaLink Touch panel, for example. If you’re unsure, look at the sticker inside the battery compartment or on the back for the model number and compare it to your controller specs. Sometimes, you can use a universal pool remote, but honestly, sticking to Jandy-branded models is just easier and less prone to errors.
If the remote is brand-new, you don’t need to reset it. But if it’s used—or someone else’s old remote—a full reset is smart. Usually, this is done by removing the batteries and holding down a specific button while you pop them back in. (Exact reset steps can vary, so check your manual or the Jandy website.) A clean slate ensures you don’t bring any oddball codes or weird settings into your main controller.
Once you’ve confirmed model compatibility and battery strength, keep both remotes handy. You don’t need to “deactivate” your first remote—adding a second one just expands the number of devices your controller listens to. Think of it as programming a new garage opener, while the original still works exactly the same.
Step-by-Step: How To Pair a Second Jandy Pool Remote
Alright, here’s where the magic happens. Adding a second Jandy pool remote is mostly about getting the controller and new remote into the same “talking” mode. Here’s the basic flow:
- 1. Access the main controller: Find your Jandy controller box (AquaLink RS or PDA panel). Open the cover carefully. If it’s outside or near water, make sure your hands are dry.
- 2. Enter programming mode: Most controllers have a “PROG” or “SERVICE” button inside the panel. Press and hold it until you see indicator lights flash, or the display shows you’re in programming mode. This tells the system you’re about to sync a new remote.
- 3. On your second remote: Hold down the “POWER” or “SYNC” button (sometimes it’s labeled “CODE”) while the controller is in programming mode. Keep holding until you see a confirmation—usually a beeping sound, a blinking light, or a message like “Remote Paired” on the screen.
- 4. Exit programming mode: Press the same button again, or just close the panel. The system should now recognize both remotes. Give it a test by turning something on or off from the new remote.
Don’t panic if something doesn’t work the first time. Sometimes the timing is a little finicky—controllers have short “windows” where they’ll accept new devices. If you miss it, just start over. It’s like missing your shot at double-dutch jump rope; just wait for the right rhythm and jump back in.
Troubleshooting Common Problems Adding a Second Remote
Now, let’s get real: Electronics don’t always play nice. If the second Jandy remote refuses to sync, here are the most common issues and how to handle them:
- Dead or weak battery: If your remote isn’t powering up, or the buttons feel unresponsive, swap in new batteries. Even if it “sort of works,” a weak battery can prevent pairing.
- Wrong remote model: Double-check the model numbers. Trying to pair an incompatible remote is like trying to fit a square peg in a round hole. Look for “AquaLink PDA” or “OneTouch” labeling and match it to your controller.
- Out of range or interference: Keep the remote close to the controller for the pairing process. Wi-Fi routers, metal enclosures, or even big pool pumps nearby can mess with the signal. Step a little closer if things aren’t working.
- Already at max remotes: Some systems only allow two or three wireless remotes at a time. If you’ve already paired the maximum, you’ll have to remove one first. Check your manual for “clear remote” instructions.
Sometimes, the fix is as simple as restarting everything—just like rebooting a stubborn computer. If you’re really stuck, a system reset can often “un-gum” a stuck pairing process. Just remember to re-add your originals afterward.
How Codes and Syncing Actually Work
Behind the scenes, each Jandy remote and controller communicate using a short “code”—a unique digital signature that keeps your pool safe from random signals. Pairing a second remote means the controller temporarily listens for any new device trying to sync, then stores its code for future access.
Here’s a little analogy: Imagine your pool controller is hosting a secret club. Each remote needs a secret knock (code) to get in. During pairing, the club leader (your controller) listens at the door, ready to memorize a new knock. When you hit the sync or power button on the new remote, it “knocks” and the controller adds it to the VIP list. From then on, both remotes can open the door.
Honestly, most people never need to know the codes themselves—they’re invisible to you. But if you’re ever troubleshooting why a remote won’t sync, remember: any glitch in that handshake (like a weak battery or bad signal) can stop things cold. That’s why it’s always important to follow the steps in the right order and keep devices close together during setup.
When To Reset or Replace Your Remotes
You might be wondering, “Is it ever better to just reset or replace my Jandy remotes?” Sometimes, yes. If an old remote starts acting up—or you’re seeing weird glitches like buttons not working or screens flashing—resetting can wipe out buggy old codes and settings. Most models have a simple reset step, usually involving holding down a specific button while installing the battery.
If even a reset doesn’t work (or the remote won’t stay paired no matter what), it might be time for a replacement. Jandy remotes aren’t immortal. Years of poolside use, battery corrosion, or a quick dip in the deep end can fry the electronics for good. Luckily, new remotes are pretty easy to find online or at pool supply stores. Just double-check model numbers, and when you get your new one, follow these same pairing steps.
A quick note: Universal pool remotes are out there, but, honestly, they rarely work as smoothly as branded Jandy remotes. Unless your system specifically says it supports third-party remotes, stick with Jandy for less frustration.
Comparing Single vs Multiple Remotes: Is It Worth Adding Another?
Let’s talk about the “why.” Is it really worth adding a second Jandy pool remote? In my opinion, absolutely—especially for families, big homes, or anyone who hates hunting for the one lost remote. Here’s what to consider:
- Convenience: More remotes mean less fighting over who gets to change the pool lights or spa temperature. Keep one inside, and another by the patio for easy access.
- Backup safety: If one remote breaks or the battery dies, having a second means you’re never stranded, especially if your controller isn’t in a handy spot.
- Houseguests and family: Sharing access means more people can help out or enjoy the pool features without bugging you every time.
You might worry that more remotes means more confusion. But honestly, as long as you keep track of them (and maybe put a label on the back), it’s no harder to manage two than one. Just remember—if you ever want to remove a remote, you’ll need to unpair it at the controller.
Tips for Maintaining Your Jandy Pool Remotes
Let me share a few hard-won tips to keep your remotes running smoothly after you’ve paired them:
- Keep them dry: Even though some Jandy remotes are “water-resistant,” they’re not fully waterproof. A dunk in the pool can mean the end, so stash them in a safe, dry spot.
- Replace batteries yearly: Don’t wait until the remote acts up. Fresh batteries every pool season will save a lot of frustration. Keep some spares handy in your pool supply box.
- Clean regularly: Dirt, sunscreen, and pool chemicals can gunk up the buttons. Wipe with a soft, damp cloth (no harsh cleaners) and make sure the battery compartment stays free of corrosion.
- Label remotes: If you have more than one, label them “Patio” or “Kitchen” so everyone knows which is which. It cuts down on mix-ups, especially if you have guests.
A little care goes a long way—these remotes are tough, but a bit of regular TLC means you’ll spend less time troubleshooting and more time enjoying your pool.
Wrapping Up: Enjoying Your Pool with A Second Jandy Remote
Adding a second Jandy pool remote to your controller might seem daunting at first, but once you understand how the pairing process works, it’s actually pretty straightforward. Whether you’re doing it for convenience, backup, or just because you love having a little extra control, syncing an extra remote gives your pool setup a big boost in flexibility.
Remember to check compatibility, use fresh batteries, and follow the pairing steps carefully. If things get stubborn, don’t sweat it—take a breath, reset if needed, and try again. Before you know it, both remotes will be up and running, making pool time a breeze for everyone in the house.
Honestly, the whole process is about giving yourself a little more freedom (and fewer poolside hassles). So go ahead—add that second remote, kick up your feet, and enjoy the peace of mind knowing you’re just one button press away from the perfect pool day.