Honestly, most folks are surprised at how simple this task becomes once you break it down into steps. If you’re used to wrestling with tangled wires or mysterious codes, Lutron’s system is a breath of fresh air. The company designs its remotes and controls with regular people in mind, which means you won’t need a master’s in electrical engineering to get everything working. So let’s roll up our sleeves, demystify the process, and get that cool breeze flowing again—no call to an expensive electrician required.
Understanding Lutron Ceiling Fan Remotes: What Makes Them Special?
Before you start syncing or pairing anything, it helps to know what you’re working with. Lutron is known for smart home tech that plays nicely with both traditional setups and modern smart homes. Their ceiling fan remotes are wireless controllers designed to operate your fan and its light kit—sometimes both, sometimes just the fan. Think of it as a universal TV remote, but for your overhead breeze.
But here’s the thing: not every ceiling fan is set up for remote control out of the box. Some have the right receiver already installed, while others might need an extra module. Most modern Lutron remotes use radio frequency (RF) to communicate, which means you don’t have to worry about pointing the remote right at the fan, and there’s no awkward line of sight needed.
You might be wondering why this matters. Well, knowing if your fan has a compatible receiver or needs a retrofit is half the job. Lutron remotes are built for ease—syncing, resetting, and replacing remotes is pretty painless, but compatibility is king. Double-check your fan’s model and look for any mention of “Lutron-ready” or “remote-compatible” in the manual. If not, you might need to pop open a cover plate or even the fan canopy to peek at the guts.
What You Need Before Adding a Lutron Remote
Let’s talk gear. You don’t need a hardware store’s worth of gadgets, but having the right stuff on hand makes things a whole lot easier. Here’s your beginner-friendly checklist:
- New Lutron ceiling fan remote (make sure it matches your fan’s system, like Caséta or Maestro)
- Compatible ceiling fan receiver (most newer fans already have one, but check the model number)
- Fresh batteries (don’t trust the ones that come in the box—swap in new ones for peace of mind)
- Phillips screwdriver (for accessing fan or receiver compartments, if needed)
- Your patience (trust me, that’s not just a joke—it’ll save you some frustration if things don’t sync instantly)
If your fan already worked with a remote, chances are you can skip installing a new receiver. If it didn’t, and you’re adding remote control for the first time, you might need to follow the receiver’s wiring instructions—usually color-coded and manageable with basic DIY skills. Always cut power at the breaker first; getting zapped is nobody’s idea of fun.
Step-by-Step: How To Pair a New Lutron Remote With Your Existing Fan
Here’s the heart of things—the actual process of pairing your shiny new Lutron ceiling fan remote. Let me explain it like we’re figuring out a new board game together, one card at a time.
- Power Cycle Your Fan: Flip the fan’s wall switch off, wait about 30 seconds, then turn it back on. This resets the receiver and gets it ready to pair with the new remote.
- Insert Batteries Into the Remote: Pop open the battery compartment (usually on the back), insert fresh batteries in the correct orientation, and snap it closed. A small LED might blink to show it’s working.
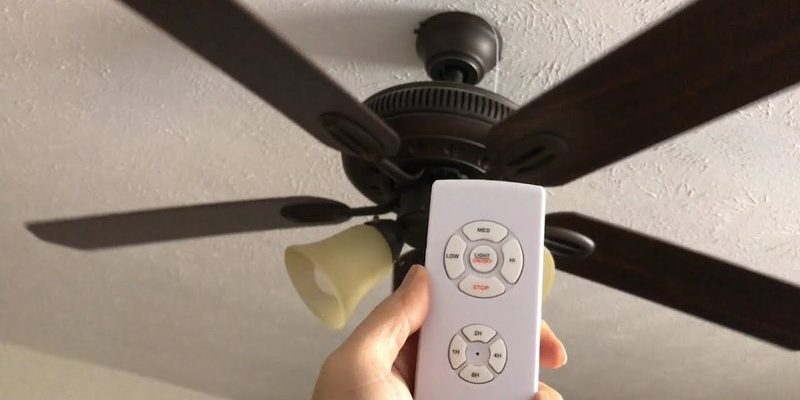
- Enter Pairing Mode: Most Lutron remotes use a simple pairing process. After restoring power, press and hold the “Fan” or “Pair” button on the remote within 30 seconds. Keep holding until the fan starts spinning, beeping, or the remote’s indicator light flashes. That’s your sign the remote and receiver are having a little digital handshake.
- Test the Controls: Press the fan and light buttons. If everything’s paired, you should be able to adjust speeds or dim the light. If nothing happens, repeat the above steps or check the receiver’s code switch (sometimes you’ll need to match a DIP switch on the remote to the one on the fan’s receiver—think of this as setting a matching code).
Don’t worry if it doesn’t work on the first try—receivers can be finicky, especially if there’s interference from other electronics or Wi-Fi devices nearby. Sometimes, you’ll need to physically reset the receiver using a tiny button under the fan canopy.
Syncing and Resetting: Troubleshooting Common Problems
Adding a new remote isn’t always a one-and-done job. You might hit a snag: nothing syncs, the fan ignores the remote, or the light flickers oddly. Here’s how to troubleshoot those headaches:
- Batteries Weak or Reversed? Double-check your battery installation. Even tech pros get this wrong—one upside-down battery and the whole setup acts dead.
- Receiver Interference? Wi-Fi routers, microwaves, and other remotes can crowd the airwaves. Try moving other electronics away during setup, or reset the receiver by cutting power for a full minute.
- Code Switches Don’t Match? Some Lutron systems (especially older ones) use little DIP switches to set a “code.” Make sure the switches inside the remote match those on the receiver—if they’re not twins, the pairing won’t work.
- Fan Not Responding At All? Test the fan from the wall switch. If nothing happens, you may have a loose wire or tripped breaker. If it works from the wall but not the remote, it’s likely a pairing or code mismatch.
Honestly, most problems with Lutron remotes boil down to battery quirks or code mismatches. Take your time, and don’t be afraid to start the pairing steps from scratch if things get weird.
If the remote still won’t sync, consult your instruction manual for a “reset” procedure—usually involving holding the pair button for 10+ seconds. In rare cases, the receiver or remote could be faulty. Test with another Lutron remote if you have one handy, or reach out to Lutron support.
Comparing Lutron Remotes With Universal Ceiling Fan Remotes
You might be debating whether to stick with a branded Lutron remote or try a universal option from the hardware store. Here’s the deal:
- Lutron remotes are built to work seamlessly with Lutron-compatible receivers. They’re reliable, offer advanced features (like scene control with Caséta integration), and rarely need complicated setup or code entry.
- Universal remotes may promise broader compatibility, but can be hit or miss—especially with smart fans or more advanced Lutron setups. Sometimes they lack the fine controls (like dimming or speed presets) you get with the official version.
If your home already uses Lutron Caséta or RadioRA, staying in the Lutron ecosystem makes life easier. The remotes talk to each other, sync with existing controls, and work with smart home hubs. Universal remotes are best if you’ve lost a remote and don’t mind potentially giving up a few features for convenience.
When & Why You Might Need To Reset Your Lutron Fan Remote
Sometimes things just…stop working. Maybe your remote starts acting up, or you try to pair multiple remotes to one fan and end up with a confused mess. Here’s why resetting or re-pairing makes a difference.
Resetting the remote wipes old connections and lets you start fresh. Think of it as a factory reset for your smartphone. Pairing again restores communication between the remote and receiver, which almost always solves random glitches or unresponsive controls.
Here’s how to reset most Lutron fan remotes:
- Remove the remote’s batteries.
- Press and hold the main power (or “Fan”) button for 10 seconds, even with no batteries installed.
- Reinsert batteries, then hold the pair button when powering the fan back on.
After a reset, you’ll need to redo the pairing process. It’s also a smart move any time you swap fans, move houses, or add smart home integration. If your fan receiver supports multiple remotes, you might need to pair each remote one after the other.
Tips For Maintaining Your Lutron Ceiling Fan Remote
A bit of TLC goes a long way toward keeping your Lutron ceiling fan remote working smoothly for years. Here are a few habits that help:
- Use high-quality, non-rechargeable batteries, and swap them every year or as soon as you notice sluggish response.
- Keep your remote clean—dust and grime can gunk up buttons. A quick wipe with a barely damp cloth works wonders.
- Avoid dropping the remote or exposing it to moisture. If it goes for a swim in your soup or coffee, remove batteries immediately and let it dry out for 48 hours before testing.
- If you’re using smart home automation, keep firmware updated. Lutron occasionally pushes updates that improve pairing and security.
Little quirks, like a sticky button or sporadic response, are usually fixed with a battery change or reset. If not, sometimes buying a new remote is simpler than struggling with a failing one.
Safety Considerations: Don’t Skip These Steps
Any time you’re poking around electrical devices, safety comes first. Here’s what you should never rush:
- Always turn off power at the main breaker before removing a fan canopy or messing with wiring. Flipping just the wall switch isn’t always enough—some lines stay live.
- Use a non-contact voltage tester if you need to check wires. It’s a tiny investment for a major safety upgrade.
- Double-check that all wire nuts are secure and no exposed copper is showing before restoring power.
- If you’re not comfortable with wiring, there’s zero shame in calling a pro. Better safe than sorry (or crispy).
Honestly, Lutron receivers and remotes are designed to keep the DIYer safe. Most work with simple plug-in connections, but don’t let confidence override caution.
Wrapping Up: Enjoy Your Refreshed Lutron Ceiling Fan Experience
Pairing a new Lutron ceiling fan remote with your existing fan doesn’t have to be complicated—or stressful. With the right tools, a little patience, and some attention to detail, you’ll have full control over your fan and light from anywhere in the room. Whether you’re swapping an old or missing remote, troubleshooting a stubborn connection, or just want to upgrade how you control your ceiling fan, the process is within reach for almost anyone.
If you ever run into trouble, remember: take a breath, reset everything, and go through the pairing routine step by step. Even pros get tripped up on batteries or code switches from time to time. Once you’re finished, you’ll wonder why you put it off for so long. Now, put your feet up, click that remote, and enjoy the breeze—you’ve earned it!