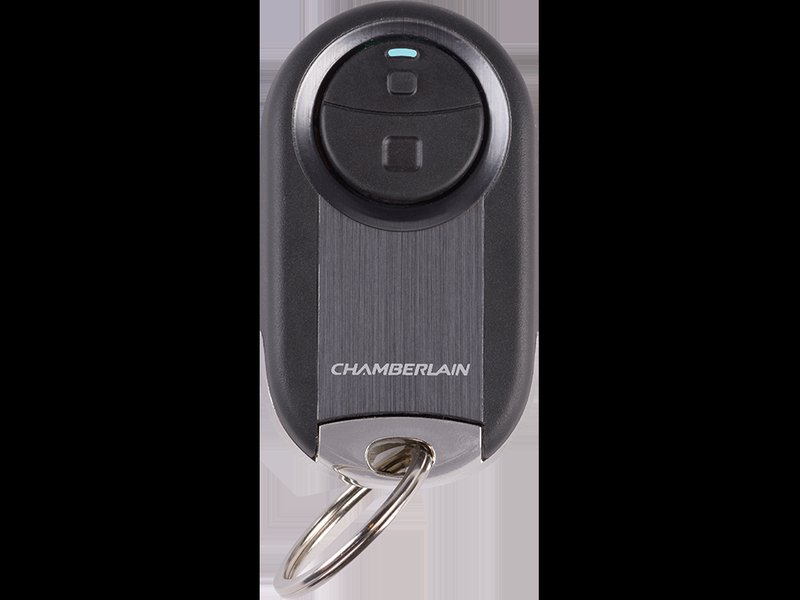
Here’s the thing: Chamberlain is a popular name in the world of garage door openers, and their remotes are everywhere. But the details about how many doors one remote can control? That’s not always so clear if you’re new to the garage game. Let me explain how this works, why it matters, and how you can set up your Chamberlain remote to tame the chaos of multiple garage doors.
How Chamberlain Garage Remotes Work: The Basics
Imagine a Chamberlain garage remote as a tiny walkie-talkie. You press a button, it sends a unique radio code to your garage opener, and—if the code matches—the door opens. Simple, sure. But the magic is in the details of how these codes are set, synced, and paired to each door.
Most Chamberlain remotes use something called “rolling code technology.” Instead of sending the same code every time, the code changes—like a secret handshake that shifts with every use. This helps prevent someone from copying your signal. If you have a newer Chamberlain opener (from the last 20 years), chances are it uses this system.
Press a button, your garage listens for its special code, and only then does it open. This handshake is unique between each paired remote and door. But you might ask, “How does one remote talk to two or more doors?” That’s where remotes with multiple buttons come in. Each button can be paired with a different opener, turning one remote into a universal key for your garage kingdom.
Can One Chamberlain Remote Operate Two or More Garage Doors?
Here’s the honest answer: **Yes, many Chamberlain garage remotes can control multiple doors**—but with some catches. The number of doors depends on how many buttons your remote has. If your remote has three buttons, you can assign each button to a different garage door. No more clunky remotes rattling around your car.
Let me walk you through a typical setup. Picture a family with a two-car garage and a backyard shop with its own opener. Instead of three remotes, they can match each button on a single Chamberlain remote to each opener. Each time they program a button, it syncs a unique rolling code with that opener, keeping things secure.
There are some limits. If you have a single-button remote, you’re out of luck—it only does one opener. Also, your openers need to be compatible (most modern Chamberlain and LiftMaster systems play nicely together, but really old openers might not). Always check the back of your opener or your manual to confirm model compatibility.
Step-By-Step: How to Pair a Chamberlain Remote With Multiple Doors
Pairing a Chamberlain remote is easier than you’d think, but it helps to move slow and pay attention to the little things—like not standing directly under the opener when you press the button (trust me, you don’t want that door closing unexpectedly).
- Step 1: Find the “Learn” button on your garage door opener. It’s usually on the back, near a short antenna wire. The button is often yellow, red, purple, or green.
- Step 2: Press and release the “Learn” button. You’ll have about 30 seconds to do the next step.
- Step 3: On your Chamberlain remote, choose which button you want to assign. Hold it down until you see the opener’s light blink or hear a click. That means you’re paired!
- Step 4: Repeat the process for each opener you want to pair, using a different button each time. If you mess up, don’t worry—you can always reset or re-sync.
It’s a good idea to label or remember which button goes to which door, especially when they all look alike at 6 a.m. on a Monday.
If things don’t work the first time, double-check that the battery in your remote is fresh. Low battery can be sneaky and cause failed syncs. Also, make sure you’re in range — too far from the opener, and the code won’t register.
Troubleshooting: When the Remote Won’t Sync With Multiple Doors
You might be wondering, “What if my remote just refuses to pair with a second or third door?” Honestly, it happens, and the culprit is usually pretty simple. Maybe the remote is too old, the battery’s dying, or your opener isn’t compatible with multi-button pairing.
First, check the battery. Even brand-new remotes sometimes sit on store shelves longer than you’d think. If your remote feels sluggish or only works up close, pop in a new battery and try again.
Second, make sure each opener uses compatible code technology. If one opener is ancient (“pre-rolling code era”), it might just not understand your newer remote’s language. Look for your opener’s model number and check with Chamberlain’s compatibility tables online.
If you’ve tried pairing and it’s still a no-go, try a remote reset. Many remotes have a small reset button (check your user manual). Press and hold it for a few seconds, then try the sync steps again from the top.
Sometimes, radio interference messes with the signal. If you have a lot of wireless gadgets in your garage (WiFi routers, LED lights, security cameras), those can interfere. Try unplugging other electronics for a quick test.
Universal Garage Remotes vs. Chamberlain-Only Remotes
People hear “universal remote” and often assume they’re the easy fix—all doors, one remote, no headaches. But the reality? Not always so simple.
Chamberlain-specific remotes are generally more reliable for—surprise—Chamberlain openers. They use proprietary rolling codes and are designed to sync seamlessly, with fewer compatibility hiccups. Their build and software are tuned for the brand’s openers.
Universal garage remotes claim to work with a mix of brands (LiftMaster, Craftsman, Genie, and more), but you might hit snags. Sometimes, the pairing process is trickier, and you might need to input a special code or even adjust tiny switches inside (called DIP switches). Not every universal remote supports rolling code tech or the newest encryption, so double-check your opener’s specs.
If you have multiple brands of garage openers, a universal remote might be your best shot. But for pure ease and reliability across multiple Chamberlain doors, sticking with a Chamberlain-branded, multi-button remote is my vote.
What Happens If You Need to Reset or Reprogram the Remote?
Life happens. Maybe you move, get a new car, or want to remove access from someone who’s moved out. Resetting or erasing a remote’s code from an opener is pretty straightforward, but it’s good to know how it affects all your doors.
- If you reset a remote, you’ll need to re-pair it with each opener again—yes, one by one. The remote forgets all its old codes, like wiping its memory clean.
- If you erase all codes from a garage opener (usually by holding the “Learn” button for several seconds), every remote tied to that opener will lose access. You’ll have to reprogram all remotes for that one opener.
- Changing the battery won’t erase codes, but if you wait too long to swap it, you might need to re-sync just to be safe.
The good news: the process is quick once you’ve done it a couple of times. Just be ready with a step-by-step plan so you’re not stuck outside when the weather turns ugly.
How to Tell If Your Chamberlain Remote Can Handle Multiple Doors
Not all Chamberlain remotes are created equal. Some are designed for one opener only, while others have up to three buttons for juggling multiple doors. If you’re shopping for a replacement or trying to figure out what you’ve got, here’s what to look for:
- Button count: The easiest sign—one button equals one door, three buttons can mean up to three doors.
- Model number: Check the label on the back. Models like Chamberlain 953EV or 956EV are made to pair with multiple doors.
- Manual/packaging: If you still have it, flip through. It should say “multi-door control” or “works with up to 3 openers.”
- Age: Older remotes—especially those without rolling code tech—may only support one door or require manual DIP switch setup (tiny sliders inside the remote).
If in doubt, check Chamberlain’s website or contact their support. They’re usually pretty quick to confirm compatibility.
Why Controlling Multiple Garage Doors With One Remote Matters
You might ask, “Is it really worth the trouble to set up one remote for several doors?” Honestly, the difference it makes in daily life is bigger than you’d think. It’s about **simplicity**. One remote on your car visor, three doors at your fingertips, no more fumbling or confusion.
Picture coming home with arms full of groceries, rain coming down, and only having to poke one familiar remote instead of searching for the right one. Or, for families with teens or housemates, it cuts down on lost remotes and locked-out moments.
There’s also a security angle. Fewer remotes mean fewer chances for someone to find a lost one and gain access. And if you ever need to reprogram or change your setup (say, a new roommate moves in or out), it’s a faster process with a single remote.
The Bottom Line: Making Your Chamberlain Remote Work Smarter, Not Harder
So, can a Chamberlain garage remote work with multiple doors? Absolutely—as long as you’ve got the right multi-button remote and compatible openers. The setup is straightforward, the payoff is big, and troubleshooting is mostly common sense (fresh battery, strong signal, matching code tech).
Don’t over-complicate your garage routine. Take a minute to check your current remotes, grab a compatible Chamberlain model if you need to, and enjoy a little extra simplicity every time you pull up to your house. With a little setup, you can control multiple doors with just one remote—and honestly, that’s the kind of small home upgrade that feels good every single day.
