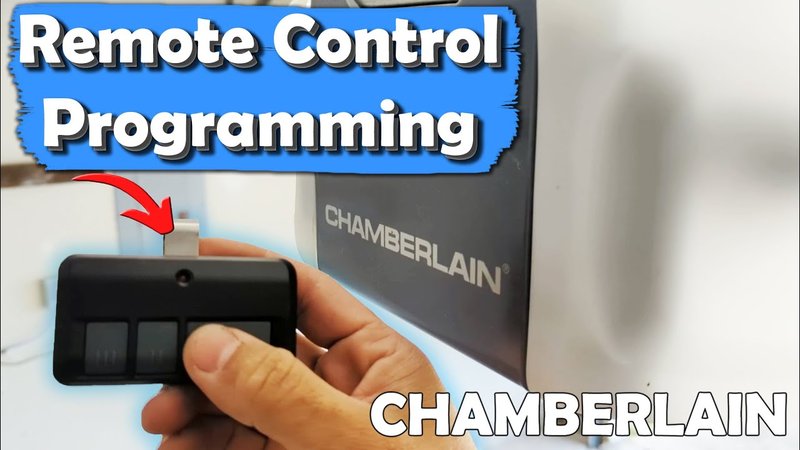
Here’s the thing: Chamberlain is one of the most common garage opener brands in North America. Their remotes look sleek, but the process to pair, code, or reset them isn’t exactly spelled out in neon lights. From syncing new remotes to troubleshooting stubborn codes, this guide walks you through best practices, explains why some remotes go haywire, and tackles the “what ifs” (like: “What if I find my old remote at the bottom of my junk drawer after programming a new one?”). Let’s break it down together, one button at a time.
Understanding Chamberlain Garage Remote Types and How They Work
Before diving into programming, it helps to understand what you’re actually working with. Chamberlain remotes might look similar, but there are a few flavors out there. Some have one button, others have three or more. You’ll see phrases like “universal remote,” “learning button,” or “rolling code” thrown around on packaging—and honestly, it’s easy to get lost in the jargon.
So, what’s happening under the hood? Most current Chamberlain remotes use rolling code technology for security. That just means the code changes every single time you press the button, making it super hard for anyone to “copy” your signal. Your remote and the garage opener are constantly in sync, like two best friends sharing a secret handshake no one else knows.
You might also run into universal remotes that promise to work with multiple brands. These usually have a similar process but may need extra steps for pairing. If you’re using a remote that came with your Chamberlain opener, things are generally smoother—everything’s designed to speak the same “language.” But if you’re mixing and matching, be ready for a couple of extra code and sync steps.
Step-By-Step Guide: Programming a Chamberlain Garage Door Remote
Let me explain—programming a Chamberlain garage remote isn’t rocket science, but it does help to have clear instructions. Here’s a straightforward, step-by-step approach:
- Find the Learn Button: Look for a small, colored button on the back or side of your garage door opener motor (usually red, yellow, purple, or green). This is your gateway to programming or resetting the code. You might need a ladder.
- Press the Learn Button: Once you’ve found it, press and release—don’t hold it down (unless you’re resetting all codes, which we’ll get to in a minute).
- Sync Your Remote: Within 30 seconds, press and hold the button on your Chamberlain remote that you want to program. The opener’s light should blink, or you’ll hear a click. That’s your sign it worked.
- Test the Remote: Step down, turn around, and try the button again. If your garage door moves, you’ve done it right. If not, repeat the steps, making sure you hit the learn button correctly.
Every model is a little different, so check your manual if you get stuck. Universal remotes may ask you to input a specific code, but the “learn button” method is the most common with Chamberlain.
How to Reset Chamberlain Garage Remote Codes Safely
Sometimes, you need a fresh start. Maybe you lost a remote and worry someone else might find it, or you bought a house with leftover codes from the previous owner. Resetting your Chamberlain remote wipes all programmed remotes from the opener’s memory—a digital “forget everything” moment.
Here’s how to reset the codes:
- Hold the Learn Button: Press and hold the learn button on the opener. After about 6–10 seconds, the LED light next to it will turn off. This means the opener has erased all paired remotes.
- Re-Pair Your Remotes: You’ll need to go back through the programming steps for every remote you want to use. Yes, it’s tedious, but it’s the only way to ensure security.
- Update Keypads, Too: If you’re using a keypad or wireless wall control, they’ll need to be reprogrammed using their own set of instructions.
Honestly, it’s a good idea to reset whenever you move into a new place or can’t account for every remote. Think of it as changing the locks—digital edition.
Troubleshooting Common Chamberlain Remote Problems
Here’s where things can get tricky. Sometimes, you’ll follow the directions, but the door just ignores you. Or the remote only works when you’re standing right next to the opener (not ideal when you want to open the garage from the street).
Here’s how to troubleshoot:
- Check the Battery: Dead or dying batteries are often the culprit. Even if the remote light comes on, a weak battery can stop the code from syncing properly. Try swapping it for a fresh one.
- Range Problems: Is the remote only working up close? Interference from LED lights, Wi-Fi routers, or metal structures can mess with the signal. Move these away or try the remote in different spots to test.
- Remote Won’t Pair: Make sure you’re pressing the right learn button, and that you’re doing it in the correct order. If you have a universal remote, be sure you’ve selected the right brand/mode before pairing.
- Multiple Remotes Not Working: If none of your remotes work, it might be the opener itself—power cycling (unplug, wait 30 seconds, plug back in) can sometimes fix weird glitches.
When nothing else works, a quick reset and reprogram can solve surprisingly stubborn issues. Kind of like restarting your laptop after a long day.
Pairing Chamberlain Remotes With Multiple Garage Doors
You might be wondering—can you use one Chamberlain remote for more than one garage door? Absolutely, if your remote has enough buttons. Think of each button as a direct line to a different opener.
Here’s how you do it:
- Assign Each Button: Most multi-button Chamberlain remotes let you program each button to a different opener. Repeat the “learn button” process for each garage door, using a new button each time.
- Label Your Buttons: If you’re forgetful (join the club), use a piece of tape or a marker to remind yourself which button controls which door.
- Mixing Brands: If you have a mix of Chamberlain and another opener brand, a universal remote might work—but always check compatibility first. Not all remotes play nice together.
It’s handy for families with multiple garages, or if you want one remote to rule them all. Just remember, each opener will still need to be programmed separately to ensure a clean sync.
Comparing Chamberlain Remotes to Universal Garage Remotes
Let me explain what makes a Chamberlain remote different from a universal remote. Brand-name Chamberlain remotes are built to pair and sync with Chamberlain openers using rolling code tech, so they’re almost always simpler to program. There’s less fiddling, fewer code inputs, and a smaller chance of compatibility issues.
Universal remotes, on the other hand, are designed to work with a wide range of openers—even those from other brands. That versatility is great if you’ve got a Frankenstein collection of openers at home. But it can be more complicated to program, often requiring you to select a brand code or follow a more involved pairing process.
Here’s a simple breakdown:
| Chamberlain Remote | Universal Remote |
| Easiest with Chamberlain openers. Built for rolling code tech. Simple, step-by-step pairing. | Works with multiple brands. Requires entering a code. May need extra steps or troubleshooting. |
| High reliability, fewer compatibility issues. | Good for mixed households, but can be hit-or-miss. |
If you want “set it and forget it,” stick with the Chamberlain brand for your Chamberlain opener. But if you need to mix and match, universal remotes have their place—just don’t expect everything to be plug-and-play.
Replacing Chamberlain Garage Remote Batteries for Reliable Performance
Let’s be honest, batteries are a sneaky cause of remote headaches—easy to overlook, but crucial for a reliable code signal. Chamberlain garage remote batteries usually last a year or two, depending on usage, but weak batteries can cause all kinds of weird behavior: short range, spotty pairing, even a total failure to reset or sync.
Here’s how to swap them:
- Open the Remote: Slide open the back panel or pop off the cover. Most Chamberlain remotes use a small coin or Phillips screwdriver.
- Replace the Battery: Check the old battery for a number (usually CR2032 or similar). Make sure you put the new one in the right way (positive side up).
- Test and Reprogram If Needed: Sometimes changing the battery erases the code memory. If your remote stops working, run through the programming steps again.
Honestly, keeping a spare battery in the junk drawer can save you an emergency dash to the hardware store. Cheap insurance for a working garage remote.
Security Tips for Coding and Syncing Your Chamberlain Garage Remote
Programming and syncing your Chamberlain remote is about more than just convenience—it’s also about keeping your home safe. Every time you pair or reset a remote, you’re controlling who has access to your garage (and, by extension, your house). Here are a few security-minded best practices:
- Always Reset When Moving In: If you’re in a new place, don’t assume the old remotes have been cleared—reset all codes and sync only your remotes.
- Don’t Share Codes: Avoid giving guests the remote or keypad code unless you trust them completely. Better to open the door for them yourself.
- Store Remotes Carefully: Don’t leave your remote visible in your car if parked outside. Thieves know where to look.
- Use the Lock Feature: Some Chamberlain openers have a wall-mounted “lock” feature that disables all remotes temporarily. Perfect for vacations.
A little caution during programming goes a long way in protecting your home. Don’t treat your garage remote like another spare key—handle it with the same care you’d give your front door lock.
When to Call Chamberlain Support or a Professional Installer
Sometimes, no matter how carefully you follow the instructions, your Chamberlain garage remote simply refuses to pair or code correctly. Wires might be loose, the “learn” button may be faulty, or you’re facing a situation the manual never anticipated—like a power surge frying the opener’s memory.
Here’s when to get help:
- You’ve Repeated Programming Steps Multiple Times: If nothing works even after resetting, there might be a deeper issue with the opener hardware.
- Remote Only Works Sometimes: This could mean faulty wiring, antenna issues, or interference too stubborn to troubleshoot on your own.
- Keypad or Wall Control Won’t Sync: Sometimes, these need a special reset or a professional’s touch, especially in older systems that resist universal remotes.
- Safety Sensors Malfunction: If the door reverses or won’t close, the problem could lie with safety sensors rather than the remote. Never bypass these—they’re there for a reason.
It’s always better to spend a little extra for peace of mind (and working garage doors) than to waste hours in frustration. Chamberlain’s support line and most local garage door pros can help get things back on track.
Closing Thoughts: Mastering Your Chamberlain Garage Remote
Programming a Chamberlain garage remote doesn’t have to feel like deciphering ancient hieroglyphics. With a little patience and the right steps, you can pair, code, and reset your remote in just a few minutes. Remember the core steps: locate the learn button, follow the correct pairing sequence, troubleshoot with fresh batteries, and don’t be afraid to reset everything for a clean slate. Always keep security in mind when syncing new remotes, and don’t hesitate to go pro if things get weird.
In the end, you’ll have a garage door that opens on cue—rain or shine—and the quiet satisfaction that comes from outsmarting a stubborn piece of technology. Here’s to never getting locked out again.
