
Let me set the scene: You finally find your grandpa’s vintage TV in the attic, only to realize the original remote is long gone. Buying a brand-specific replacement? Tough luck—they’re usually overpriced or extinct. That’s where the Philips universal remote steps in. It’s designed to talk to almost any TV model, including those retro gems from the ’90s or early 2000s. Think of it as a universal translator for your living room gizmos. But how does it actually work, and what’s the trick to syncing it with a television that predates binge-watching? Here’s how I cracked the code (literally and figuratively).
How Philips Universal Remotes Actually Work
At its core, a Philips universal remote is basically a smart controller. Instead of being hardwired to one specific brand or model, it has a giant library of *codes*—think of them as secret passwords for different TV makes and models. When you try to pair your remote to your older TV, you’re basically telling it, “Try these codes and see if my TV gets the message.” If the code is right, the TV listens. If not, it’s like speaking French to someone who only knows Spanish—nothing happens at all.
One of the coolest things about these remotes is that they let you *sync* with not just TVs, but also DVD players, soundbars, or even those ancient VCRs you swore you’d digitize one day. That’s the magic of being “universal”—you can cut down on clutter, but it does mean the setup process is a tad less straightforward than just popping in batteries and pushing Power.
But here’s the catch (there’s always a catch, isn’t there?): older TVs might not always “get” the new remote right away. The language changes, buttons evolve, and sometimes the codes in the manual are missing or out of date. It’s a little like trying to pair your Bluetooth headphones to a rotary phone—not impossible, but you’ll need a workaround.
Finding the Right Code for Your Older TV
Every universal remote journey starts with the hunt for the *right code*. Each TV brand—and honestly, sometimes even each model—has its own secret handshake. Philips remotes usually come with a booklet or a little paper packed full of 3- or 4-digit numbers. If you’ve lost that (don’t worry, we all lose those), you can often find the codes online by searching for your remote’s model and the TV brand.
Say you have an old Toshiba TV. You’d look for the Philips universal remote code for Toshiba—usually listed as something like 013, 049, or 089. The remote needs this code to communicate with your TV, kind of like inputting WiFi passwords until one finally connects.
- Manual Entry: Entering codes by hand feels old school but is reliable. Just punch in the numbers, cross your fingers, and hit the Power button. If nothing happens, try the next code for your brand.
- Auto Search: Some Philips remotes let you scan through all possible codes automatically. It’s slower, but means less flipping through manuals (or Googling in frustration).
- Direct Code Search: This lets you cycle through codes for a single brand. It’s quicker than full auto search but less precise than manual entry.
Let me explain: I once had an old Sony Trinitron that refused to play nice with my shiny new Philips remote. I must’ve tried ten different codes, slowly squinting at the TV after each one until—boom—the Power button worked. Patience is your friend here.
Step-by-Step: How to Program Your Philips Universal Remote
You’ve got your code, you’ve got your remote, and your TV—well, it’s waiting for orders. Here’s a clear, beginner-friendly way to do the initial setup. No jargon, I promise.
- Step 1: Install the Batteries
Open the back of the remote, pop in fresh AA or AAA batteries (depending on the model), and snap the cover shut. Dead batteries are sneakier than you’d think; I’ve lost too much time troubleshooting only to realize, oops, the batteries were ancient. - Step 2: Turn On Your TV Manually
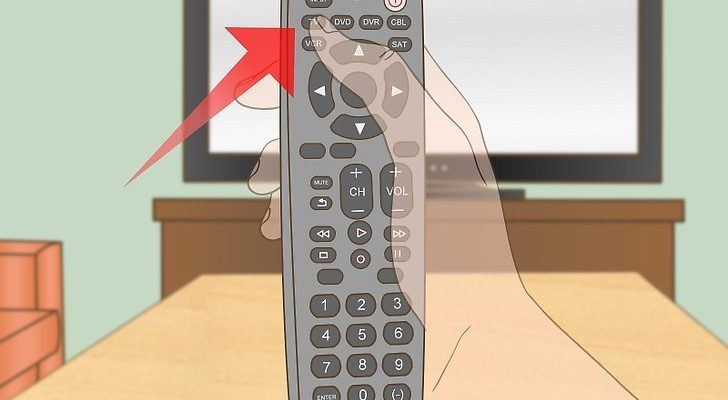
Most older TVs need to be on so the remote can send pairing signals. Find the Power button on the TV itself and switch it on. - Step 3: Enter Programming Mode
Usually, you’ll need to hold down the “Setup” or “Code Search” button until a little LED light stays on. Sometimes you’ll hold “TV” + “Power” or a similar combo. Check your remote’s manual for specifics, but most work in a similar way. - Step 4: Enter the TV Code
Key in that magic code you found earlier. If the light blinks or stays on, you’re golden. If it flashes and then turns off, try the next code on your list. - Step 5: Test the Remote
Press Power, Volume, and Channel buttons. If your TV responds, congrats! If not, repeat with a new code or try auto search mode.
Here’s the thing: sometimes you need to try all three methods before you get a working pairing. It’s a little tedious, but the payoff—a clutter-free coffee table—makes it worth the effort.
Troubleshooting: When Things Don’t Go As Planned
So you’ve followed all the steps, but your Philips universal remote still won’t play nice with your older TV. Frustrating, right? Don’t worry—here are some real-world strategies to get things back on track.
Check the batteries first. Seriously. I once spent thirty minutes muttering at a remote only to discover the batteries looked fine but were just a tad too old to deliver a strong signal. Swapping in new ones can make all the difference.
Next up, point the remote directly at the TV’s sensor. Older TVs have specific infrared (IR) receivers—usually a tiny, dark window on the front. Make sure nothing’s blocking it (even dust or glass can mess with the signal). I sometimes pretend I’m aiming a laser pointer at a cat; it needs to be that precise.
If the remote isn’t syncing, try resetting it. Most Philips remotes let you reset by removing batteries, pressing each button once (to drain any leftover juice), and then reinstalling the batteries. This “soft reset” often clears any weird glitches.
Sometimes, the code just isn’t in your remote’s library—especially if the TV is a really old or rare model. If none of the codes work, your best bet is to use the auto search mode or check online forums for updated codes. It’s the digital equivalent of asking neighbors if anyone has a missing puzzle piece.
Comparing Universal Remotes to Original Brand Remotes
You might be wondering: why not just hunt down the TV’s original remote? Well, here’s my take: universal remotes like the Philips model are way more flexible. They can control multiple devices, so you’re not juggling remotes like a circus performer just to watch a movie or change the channel.
Brand-specific remotes do have an edge in some areas—if you’re after full functionality like special menu buttons or unique smart TV features, the original remote might be worth hunting down (if you can even find it). But for basic stuff—power, volume, channel, input—the universal remote is a lifesaver.
Another perk: modern Philips remotes tend to have updated code libraries. That means they’re more likely to work with newer devices, but sometimes a little trial and error is needed for older equipment. I’d say, unless you need deeply specialized functions, going *universal* is just plain convenient.
Dealing with Really Ancient TVs: What If Nothing Works?
Let’s say your TV is truly a relic—maybe from the ’80s or early ’90s. Some of these older models weren’t designed for remote control, or their IR technology was a bit… let’s call it primitive.
If the Philips universal remote refuses to pair, you’ve got a couple of options:
- Add an IR Extender: Some modern universal remotes work better when paired with an external IR extender. These little gadgets boost the signal, helping it reach fussy or old TV sensors.
- Remote Extender Boxes: There are aftermarket remote relay kits that pick up the universal remote’s signal and “translate” it for the old TV. Think of it as a translator at the UN, only for your living room gadgets.
- Manual Controls: Sometimes all you can do is operate the TV using the buttons on the panel. Not ideal, but hey, it’s a built-in backup plan.
I once inherited a “classic” RCA set that just wouldn’t budge, no matter what code I threw at it. Eventually, I admitted defeat and just stuck to the channel knob. Your mileage may vary, but don’t be discouraged—most TVs from the late ’80s onward will work with universal remotes after a few tries.
Resetting or Re-Syncing Your Philips Remote
Let’s say you’ve changed TVs, or maybe you just want to use your remote for another device. No need to toss it and start over—most Philips universal remotes let you reset to factory settings and re-sync with new devices.
The reset process is simple but a bit shy, so don’t blink:
- Remove the batteries and leave them out for about a minute.
- Press each button on the remote once—this drains any stored energy and clears previous codes.
- Reinstall the batteries. The remote should now be back to its default “blank slate.”
- Repeat the original programming steps: enter setup mode, input the code, and test.
If you want to pair additional devices (say, a DVD player or old cable box), just repeat the setup steps for each one, using the right codes. Philips remotes can “remember” multiple devices—they’re smarter than you’d think.
Pro tip: Even after a reset, some remotes hang onto one or two stubborn codes. If you’re still having issues, consult the remote’s manual for a “deep reset” or look for help on tech forums. Someone out there has probably run into the same issue.
Tips for Making Your Philips Remote Experience Smoother
Honestly, programming a Philips universal remote for an older TV doesn’t have to be a headache. With a few tricks up your sleeve, the whole process can be way easier:
- Keep the Code List Handy: I learned the hard way to tape the code list to the back of the remote. Saves you the next frantic Google search.
- Label Your Devices: If you’re controlling multiple gadgets, stick a label on each so you don’t forget which button does what. (Voice of experience: pressing “DVD” when you wanted “TV” just leads to a whole lot of nothing.)
- Check Online for Updates: Philips sometimes releases new code lists online—especially for newer universal remotes. Bookmark their support page.
- Patience is Key: Sometimes you’ll nail it first try, other times not so much. I promise, after the third or fourth attempt, you’ll start feeling like a universal remote ninja.
Wrapping It Up: Bringing Old TVs Back to Life
Getting a Philips universal remote to work with an older TV feels a little bit like resurrecting a forgotten gadget from the past. There’s a learning curve, sure, but once you find the right code and see that familiar green or red light on your TV flicker to life—from the comfort of your couch—it’s a small but satisfying victory.
Learning to pair, sync, and even reset your remote gives you a new appreciation for the technology hiding in plain sight. If you’ve got a stubborn TV and a universal remote, don’t give up—half the battle is just sticking with it until everything “clicks.” I honestly love the moment when a decades-old television suddenly responds to a modern remote like it just remembered how to listen.
So go ahead and give that old TV one more shot at stardom. With a Philips universal remote in hand—and a bit of patience—you’ll soon have both your tech and your sanity in sync again.