Honestly, Westinghouse remotes are designed to make your life easier, but the first time you use one can be a little intimidating. There’s nothing worse than sweating it out on a summer day, remote in hand, wondering if you’re about to launch a rocket instead of starting your fan. I promise, once you know the basics, using the remote becomes second nature—no tech expertise required.
Getting Familiar With Your Westinghouse Ceiling Fan Remote
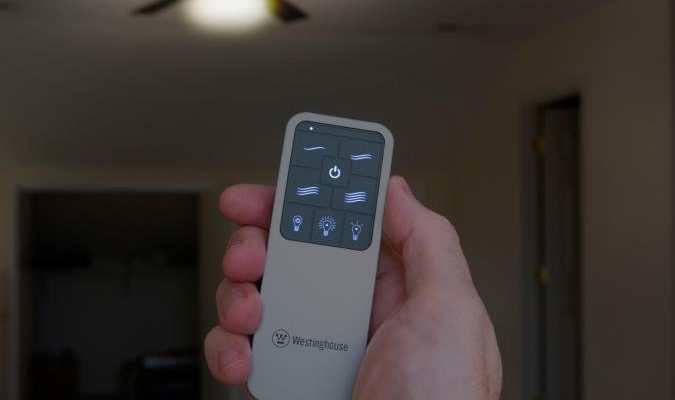
Let me explain what you’re actually holding. A typical Westinghouse ceiling fan remote isn’t just some generic clicker; it’s tailored for your fan model and packed with options. Most models have three fan speed buttons—often marked as High, Medium, and Low (sometimes even numbered 1-2-3). There’s usually a separate button for the light, and sometimes a reverse button that changes the fan’s direction for summer or winter modes.
You might also notice a small dip switch panel under the battery cover. This little section helps your remote and fan “talk” to each other—sort of like Bluetooth pairing, but with old-school tech. If you see extra labels like “Sync,” “Pair,” or “Code,” don’t panic. They’re just there to help the remote find and connect to your specific fan (handy if you have more than one Westinghouse fan in the house).
Here’s the thing: every remote is just a shortcut to your fan’s built-in settings. If you ever lose the remote (we’ve all had it disappear into couch cushions), you can still control the fan manually from the pull chains. But with the remote, you’ve got the magic wand for instant comfort.
How To Set Fan Speed On a Westinghouse Ceiling Fan Remote
Let’s get hands-on. First, make sure your remote has fresh batteries. Weak batteries mean weak signals—and sometimes no signals at all. If your fan doesn’t respond, this is the first thing to check. Pop off the battery cover and insert the recommended size (usually AAA or 9V, but double-check the label).
Now for the actual speed control. Here’s how most remotes work:
- High: For those muggy days when you need maximum airflow. Press this button once; you should hear a faint *click* or see the fan blades speed up within a few seconds.
- Medium: Perfect for steady, gentle air—think dinner parties or relaxed afternoons. Tap this button, and the fan will slow down to a comfortable middle speed.
- Low: Great for nighttime or quieter moments. Pressing this button gives you that soft, barely-there breeze.
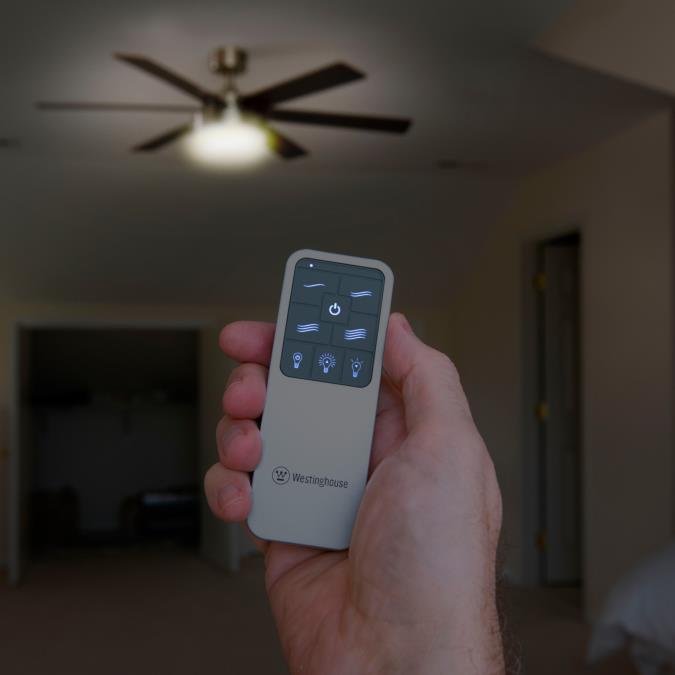
The response isn’t always instant, so give it about 2-5 seconds. If nothing happens, point the remote directly at the fan’s receiver (usually in the ceiling canopy). Sometimes, moving just a foot or two closer makes all the difference.
You might be wondering: what if the fan is stuck on one speed or ignores your commands? Nine times out of ten, the culprit is a drained battery, interference from other remotes, or a sync issue between your remote and the fan.
Troubleshooting Common Remote and Fan Speed Problems
Setting your fan speed should be simple, but things can get finicky. If you press a button and nothing happens—don’t worry, you’re not cursed. Troubleshooting is part of owning any remote-controlled device.
First, double-check the remote’s power. Dead or misaligned batteries are the usual suspects. Remove the batteries, wipe the contacts, and re-insert them the right way. If the remote still won’t work, try changing the batteries completely.
Next, consider signal interference. If your neighbor’s fan remote works on the same frequency, or you have another Westinghouse device in the house, your remote signal might be getting drowned out. In this case, you’ll need to “reset” or “pair” your remote with your fan. Look for a tiny sync or code switch panel—often inside the battery compartment. Adjusting these dip switches so they match the ones on your fan receiver basically gives your remote a private channel.
If the fan still won’t budge or only operates at one speed, you might be dealing with a wiring issue or a faulty receiver in the ceiling. At this point, it’s best to consult your fan’s manual or contact Westinghouse support. But most problems are solved with fresh batteries and a quick check of the dip switches.
How To Sync or Pair Your Westinghouse Remote With the Ceiling Fan
Sometimes pressing the right speed button isn’t enough—especially if you’ve just installed the fan or moved into a place with an existing setup. Pairing (or syncing) your remote tells it which fan to control, especially important if you’ve got multiple ceiling fans in the house.
To do this, switch off power to the ceiling fan at the wall or breaker (safety first). Next, remove the remote’s battery cover to access the dip switch panel. Open the canopy cover on the ceiling fan (usually a couple of screws) and find a similar set of switches on the receiver unit.
Set both sets of switches to the same code. It’s a bit like giving your devices a secret handshake. Replace the covers, restore power, and try the remote again. Press the fan speed buttons and see if the blades respond. If they do, you’re all set.
Pro tip: Keep a note or photo of your dip switch code somewhere safe, so you don’t have to guess next time something goes wrong.
Resetting Your Westinghouse Ceiling Fan Remote
Let’s say your remote is acting wonky—turning the fan on but not adjusting speeds, or doing nothing at all. Resetting can help clear up the confusion. The process is almost always quick:
- Remove the batteries from your remote.
- Wait 10–20 seconds (this lets any lingering signals fade out).
- Reinsert the batteries and try setting the speed again.
If this doesn’t work, turn off power to the fan for one minute (at the breaker or wall switch), then turn it back on. Sometimes both the fan and remote need a “fresh start” to reconnect.
Honestly, sometimes the old “turn it off and on again” advice still works wonders—even for ceiling fans.
Comparing Westinghouse OEM Remotes With Universal Ceiling Fan Remotes
If you’ve lost your original Westinghouse remote or it’s bitten the dust, you might be tempted to buy a universal remote. Here’s where things can get tricky. While many universal ceiling fan remotes promise broad compatibility, not every model plays nicely with all fan brands or features.
Original (OEM) Westinghouse remotes are designed to match the specific code, sync, and speed settings for your fan’s receiver. Universal remotes usually come with adjustable dip switches or programming steps, but some advanced features (like light dimming or reverse mode) might not work perfectly.
If you need a quick fix, a universal remote can get your fan spinning again. But for full functionality—every speed, every mode, reliable pairing—the branded Westinghouse remote is usually the safer bet. Plus, the code pairing process is much less of a guessing game.
Maintaining Your Westinghouse Ceiling Fan Remote for Best Performance
Even the best remotes need a little TLC from time to time. Here’s how to keep things running smoothly:
- Regular battery checks: Don’t wait for the remote to die completely. Replace the batteries every year, or whenever you notice laggy response.
- Keep it clean: Dust and grime love to hide around the buttons. Wipe the remote with a slightly damp cloth every so often. Avoid harsh cleaners or soaking the remote.
- Protect it from drops: Remotes may seem tough, but a bad fall can jolt internal contacts loose or break the battery door. Store it in a safe, easy-to-reach spot.
- Review the manual: Each fan model has its own quirks and recommended maintenance. Having the manual handy can save you time if problems pop up.
Staying ahead of these simple steps saves you hassle—and ensures your fan speed is always just a click away.
Why Setting Fan Speed Matters for Comfort and Energy Efficiency
You might not think much about fan speed until you need to cool off—fast. But choosing the right speed isn’t just about comfort. It can actually save you money. Running the fan on high all the time isn’t always better. For cool evenings or mild days, low or medium speed is usually enough. The fan uses less energy at lower speeds, and your room stays just as pleasant.
Here’s a tip: In the summer, set your Westinghouse fan to spin counterclockwise and use a higher speed to create a wind chill effect. In winter, reverse it (clockwise at low speed) to gently push warm air down from the ceiling, improving your home’s heating efficiency.
Bottom line: Mastering your Westinghouse ceiling fan remote means finding the right speed for every moment—saving sweat and cents along the way.
Closing Thoughts: Confidently Controlling Your Ceiling Fan
Once you get the hang of your Westinghouse ceiling fan remote, you’ll wonder how you ever lived without it. No more awkward pull chains or climbing on chairs. You set your ideal breeze, kick back, and relax. The remote puts total comfort in your hand—whether you need quick cooling or just a gentle spin to move the air.
If things ever go sideways—unresponsive buttons, odd speeds, or sync problems—you know exactly where to start. Fresh batteries, sync the code, reset if needed, and don’t be afraid to consult your manual. Remember, a little patience pays off. With just a few clicks, your fan will be humming along at the perfect speed, every time.