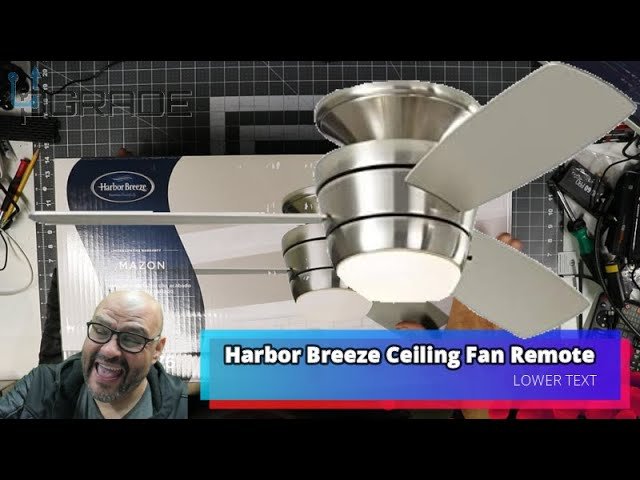
Most Harbor Breeze remotes work with both newer and older models, but each fan and remote pairing is like matching dance partners. If you take your time and trust the process, syncing up is pretty painless. It all comes down to understanding the remote code, resetting your system, and giving your fan and new remote a way to “talk” to each other. Let’s break down the steps, avoid the most common headaches, and get that breeze blowing again—without stress.
Understanding Your Harbor Breeze Remote Control
Before getting started, it’s smart to know what kind of Harbor Breeze remote you have, and if your ceiling fan supports remote pairing. Harbor Breeze, a brand sold mainly by Lowe’s, offers remotes with different designs: some are handheld, some mount on the wall, and others are universal (meant to work with multiple brands). The most common types use **radio frequency (RF)** signals, which let you operate your fan from across the room—no need for line of sight.
Take a close look at the new remote’s packaging or manual. Does it say it’s a *universal Harbor Breeze remote* or a model-specific one? Universal remotes try to cover all the bases, but sometimes run into issues with unique or older fan models. If you’re unsure, check your fan’s model number (often found on the base or in the original manual) and cross-reference online to make sure the remote is compatible.
Another thing to notice: almost every Harbor Breeze remote uses **DIP switches** (those tiny switches you flip with a pen or screwdriver) or a “learn” button for syncing. Understanding which system you have will shape how pairing works. Honestly, this little detail trips up more people than you’d expect.
Gathering Tools and Preparing for Installation
Let me explain—adding a new Harbor Breeze remote isn’t just about swapping batteries and pressing buttons. You’ll usually need a few basic tools, and a bit of patience. Here’s what you’ll want to have on hand:
- Small Phillips-head screwdriver (for opening fan housing or battery compartment)
- Fresh AAA or 9V batteries (depending on your remote model)
- Ladder or sturdy step stool (for safe access to the fan canopy)
- Your new Harbor Breeze remote and manual
- Optional: a flashlight (to peek inside tight spaces)
Safety first: before you climb up, always turn off the fan at the wall switch and flip the circuit breaker for that room. Yes, it seems like overkill for just a remote, but better safe than sorry when poking around live wires. If you need to remove the fan canopy (the part at the ceiling that covers wiring), make sure to have a spotter if you’re uneasy with heights or tools.
You’ll also want to check that the receiver—the little black box inside the fan that “talks” to the remote—is present and correctly wired. Sometimes, older fans don’t have a receiver and need one installed, or previous DIY jobs have left things loose. A well-lit, organized space makes the process smoother and keeps those tiny screws from vanishing into the carpet forever.
Locating and Understanding the Fan Receiver
You might be wondering: what exactly is the receiver, and why does it matter? Here’s the thing—your Harbor Breeze remote only works because of this receiver, which acts like a bridge between your button-pressing and the fan’s motor. Without it, you could be mashing remote buttons all day with nothing happening.
The receiver is usually tucked inside the fan’s canopy at the ceiling. Sometimes you’ll see a slim, rectangular box with wires running into it. To get to it, gently lower the canopy (after taking out the screws). If you spot a label that says “Harbor Breeze” along with a series of DIP switches or a small “learn” button, you’re in the right place.
Look for the battery compartment on your new remote, too. Most models have their own set of DIP switches behind the battery door. You’ll sync these with the receiver’s switches to make sure the fan listens to your specific remote and ignores signals from the neighbor who just got a similar fan.
Pro tip: Take a picture of the receiver’s wiring and switch layout before touching anything. If you get lost or accidentally bump a wire, you’ll be glad to have a visual reference.
If your fan doesn’t have a receiver, or if it’s an older-style pull-chain model, you’ll need to install one. Universal Harbor Breeze remote kits include both the remote and a compatible receiver that you can wire in. This process adds a few extra steps (and patience), but usually pays off with much smoother fan control.
Setting the Remote Code With DIP Switches
Let’s talk DIP switches. These tiny toggles are the secret code that lets your Harbor Breeze fan and remote communicate without interference from other remotes in your building. If you’ve ever set up a garage door opener or an old-school TV remote, you’ll recognize the concept.
Here’s how the process works step-by-step:
- Open the battery compartment on the new remote.
- Locate the row of 4 or 5 tiny switches—these are the DIP switches.
- Climb up to your ceiling fan’s receiver, and find its matching set of DIP switches.
- Make sure both sets of switches match exactly. If the remote is set to “up, up, down, up,” then the receiver should be set exactly the same way.
- Use a small screwdriver or even a paperclip to flip the switches carefully.
Why does this matter? If your switches don’t match, the remote and fan might ignore each other entirely—or worse, trigger both your fan and your neighbor’s at the same time. Matching DIP switches isolates your fan’s code.
Honestly, this is the most fiddly part of the process. Double-check your settings before closing up the battery door. Some remotes use “off” positions marked down, others up, so always check your manual or the diagram inside the battery compartment. Once done, replace the remote battery and reattach the fan canopy.
Pairing a Harbor Breeze Remote With a Learn Button
Not every Harbor Breeze remote system uses DIP switches. Many newer models (and some universal kits) come with a small “learn” button, which is designed to make pairing easier—no switch flipping required. If you see this button on your receiver or remote, the pairing process changes a bit.
Here’s how to pair with the “learn” button system:
- Install fresh batteries in your new remote.
- Restore power to your ceiling fan (flip the breaker or turn on the wall switch).
- Within 30 seconds of restoring power, press and hold the “learn” button on the remote (or receiver) for about 3-5 seconds.
- The fan’s light should blink, beep, or the blades might move briefly—this signals successful pairing.
If nothing happens, try shutting off power again and repeating the steps. Timing matters here: if you wait too long after turning the power on, the fan’s receiver might “time out” and ignore new signals.
You might be wondering what happens if you mess up this step. No worries—the receiver won’t be damaged. Just repeat the process until you see that telltale blink or hear a beep. It’s a bit like programming a universal TV remote: sometimes it takes two tries, but success is usually close.
Resetting and Troubleshooting Your Harbor Breeze Ceiling Fan Remote
Sometimes, even after following the steps, your new Harbor Breeze remote doesn’t seem to work. Maybe the fan ignores it, or only one function (light or fan speed) responds. Here are a few things to try before ripping everything apart or calling customer service.
- Check the batteries: Old or weak batteries are the number one culprit for remotes not working. Always start with fresh ones.
- Re-check DIP switch or “learn” code: If you set the code wrong or the switches slipped, the remote won’t sync.
- Ensure proper wiring: If you recently installed the receiver, double-check that all wires are secure and correctly connected—loose wires mean no power.
- Reset the receiver: Turn off power to the fan at the breaker, wait 30 seconds, then turn it back on. Re-pair the remote (using DIP switch or “learn” button as needed).
- Test nearby electronics: Sometimes, other RF devices (garage openers, baby monitors) can interfere. Try pairing again after turning off these devices.
If you hear a beeping sound or see the fan light blinking unexpectedly, that’s usually the receiver signaling it’s in pairing mode—or that it’s getting confused by crossed signals. Repeating the process slowly, step by step, usually solves most problems.
Comparing Harbor Breeze Remotes: Universal vs. Brand-Specific
You might face a choice: buy a genuine Harbor Breeze remote or go for a universal model. Here’s what matters. Brand-specific remotes are built to match your fan and its receiver perfectly—usually fewer headaches, but sometimes harder to find or a bit pricier.
Universal Harbor Breeze remotes offer great flexibility. They work not only with Harbor Breeze ceiling fans but often with other major brands. They come with their own receiver, so you can modernize older, pull-chain fans or even upgrade another brand’s unit at the same time.
Here’s a quick comparison:
| Genuine Harbor Breeze Remote | Universal Remote Kit |
|
|
In my experience, if you’re replacing a lost or broken remote and your fan is less than 10 years old, a genuine replacement saves time. If your fan is older, has no remote capability, or you want universal features (like timers), a universal kit is the way to go.
Alternative Control Options for Your Harbor Breeze Ceiling Fan
Let’s say you’ve tried everything and the remote still won’t sync—or maybe you’re tired of hunting for remotes between couch cushions. You do have alternatives that keep your fan usable and might even add convenience.
- Wall-mounted remote controls: Some Harbor Breeze kits offer wall mounts, which replace a typical light switch and send RF signals to the receiver. No more digging for remotes.
- Smart home integration: A few universal kits support Wi-Fi, Alexa, or Google Assistant. This lets you control your fan with voice or from your phone (look for smart ceiling fan remote kits).
- Manual pull chains: As a last resort, you can always keep using your fan with its built-in pull chains for speed and light, even if the remote system is giving you trouble.
Here’s the thing: technology should make your life easier, not harder. If upgrading to a smart remote or wall control fits your lifestyle, don’t be afraid to adapt. Harbor Breeze’s kits are designed for flexibility, so you’re not chained to one system or remote forever.
Final Thoughts: Keeping Your Harbor Breeze Ceiling Fan Remote Working Smoothly
Syncing up a new Harbor Breeze ceiling fan remote feels tricky at first, but most of the battle is just knowing what to look for. Whether you’re matching DIP switches, pairing with a learn button, or wiring in a universal receiver, the process is actually pretty forgiving. The main thing is to go slow, double-check your codes, and make sure everything fits together.
If your fan and remote still won’t communicate, don’t panic. Batteries, wiring, or crossed codes can all be solved with a little patience. And if you ever feel stuck, it’s okay to ask for help or explore alternatives—there’s always another way to enjoy your cool, comfortable space.
One last bit of advice: Whenever you finish pairing your new remote, stash the manual and a spare battery somewhere handy. Future-you will thank you the next time the dog eats the remote or you need to reset the code during a move. Here’s to many breezy days ahead with your Harbor Breeze fan working just the way you want.
