
Picture your Ecobee Smart Remote as a sort of “traffic light” for your home’s climate control. A green glow might mean all’s well, while a sudden red flash could be a sign to pull over and check what’s wrong. If you’ve just unboxed your Ecobee hardware, or found yourself puzzled by flickering LEDs late at night, you’re not alone. These little signals are there to guide you, not stress you out.
Ecobee’s remotes, officially called SmartSensors, pop up in a lot of households looking to balance temperature room-by-room. They pair wirelessly with the main Ecobee thermostat and help even out hot and cold spots. But when their status lights act up, it’s easy to feel lost. Let’s break down what those lights mean, why they light up, and how you should react—like reading tiny text messages from your thermostat.
Ecobee Smart Remote: What Is It and How Does It Work?
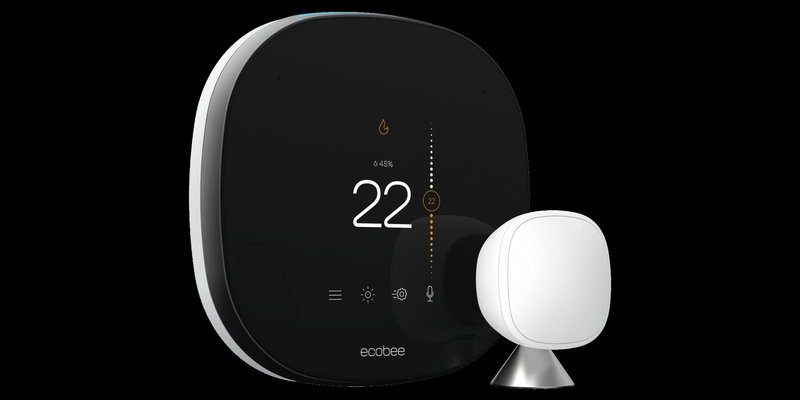
The Ecobee Smart Remote, better known as the SmartSensor, is a small wireless device designed to make your thermostat smarter. Think of it as a temperature and motion detective. You place it in rooms where you care most about comfort—like your bedroom or home office. Instead of just measuring the air near your main thermostat, the SmartSensor picks up temperature and whether someone’s actually in the room.
Here’s the thing: the Ecobee Smart Remote doesn’t try to control your HVAC directly. It talks with your main Ecobee thermostat, sending data about room conditions and occupancy. Together, they create a smarter, more customized climate for your home. If you set your Ecobee to keep occupied rooms comfortable, the remote plays a starring role in deciding when the heat or AC should kick on.
What sets the Ecobee Smart Remote apart from a regular universal remote or other brands is its focus on feedback. That’s where those little lights come in—they show you when the sensor is working, pairing, or needing attention. If you’ve ever struggled with syncing a device or wondered if your battery was dead, the Ecobee’s visual codes make troubleshooting less mysterious.
Honestly, these remotes are pretty user-friendly, but you do need to understand their language. Whether you’re pairing for the first time or noticing an unusual light pattern, knowing what each color means can save you a lot of time and frustration.
Decoding Ecobee Smart Remote Light Colors
Let’s be real: no one wants to guess what a blinking light means. Ecobee uses LEDs on the Smart Remote to signal specific states. Here’s how to understand each color and pattern.
- Green Light: This is your “all clear.” When the Ecobee Smart Remote flashes green briefly, it usually means successful pairing with your thermostat. It’s the device’s way of giving you a thumbs up. If you see a solid green after setup, you’re good to go.
- Amber or Orange Light: This typically signals it’s in pairing mode. Maybe you’re syncing a new sensor, or you pressed the pairing button. The amber light is your cue to follow app instructions to finish setup. Don’t worry if it blinks for a bit—sometimes devices take a second to connect.
- Red Light: Honestly, this is the “stop sign” of your Ecobee kit. A red flash or solid red usually means trouble: low battery, lost connection, or a pairing failure. If you see this, your remote needs help.
- No Light: No news *can* be good news, but if your sensor isn’t responding, the battery may be dead or the device could be out of range.
Here’s a quick story: I once spent 20 minutes pressing the pairing button, wondering why nothing happened, only to realize the red flash was basically screaming, “Change my battery!” Light codes aren’t just for show—they save you from endless trial and error.
Pairing and Syncing: Light Signals During Setup
Getting your SmartSensor paired with the Ecobee thermostat can feel a bit like matching socks—you need both parts in the right mood. When you start the pairing process, the remote will usually blink amber or orange, signaling it’s ready to connect. This is your cue to open the Ecobee app and start the “Add Sensor” steps.
Once pairing begins, keep the remote close (within about 15 feet) of the main device. The amber light tells you it’s searching. When pairing succeeds, the LED gives you a green flash—that’s your victory dance. If things go wrong and you spot a red light instead, you’ll need to reset and try again, often by removing and reinserting the battery.
Syncing issues crop up most often when there’s a weak signal or interference (think thick walls or too much distance). If you’re stuck in “pairing mode,” move the remote and thermostat closer together. Sometimes, even a couple feet makes the difference between a happy green flash and the dreaded red.
Here’s a pro tip: If pairing still fails, check for firmware updates in your Ecobee app. Occasionally, glitches are fixed with a quick refresh. The light codes give you a running commentary, so trust their feedback—it keeps you from guessing in the dark.
When the Red Light Appears: Troubleshooting Ecobee Remote Problems
Red means stop—and in the world of Ecobee Smart Remotes, it’s never something you should ignore. The most common reason for a red light? Dead or dying batteries. These remotes run on coin-cell batteries (usually CR2032), and a red flash is often their dramatic way of asking for a replacement.
But that’s not the only cause. Sometimes, a red light means the remote has lost its connection to the Ecobee thermostat. Maybe you moved the sensor too far away, or there’s interference from other wireless gadgets. Try relocating it closer and see if the light changes. Still seeing red? It could be time for a simple reset.
To reset, pop the sensor’s back cover off, remove the battery for a minute, then reinsert it. The device should reboot into pairing mode (amber light). If it flashes green after pairing, you’re back in action. If not, check your Ecobee’s main panel for error messages or connectivity status.
Honestly, don’t ignore persistent red lights. If a battery swap and reset don’t work, you might be dealing with a faulty sensor, which could mean reaching out to Ecobee support. Either way, those lights are your early-warning system—think of them as your remote’s way of sending an SOS.
Understanding Battery Issues and Replacement Steps
Let me explain: dead batteries are the silent struggle of every smart device. If you notice your Ecobee Smart Remote isn’t showing any lights, doesn’t respond, or flashes red, it’s likely time to swap the coin-cell battery.
Here’s how you do it step-by-step:
- Flip the SmartSensor over and gently slide off the back cover.
- Carefully remove the old CR2032 battery. Sometimes a thin plastic tab helps pop it out.
- Insert a fresh battery, positive (+) side facing up. You’ll usually hear a soft click.
- Replace the back cover and hold the sensor near your thermostat to check for a startup light (amber, then green if successful).
After a battery change, you might need to re-pair the sensor. If you see a green light, you’re all set. But if the light stays off or goes red, repeat the pairing steps or check for physical obstructions. It makes sense to keep spare CR2032 batteries handy—these sensors are tiny, but they burn through power just like any other wireless gadget.
One last tip: Don’t use old or expired batteries, or you might find yourself troubleshooting all over again in a week.
Common Ecobee Smart Remote Sync and Reset Problems
You might be wondering why, even after following the steps, your sensor just won’t play nice. Sometimes, sync problems pop up because of wireless interference—Wi-Fi routers, baby monitors, or even thick concrete walls can make SmartSensors feel isolated.
If the sensor’s light endlessly blinks amber without going green, try these troubleshooting steps:
- Move the sensor and thermostat into the same room for pairing.
- Remove and replace the battery to force a fresh start.
- Check the Ecobee app for any pending updates or error messages.
- Clear other wireless gadgets from the area temporarily during setup.
Occasionally, you’ll need to fully reset the device. To do this, remove the battery, wait 60 seconds, then reinstall it. Hold it near the Ecobee thermostat and begin the setup process again. A successful reset often leads to a quick green flash, while a stubborn device may keep blinking amber or go red—both signs to try once more or consider a warranty replacement.
Here’s an insight: Avoid pairing during electrical storms or Wi-Fi outages. These small devices are more sensitive than you’d expect, and a little patience can save a lot of aggravation.
The Ecobee Smart Remote’s light system isn’t just functional—it’s your first line of defense against setup frustrations. Learning to “read” it can save hours of guesswork.
Comparing Ecobee Smart Remote to Universal Remotes and Alternatives
So why stick to Ecobee’s own SmartSensor instead of a universal or third-party remote? Here’s the thing: Ecobee Smart Remotes are uniquely tuned for their thermostats, using secure wireless protocols and giving you clear feedback with their light codes. Most universal remotes focus on entertainment systems or broad device control—they won’t measure temperature, detect occupancy, or sync directly with Ecobee’s code.
For example, a universal smart remote might control your TV or lights, but it’s not going to help your thermostat know when you’re reading in the guest room. Ecobee’s SmartSensor is focused on climate comfort and seamless communication. Its light system is there to guide you through setup and ongoing use, not just power things on and off.
If you’re comparing with other brands (like Nest or Honeywell), the main difference is in the clarity of feedback—Ecobee’s light codes make troubleshooting more visual and beginner-friendly. That said, no system is perfect. Some users choose to supplement Ecobee sensors with third-party smart home gadgets, but you’ll often lose those helpful diagnostic lights and straightforward syncing.
Put simply, if you want plug-and-play ease and clear status indicators, the Ecobee Smart Remote is tough to beat.
How to React to Ecobee Smart Remote Light Patterns
When your Ecobee Smart Remote blinks, pauses, or stays dark, your next move depends entirely on the color and pattern. Here’s a breakdown of what to do for each scenario:
- Green Flash: Smile and move on! The sensor is paired and working. No action needed.
- Amber/Orange Blink: Begin pairing steps in your Ecobee app. If it stays amber for more than a couple minutes, move it closer to the thermostat and try again.
- Red Light or Flash: Check or replace the battery first. If the red persists, try a reset by removing and reinserting the battery. Still stuck? Consult the Ecobee app or support for further troubleshooting.
- No Light: This usually means low/dead battery or a lost connection. Swap the battery, then try pairing. If still nothing, your sensor might be out of range or require a full reset.
Don’t stress if things don’t work on the first try. These sensors are robust, but wireless tech occasionally throws curveballs. Trust those LED signals—they’re more precise than most error messages and can help you zero in on the issue quickly.
Honestly, it’s a bit like learning a secret handshake. Once you know the routine, you’ll handle Ecobee Smart Remote lights with zero anxiety.
Final Thoughts: Making Sense of Ecobee Smart Remote Lights
Living with smart devices means decoding their symbols—and the Ecobee Smart Remote’s lights are some of the clearest around. Once you get familiar with green for “all good,” amber for “pair me,” red for “help,” and a dark sensor for “check my battery,” you’ll find setup and daily use a breeze. Most problems have simple fixes: swapping a battery, moving the sensor closer, starting a fresh pairing, or giving the device a quick reset.
If you ever feel overwhelmed by flashing lights, just remember they’re there to point you toward a solution, not add stress. Little by little, those codes become second nature. With a bit of patience (and maybe a spare CR2032 or two), you’ll keep your Ecobee system running smoothly and your home perfectly comfortable.