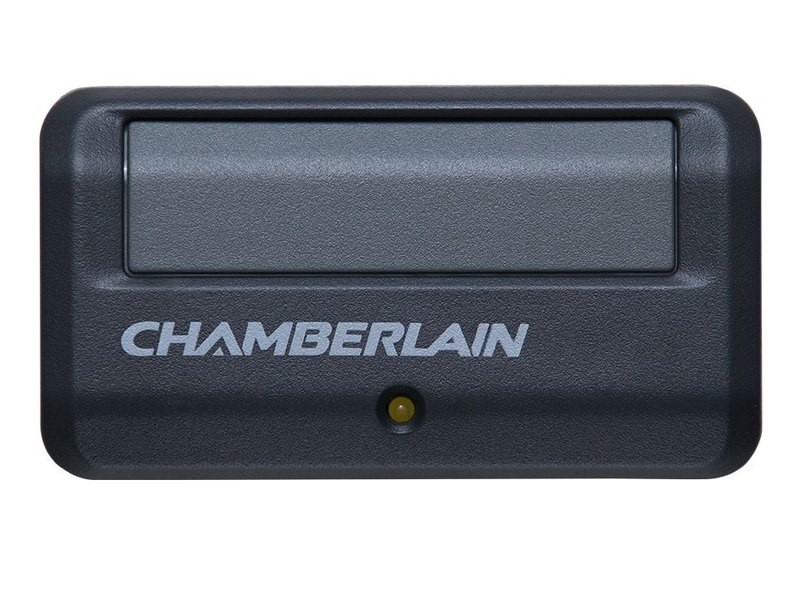
You might be staring at your remote in one hand, the car’s visor in the other, and wondering if you’re missing a secret code or a handshake. Here’s the thing: once you break it down, pairing your Chamberlain remote is pretty simple—no tech degree required. It just takes a bit of patience and a step-by-step approach. Let me walk you through it from scratch, all jargon demystified.
Understanding Chamberlain Garage Remotes and Visor Buttons
Before diving into pairing, it helps to know what you’re working with. Chamberlain is a popular brand for garage door openers and remotes. Their remotes often use “rolling codes” for security, which basically means every time you press the button, a new code gets sent—making it harder for anyone to “clone” your remote.
Most modern cars come with a visor button system, often called “HomeLink” or “Car2U.” It’s usually three small buttons tucked into your driver-side visor. These built-in buttons act like a universal remote for garage doors, gates, or even home lighting. You might notice a little house icon. Major car brands support this feature—think Toyota, Ford, Honda, and plenty more.
Here’s what matters: Not all remotes and cars are compatible. If your car is less than 15 years old, and your Chamberlain opener was made after 1993, chances are you’re in pretty good shape. But checking your manuals never hurts.
What You Need Before You Start Pairing
No one likes getting halfway through a project and realizing they’re missing something crucial. Honestly, gathering everything ahead of time saves headaches. Here’s a quick list of what you’ll want on hand:
- Chamberlain remote (with a working battery)
- Your car’s key fob and access to the visor button area
- Garage door opener unit (the box mounted on your garage ceiling)
- Step ladder—if your opener is out of reach
Many Chamberlain units need you to press a “Learn” or “Smart” button located on the opener itself. It’s usually under a light cover or panel. If you can’t find it, look for a round, colored button (yellow, purple, red, or green) and maybe a small LED nearby.
Sometimes the hardest part is just finding the right button—it’s like a secret handshake for your garage.
Finally, double-check your remote’s battery if it’s been a while since you replaced it. Weak batteries cause all sorts of pairing headaches that have nothing to do with your technique.
Step-by-Step Instructions: How To Pair Chamberlain Garage Remote With Car Visor Button
Let’s walk through the actual process, nice and slow—because the worst feeling is rushing and having to start over.
Step 1: Clear Old Codes (If Needed)
If you bought the car used, or you’re not sure what’s been programmed into the visor, clear any old codes first. Hold down the two outer visor buttons for about 20 seconds. You’ll see the indicator light flash rapidly. That means it’s wiped and ready for new pairing.
Step 2: Position Yourself in the Garage
Park your car in the garage (engine off, just in case). Keep your Chamberlain remote handy, and make sure you can reach both the visor button and the garage door opener.
Step 3: Program the Visor Button
- Hold the Chamberlain remote close (1–3 inches) to the visor buttons.
- Press and hold the remote’s button and the visor button you want to program at the same time.
- Keep holding until the visor’s indicator light changes from slow blinking to fast blinking (this usually takes 20–30 seconds).
What’s happening here is your car is learning the code from the Chamberlain remote—think of it as passing a secret note in class.
Step 4: Sync With The Garage Opener’s “Learn” Button
- Now, get up on your ladder and locate the “Learn” or “Smart” button on the opener motor unit.
- Press and release it (don’t hold it). You’ll see a small LED light up—this means the opener is in programming mode for about 30 seconds.
- Within that window, go back to the car and press the programmed visor button for 2 seconds—then release. Repeat this press-release motion up to 3 times until the garage door moves.
You might feel like a kid in a spy movie—timing is everything. If you wait too long after pressing “Learn,” you’ll need to start over.
Troubleshooting Common Pairing Issues
You followed every step, but nothing’s happening. Honestly, it’s not always your fault. Here’s what might be going wrong and how to fix it:
The visor light never flashes fast: Make sure the remote’s battery is good, and hold both buttons closer together. Some remotes need to practically touch the visor to sync.
Garage door never responds: Double-check that you’re pressing the right “Learn” button. Some openers have more than one. Also, make sure you’re within the 30-second syncing window, or try a different visor button.
Door opens with the remote but not the visor: Sometimes the car’s HomeLink (or Car2U) system needs a “training mode.” Consult your car manual for specific instructions. Certain vehicles require the ignition to be in “on,” but engine off.
Opener blinks but won’t program: Some very new Chamberlain models use different frequency bands or security protocols. In rare cases, you might need a “Compatibility Bridge Kit.” Not fun, but worth knowing if you’re totally stuck.
Patience counts! Most pairing failures come down to timing, weak batteries, or picking the wrong button.
Resetting Your Chamberlain Garage Remote or Car Visor Memory
There are times when things get so tangled, it’s best to start from scratch. Resetting clears out old codes and lets you start fresh. Here’s how it works:
For Chamberlain opener units: Press and hold the “Learn” button for about 10 seconds. The LED will turn off or blink, meaning all remote codes are erased. Now, nothing will open the garage until you reprogram.
For car visor buttons: Hold the outermost buttons together for 20–30 seconds. Wait for the rapid blinking light. This resets any “learned” codes in the car.
After resetting, follow the pairing process from the beginning. It sounds dramatic, but it can rescue you from endless frustration—and protect your garage if you’ve lost a remote.
Differences Between Chamberlain Remotes and Universal Garage Remotes
You might be wondering, “Why not just grab a universal garage remote and skip all this pairing?” Good question.
Chamberlain remotes are designed to work seamlessly with Chamberlain garage door openers. They use the proprietary rolling code system and often have extra features—like controlling multiple doors or turning on the garage light.
Universal remotes are, well, universal. They’re meant to sync with a wider range of openers: Genie, LiftMaster, Craftsman, and more. But—here’s the catch—compatibility isn’t always perfect. Some need extra programming steps or adapters to work with newer Chamberlain models.
If you love things simple and seamless, stick with the original Chamberlain remote. If you want to control multiple brands (say, at home and at work), a universal might be worth the setup hassle.
When To Replace Your Remote Battery or Seek Professional Help
Here’s a little secret: dead or dying batteries are the silent killer of garage door remotes. If you notice range shrinking, delayed response, or total silence, swap out the battery. Most Chamberlain remotes use a flat coin cell (CR2032 or similar), which pops out easily with a small screwdriver.
If you’ve tried new batteries, reset everything, and still can’t pair your Chamberlain remote with your car’s visor button, don’t beat yourself up. Sometimes, older vehicles or very new openers just won’t play nice. Don’t hesitate to call a pro or contact Chamberlain support—they deal with pairing gremlins every day and can walk you through specific solutions for stubborn setups.
Why Programming Your Car’s Visor Button Makes Life Easier
It’s a small thing—synchronizing your Chamberlain garage remote to your car’s visor button—but it pays off every time you pull into the driveway. No fumbling for the clicker. No late-night “where’s my remote” panic. Just one tap, and your door glides open.
Plus, securing your garage matters. The rolling code technology keeps things safe, and having the remote built-in means you’re less likely to lose it or leave it in plain sight. For families, this setup can save time and keep everyone moving in and out smoothly.
If you ever swap cars or buy a new house, learning how to pair a Chamberlain remote with a car visor button is a handy skill. Like programming your coffee maker, it’s one of those small wins that makes daily life a little more convenient.
Final Thoughts: Getting the Most Out of Your Chamberlain Remote and Car Visor
Pairing your Chamberlain garage remote with your car visor button isn’t rocket science, but it does take a bit of patience and a little detective work. Once it’s set up, you’ll wonder how you ever managed with that clunky old clicker rattling around your cup holder.
If you run into trouble, remember: check your batteries, clear old codes, and don’t be afraid to reset. Most issues have simple fixes when you break them down. And if your remote just won’t sync with your car, alternatives like universal remotes or a quick call to a professional can solve even the trickiest cases.
Every garage setup is a bit different, but once you get the hang of programming your Chamberlain remote to your car’s visor button, you’ll have one less thing to worry about on your daily drive. That’s the kind of tech upgrade that actually feels worth it.
