If you’re new to this, don’t worry. Frequency settings sound complicated, but they’re really just a few little switches tucked inside your remote and fan. Imagine matching socks: mismatched ones won’t work, but get the pairs right and everything runs smoothly. Knowing how to check and adjust these dip switches can save you frustration (and maybe even a call to an electrician).
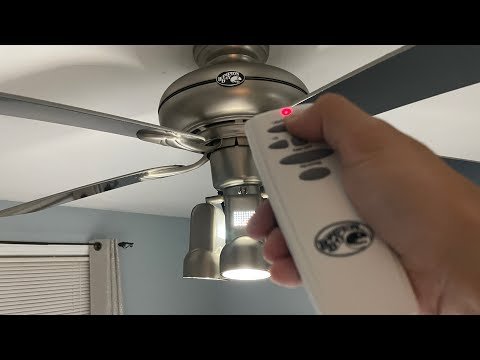
You’ll mostly encounter this with Hampton Bay remotes, which are common in many homes and apartments. These remotes let you control fan speed and lighting from the couch—pretty nice, unless the remote falls out of sync. Let me explain how to check those frequency settings step by step.
Why Frequency Settings Matter for Hampton Bay Fan Remotes
Here’s the thing—frequency settings are like passwords or PIN codes for your ceiling fan and remote. Every remote and fan pair needs to share the same code, or else your clicks won’t do a thing. If someone else nearby has a Hampton Bay fan, different codes also make sure you don’t start each other’s fans by accident. Imagine the chaos!
Most Hampton Bay remotes use tiny switches called dip switches. Each switch can move up or down, creating a unique pattern or code. The fan’s receiver (inside the fan housing) and your remote both have these switches. When the codes match, the two devices are “paired” and can talk to each other.
You might be wondering why you’d ever need to check or change this. Here are a few common reasons:
- Your remote suddenly stops working after a battery change.
- You’re setting up a new ceiling fan for the first time.
- Someone else’s remote is controlling your fan (awkward).
- You want to reset, re-sync, or troubleshoot the remote.
So, getting the frequency right isn’t just techy nonsense. It’s the key to a peaceful, hassle-free fan experience.
Recognizing Hampton Bay Ceiling Fan Remote Types
Not all Hampton Bay remotes look the same, and you might be staring at yours right now, unsure where to begin. Most Hampton Bay ceiling fan remotes are wireless, battery-powered controllers with a row of buttons for speeds, light, and maybe a reverse function.
Some remotes are “universal” models that can work with different brands if the frequency codes match. Others are brand-specific, pre-set to match your fan right out of the box. Look for a small battery compartment on the back—often, the dip switches hide inside. The face of the remote will usually have the Hampton Bay logo. If you’re using a universal or aftermarket remote, these steps may be similar, but there could be small differences in the location or number of switches.
If you’re ever unsure, check your Hampton Bay manual or look up the model number (often found on a sticker inside the battery compartment or under the fan’s canopy). Comparing your remote to its manual might clue you in if you’re not getting any response or can’t find where to adjust the code.
How To Access Dip Switch Settings on Hampton Bay Remotes
Let’s get hands-on. First, make sure your fan is powered off at the wall switch or breaker for safety—no shocking surprises today. Now, you’ll need to access those elusive dip switches.
On almost every Hampton Bay remote, the dip switch bank hides in the battery compartment. Slide off the battery cover on the back of your remote. You’ll see a row of four or sometimes five tiny white switches. Each one flips up or down, like little levers. Sometimes they’re labeled 1, 2, 3, 4, but don’t worry too much about the numbers—it’s the up/down pattern that matters.
Use a small tool—like a pencil tip or a tiny screwdriver—to gently flip the switches. Don’t force them; they’re delicate. If you don’t see the switches right away, double-check under any stickers or extra covers inside the compartment. Universal remotes sometimes have a recessed slot you need to open with a coin or screwdriver.
Tip: Always snap a quick photo of the current switch pattern before changing anything. If things go sideways, you can always switch back.
How To Check Frequency Settings in the Ceiling Fan Receiver
Now for the trickier part: the receiver inside the fan. The receiver is a small rectangular box, usually hidden under the fan’s canopy (the dome-shaped cover at the ceiling). You’ll need a ladder for this step—don’t try it from a chair, trust me.
Switch off power at the breaker before you start. Remove the screws from the canopy and gently lower it; the receiver should be right there, usually wrapped in wires. Look for the same kind of dip switches as you saw on your remote. They’ll be tiny, but you’ll recognize that familiar up-down pattern.
Sometimes, accessing the receiver feels a bit like playing Operation—you might need to wiggle things around, but don’t pull hard on wires. If you can’t see the switches directly, they might be on the edge or side of the receiver. Use your phone’s flashlight to peek in.
Compare the dip switch pattern on the receiver to your remote. If they don’t match exactly, your remote and fan won’t sync. You want them to look identical—if remote switches 1 and 3 are up, and 2 and 4 are down, set the receiver the same way.
How To Change and Sync Hampton Bay Remote Frequency
Once you’ve checked both the remote and receiver, you might need to match the switches. Here’s a simple step-by-step:
- Power off the fan at the circuit breaker. Safety comes first.
- Open the remote. Find those dip switches using the steps above.
- Open the fan’s canopy and locate the receiver. Find its dip switches.
- Set both dip switch patterns to be identical. Up must match up, down matches down. Use a phone pic as a reference.
- Replace all covers and restore power.
- Test the remote. Try turning the fan and light on and off. If it works, you’ve paired the remote! If not, double-check your patterns and try again.
Honestly, this is the kind of thing that seems intimidating until you try it once. It’s surprisingly satisfying when you flip that switch and suddenly everything syncs up.
Troubleshooting Hampton Bay Remote Frequency Issues
You might be wondering—what if my remote still doesn’t work after setting the frequency? There are a few common hiccups.
First, check the batteries. Weak or dead batteries are often the main culprit—swap in fresh ones, just to rule that out. Next, make sure the dip switches aren’t set to the default “all up” or “all down” position, since that can cause signal interference or prevent pairing.
If you’ve just changed codes, sometimes the receiver needs a minute to “reset” its sync. Power cycle the fan—turn off the breaker, wait a few seconds, then turn it back on. Try again with the remote.
Still stuck? There’s a slim chance your remote or receiver is faulty. It happens, especially with older units. If you have another compatible Hampton Bay remote around (for another fan, maybe), try syncing it using the same switch pattern. If that works, your original remote may need replacing.
Insight: Sometimes wireless routers or other electronics nearby can cause interference. If your fan works inconsistently, try switching to a less common dip switch pattern.
Comparing Universal vs. Hampton Bay Brand Remotes
Let me explain something that confuses a lot of people: not all ceiling fan remotes are the same. Universal remotes can be programmed to work with a variety of brands, including Hampton Bay, but you’ll still need to match the frequency settings.
Universal remotes might use more (or fewer) dip switches, or a digital pairing process. Some even auto-sync when you press a “pair” button after installing batteries. Hampton Bay brand remotes generally use the manual dip switch method, which is reliable and easy to check.
If you’re thinking about switching to a universal remote, check that its dip switch bank matches your fan receiver’s options. Otherwise, you might need to replace the receiver too, which takes more effort. For most folks, sticking with a Hampton Bay brand remote keeps things simple and avoids headaches with compatibility.
Why Checking Frequency Settings Solves Most Remote Problems
You might be surprised how many ceiling fan issues boil down to the dip switch settings. People often assume their remote or fan is broken, when really it’s just a mismatched code or a simple battery swap away from working perfectly.
Misaligned frequency settings can cause all kinds of quirky behavior. Maybe your fan turns on by itself, or the light won’t respond. Sometimes your remote affects your neighbor’s fan, or vice versa. Double-checking and syncing those dip switches is almost always the fix.
If you’re patient and methodical—and a little bit curious—you’ll probably never need help from customer service. Plus, it’s a handy skill to have if you move, remodel, or inherit someone else’s ceiling fan setup.
Final Thoughts: Stay Synced and Enjoy Your Hampton Bay Fan
Fixing a Hampton Bay ceiling fan remote often comes down to matching the frequency settings—nothing more, nothing less. Even if you’re not a “handy” person, these dip switches are surprisingly easy to find and adjust. Grab a ladder, a friend for safety, and a little patience. You’ll have your fan spinning and lights glowing in no time.
Remember, when in doubt, snap a photo before making changes and keep your remote’s battery fresh. If you ever need to troubleshoot, start by checking those little switches before stressing about bigger issues. A few minutes matching the frequency settings can save you hours of frustration.
So go ahead—enjoy that cool breeze or soft lighting, knowing you’ve got the secret handshake between your remote and fan all figured out.