LiftMaster is one of the most popular garage opener brands, and their remotes are generally pretty reliable. Still, every battery gets tired after a while. If you’re like me, you might worry you’ll break something while trying to open the remote or mess up the pairing. Don’t stress—changing the battery in a LiftMaster garage remote is easier than making your morning coffee. You don’t need special tools. You don’t need to be a tech expert. With a little patience and a few minutes, you’ll have your garage remote working like new.
Recognizing When Your LiftMaster Remote Battery Needs Replacing
Before grabbing your screwdriver, let’s talk about the sure signs your remote battery is on its last legs. The most obvious clue? The remote stops opening your garage door. Maybe it works if you’re standing next to the opener, but not from the car. Sometimes, the light on your remote blinks weakly or doesn’t light up at all. These are classic symptoms of a dying battery.
It’s easy to jump to bigger conclusions—maybe you think the whole garage door system has failed, or there’s something wrong with the code or the remote’s sync. But honestly, battery issues are the most common culprit. If your remote has been flaky, ask yourself: how long has it been since you swapped the battery? For most folks, it’s usually years, since the batteries tend to last quite a while.
You might be wondering, “What if a new battery doesn’t fix it?” That’s a valid question. But changing the battery is the simplest, cheapest first step. Before troubleshooting codes or replacing the whole unit, rule out the easy stuff. Once you’ve got a fresh battery in there, you can start thinking about more complex issues if the problem sticks around.
Identifying Your LiftMaster Garage Remote Model and Battery Type
Not all LiftMaster remotes look the same. Some are small and rectangular, others have rounded edges, and a few have multiple buttons for different doors. Here’s the thing: knowing your specific remote model will help you find the right battery, and make the replacement process much smoother.
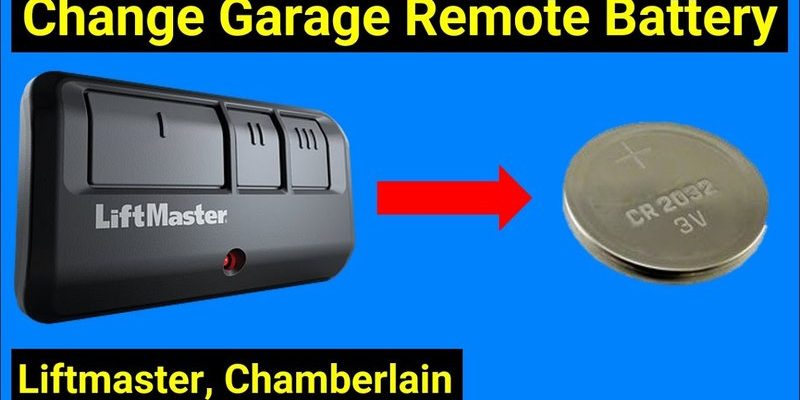
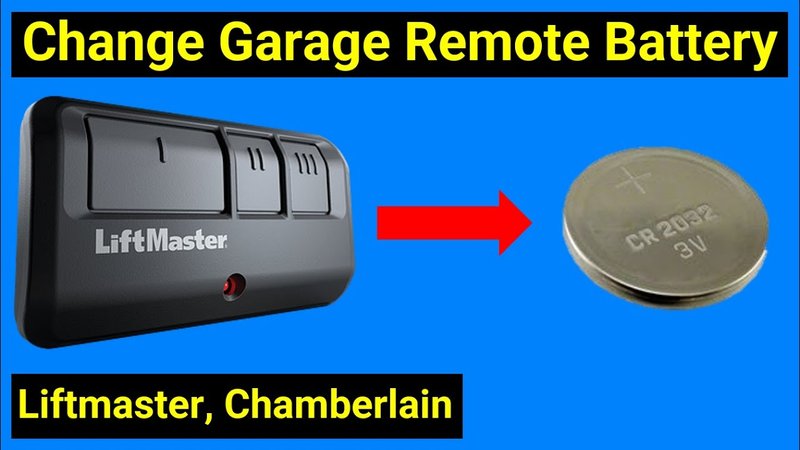
If you still have the manual, great—flip to the battery section. No manual? Don’t worry. Flip your remote over and look for a tiny sticker or embossed number. Common models like the 371LM, 375LM, or 890MAX have their model numbers printed right on the back or inside the battery compartment. Most LiftMaster remotes use a coin cell battery (like CR2032 or CR2016), but some older or larger models use a small rectangular 9V battery.
Here’s what you want to double-check before running to the store:
- Model number of your remote (look for “371LM” or similar)
- Battery type (usually printed on the battery itself)
- How the battery compartment opens (screw, slide, or pry method)
If you’re unsure, snap a photo of your remote and battery. Having a visual reference helps when asking for help or searching for the right replacement.
Step-by-Step: How To Open Your LiftMaster Remote Safely
Okay, now for the hands-on part. Most LiftMaster remotes open up like a little clamshell, but the exact method might differ. Let me break this down so you’re not left guessing.
First, hold your remote and give it a careful look. Some models have a visible screw (usually a tiny Phillips head) on the back. If you see a screw, grab a small screwdriver and remove it. Most newer remotes, though, don’t have screws at all. Instead, look along the side edge for a notch or seam.
Here’s a safe way to open a snap-shut remote:
- Locate the notch—usually on the side or bottom edge.
- Use a coin or flathead screwdriver—gently twist in the notch to pry open the case.
- Go slow—if it doesn’t pop easily, try another spot along the seam. Don’t force it (plastic can crack).
If you’re struggling, don’t get frustrated. Sometimes the case just needs a little wiggling. Think of it like opening a stubborn jar lid—patience wins.
Once the remote is open, you’ll see the circuit board and the battery nestled inside. Handle the circuit board gently; you don’t want to bend or dislodge anything.
How To Replace the Battery in Your LiftMaster Garage Remote
With the remote open, take a closer look at the battery. If it’s a round, silver “coin cell,” it will have a code like CR2032 or CR2016 stamped on it. Remember which way the battery faces—usually, the plus (+) side is facing up, but check for a diagram in the case or take a quick photo before removing it.
To remove the old battery:
- Use your fingernail or a small tool to slide or gently pop the battery out of its slot.
- Check for corrosion or residue—if you see white powder or buildup, carefully wipe it away with a dry cotton swab.
- Insert the new battery, matching the + and – sides to exactly how the old one sat.
Once the new battery is in, snap or screw the remote case back together. Give the buttons a soft press to make sure everything feels like it’s clicking smoothly. Sometimes, the contacts need a tiny nudge—if a button feels stuck or the remote seems unresponsive, recheck how the battery is seated.
Testing Your LiftMaster Remote After Battery Replacement
Here’s where you cross your fingers and hope the fix worked. Step away from the garage door opener, about where you’d usually click your remote (maybe from your car or the sidewalk). Press the button. If the door opens, congratulations—you nailed it!
If you don’t see a response, try these troubleshooting steps before panicking:
- Check the battery orientation. Did you put it in upside down?
- Reseat the battery. Take it out, reinsert it, and close the case firmly.
- Try another brand-new battery in case the first was faulty.
- Press all the buttons in case your model supports multiple doors or codes.
If you’re still stuck, the problem could be the remote’s code or pairing with the opener. Sometimes, remotes lose their sync after a battery change, especially if you fiddled with the circuit board or left it open for a long time. Usually, a simple reset or re-sync (holding the “learn” button on the garage opener unit and pressing the remote) solves it. But honestly, just swapping the battery fixes things about 90% of the time.
When To Reset or Re-Pair Your LiftMaster Garage Remote
You might be wondering, “What if my remote still isn’t working after a battery change?” Good question. It’s possible the remote needs to be re-coded or paired with your garage door opener again. This sometimes happens if your remote lost power for an extended period, or if you accidentally pressed a combination of buttons during the battery swap.
Here’s how to re-sync most LiftMaster remotes:
- Locate the “Learn” button on the main garage opener unit—usually near the light bulb cover or antenna wire.
- Press and release the “Learn” button. An indicator light will start blinking.
- Within 30 seconds, press and hold the main button on your remote until you hear a click or the opener light blinks.
That’s it! Your remote should now be paired again. Some newer models might need you to enter a code or follow a slightly different pairing process (check your manual if you get stuck). If you’re dealing with a universal remote instead of a genuine LiftMaster one, the general process is similar—but there might be extra steps for code selection.
If your remote still won’t sync after all this, it might be time to consider a replacement. Remotes do have a lifespan, especially if they’ve been dropped, dunked in water, or just plain worn out.
Troubleshooting Other Common LiftMaster Remote Issues
Changing the battery solves most problems, but not all. Occasionally, you may run into issues where the remote won’t work even with a fresh battery, or the range seems weak after replacement. Let me explain a few things you can try before calling in a pro.
First, check for interference around your garage. Wireless devices, LED lights, or even your neighbor’s opener could mess with the signal. Moving other electronics away from your opener sometimes helps. Second, inspect the battery contacts inside the remote. Bent or dirty contacts can prevent the battery from connecting properly—clean them gently with a dry cotton swab if you notice gunk or oxidation.
If your remote works only when you’re standing right next to the opener, the issue might be with the opener’s antenna. Make sure it’s hanging down freely and isn’t tucked away or damaged. Sometimes, simply repositioning the antenna gives you back the full range.
Don’t forget: after any troubleshooting or battery change, test the remote from different spots (driveway, inside your car, etc.) to make sure it’s back to its usual range and reliability.
Comparing LiftMaster Remotes with Universal Garage Remotes
Let’s say your remote still doesn’t work or it’s completely lost. You might think about grabbing a universal garage remote from the hardware store. Universal remotes are designed to work with multiple brands, including LiftMaster. They look similar and often support the main features you need: door opening, code pairing, and sometimes even managing multiple doors.
But here’s the thing: a genuine LiftMaster remote is usually a bit more reliable, especially when it comes to pairing and range. Universal remotes work well for basic opening and closing, but sometimes they don’t support the latest LiftMaster rolling code technology (think added security). If your opener is newer, or you have extra security features set up, the original remote is a safer bet.
Still, if you’re in a jam and can’t find an exact replacement, a universal remote can hold you over until you get the real thing. Swapping the battery is similar—just make sure you double-check the battery type, as universal remotes sometimes use different cell sizes.
Keeping Your LiftMaster Remote Battery Working Longer
You might want your next remote battery to last as long as possible. Good news: there are a few simple habits that make a big difference. Don’t leave your remote in your car over summer or winter—extreme heat or cold drains batteries. If you rarely use your remote (maybe it’s for a vacation home), pop out the battery before long periods of inactivity. This prevents slow drain and corrosion.
Every year or so, crack open the remote and check for any weird smells, discoloration, or white powder inside. These are early signs of battery leakage or case failure. Swapping the battery at the first sign of trouble keeps the rest of the electronics healthy.
Honestly, taking care of your remote’s battery is like caring for a favorite watch or flashlight. A few quick checks—and the occasional easy replacement—save a lot of headaches in the long run. Your garage door will thank you, and you’ll keep your routine running smoothly.
Final Thoughts on Changing Batteries in LiftMaster Garage Remotes
Dealing with a dead LiftMaster garage remote battery isn’t anyone’s idea of a good time, but it’s one of those little fixes that makes life so much easier when you handle it yourself. You don’t need to be tech-savvy or have a toolbox full of gadgets. Just a new battery, a bit of patience, and a few steps—and your remote is back in action.
Whenever your garage remote acts stubborn or unpredictable, remember to start simple. Nine times out of ten, it’s just the battery asking for a fresh start. Handle your remote gently, check the battery orientation, and take a few moments to re-sync if needed. If problems continue, you know how to troubleshoot like a pro—or when to swap in a universal remote as a backup.
With a new battery and a little know-how, your LiftMaster remote will be ready to open the door for you, rain or shine.