Let’s be real: modern Optoma remotes come with a boatload of buttons, blinking lights, and settings that aren’t exactly self-explanatory. If you’ve ever waved the remote, hoping it “just works,” you’re not alone. I remember my first go with an Optoma remote—accidentally switching the input to the wrong HDMI, and then desperately trying to switch it back while my friends watched in suspense. Trust me, getting the hang of your Optoma projector remote is easier than you think, and once you have it down, you’ll seriously wonder how you ever managed without it.
Meet The Optoma Projector Remote: A Quick Tour
Optoma projector remotes aren’t all the same, but they definitely share some family traits. Most models come with a handful of essential buttons—power, source select, menu, arrow keys, and volume controls—along with a few others that might seem mysterious at first. Don’t worry, you don’t need to memorize every single feature to get started, but understanding the main layout is a game-changer.
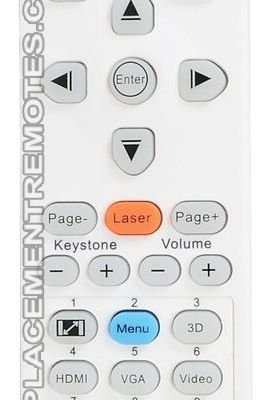
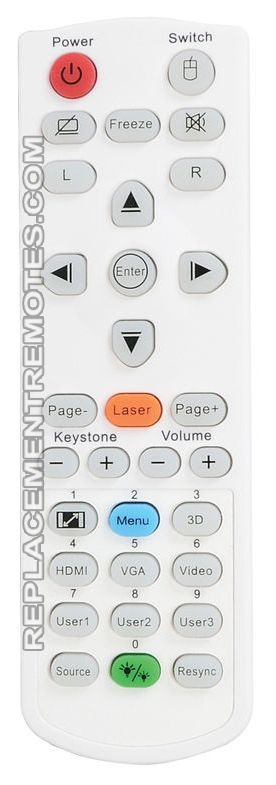
Picture your living room remote control, but trimmed down to focus on making your projector life easy. The power button always stands out, usually up top. There will be shortcuts for changing input sources (like from your laptop to your gaming console), and a menu button that opens up settings for picture, sound, and network stuff. The arrows and OK button are navigation central—think of these like your remote’s joystick. Some models even have dedicated buttons for keystone correction or mute.
If you’re used to universal remotes, you’ll notice Optoma’s is more streamlined. Everything’s organized for quick projector tweaking, not navigating a full home theater system. Honestly, the learning curve is gentle—especially when you realize how much time you save compared to fiddling with buttons on the projector body itself.
Powering Up: Batteries, Codes, and Getting Started
First things first—check your batteries. I know, it sounds basic, but a surprising amount of “is my remote broken?” panic comes down to tired old batteries. Most Optoma projector remotes use AAA batteries. Flip over the remote, slide off the cover, and pop in a fresh set, making sure to line up the positive and negative ends right. A quick tip: if you’re doing this for the first time, give the battery compartment a gentle shake to make sure everything’s snug. Loose batteries can cause intermittent connection issues that’ll make you question your sanity.
Now, you might spot a little sticker inside the battery slot with a code or model number. Hang onto this! Some advanced Optoma remotes (especially those that come with higher-end models or have programmable features) may require you to enter a pairing code or use this code if you need to replacement remote down the road. For most people, though, you simply put in the batteries and the remote is ready to use—no pairing or fancy setup needed.
If you’re upgrading from a universal remote or trying to get a replacement one working, you might need to manually pair your remote to your Optoma projector. This is where the model number and remote code become your best friends. Every Optoma projector model has a “native” remote, but you can often sync a compatible one using manufacturer-provided instructions, usually involving holding down certain buttons or entering a code on the remote while in pairing mode. It’s not hard, just feels a bit like entering a secret handshake!
Pairing and Syncing: Why It Matters and How To Do It
You might be wondering why some remotes work straight out of the box while others need an extra step. Here’s the thing: Optoma uses two main kinds of remote connections—infrared (IR) and sometimes radio frequency (RF). Most home and office models stick to IR, which means you need a clear line of sight between the remote and projector. Simple, but it also means sunlight glare or a tall plant on the table can mess things up.
If you’re using an IR remote, syncing is usually automatic. Pop in the batteries, point the remote at the front sensor of your projector, and you’re golden. If nothing happens—or if you’re setting up a universal Optoma remote—you may need to code or manually pair it. This usually involves:
- Turning the projector off (standby mode)
- Pressing and holding a specific button (often “Menu” or “Input”)
- Waiting for a blink or beep, then entering a remote code if prompted
- Testing power and navigation to confirm connection
Now, RF remotes are mostly seen in Optoma’s high-end or professional setups. These don’t require line-of-sight, making them magical for ceiling mounts or hidden projectors. Pairing these usually means pressing a tiny button on both the receiver (sometimes built into the projector or a dongle) and the remote. Wait for the blinking to go solid, and you’re set.
Pro tip: If your remote isn’t responding after pairing, remove the batteries for 10 seconds, then pop them back in. Sometimes, a quick reset is all it needs to get talking to your projector again.
Troubleshooting Common Optoma Remote Problems
Even with the smoothest setup, things can go “off script.” I’ve personally had evenings derailed just because the remote wasn’t cooperating (always right before the big twist in the movie, am I right?). Let’s walk through some common issues and fixes.
First, if the projector isn’t responding at all, double-check the basics: fresh batteries, clean battery contacts, and a clear path to the IR sensor. Sometimes, sneaky dust or a decorative flower arrangement can block the signal. If you’re working with an RF remote, make sure the dongle or receiver is securely connected to both power and the projector.
Next up: button confusion. Pressing “Menu” but nothing appears? The remote might be set to a different device mode (some remotes can control multiple gadgets), or the projector might be on the wrong input. Cycle through input sources and try again. If none of the buttons are working, try resetting the remote. This usually means pulling the batteries, holding down the power button for 30 seconds, then replacing them and trying again. For persistent issues, your Optoma projector’s user manual will have a troubleshooting section—honestly, it’s worth a quick skim.
If you’ve tried everything and still can’t get things back on track, consider testing the remote with another Optoma projector (if you have access to one) or using a universal remote designed for Optoma models. This can help you figure out if the problem is with the remote or the projector itself.
Using Your Remote: Everyday Controls and Hidden Features
Here’s where things get fun. Once your Optoma projector remote is connected, you get access to all kinds of quick controls. Turning the projector on and off is obvious, but did you know you can adjust keystone correction, aspect ratio, or even color modes straight from the remote? It’s like having a spaceship console at your fingertips—minus the risk of launching yourself into orbit.
- Display Modes: Toggle between Cinema, Vivid, and Gaming modes to get the best picture for your content.
- Keystone/Zoom: Fix any wonky angles or stretch the image without moving your projector.
- Menu Navigation: Dive into settings for brightness, contrast, and network connections, all from your seat.
- Freeze & Mute: Instantly pause the image or mute the sound if you need to take a call or step out.
Honestly, once you start exploring the shortcuts, you’ll wonder how you ever used your projector without them. The remote lets you fine-tune your setup without getting up every five minutes. And if you accidentally press the wrong thing, don’t panic—the “Menu” and “Back” buttons are your lifeline.
Resetting and Reprogramming Your Optoma Remote
Occasionally remotes start acting up—maybe buttons get “stuck” on a certain command, or syncing suddenly fails. Resetting to factory defaults can clear out bugs or old settings. The steps depend on your specific Optoma remote, but the process is usually similar:
- Take out the batteries
- Press and hold the power button for 30 seconds to drain any remaining charge
- Re-insert the batteries and try again
Some advanced Optoma models allow for deeper reprogramming—think changing which buttons do what, or even setting up macros for presentations. Usually, this is done through on-screen menus or a companion app. If you get stuck or can’t remember your “pair” code, check the model number inside the battery compartment, then head to Optoma’s support website.
And here’s something that surprised me: if your remote gets too funky or simply won’t sync, replacing it isn’t as costly as you’d expect. Optoma sells branded replacements, but universal projector remotes (as long as they support Optoma’s codes) work too. Just make sure the one you buy lists your projector model for compatibility.
Alternatives: Universal Remotes, Apps, and Manual Controls
You might be thinking, “What if I lose my Optoma remote entirely?” It’s not the end of the world. Universal remotes are easy to find—just double-check for Optoma compatibility and input the right remote code. Some even come pre-programmed for major projector brands. The main tradeoff is you might lose some advanced features, like keystone correction or screen blank, but the basics will work fine.
For certain newer Optoma projectors, there’s also a mobile app. This lets you control the projector over Wi-Fi—change inputs, tweak settings, or even type in search fields from your phone. I personally find mobile apps handy (no more battery hunting!), but the reliability depends on your network connection and projector model.
And if all else fails? Don’t forget that every Optoma has manual controls on the unit itself. It’s not as convenient as using the remote, but it’s a lifesaver if you need to power up, change sources, or navigate menus in a pinch.
Maintenance, Care, and When To Replace Your Remote
Remotes seem indestructible, but they’re not immune to life’s little disasters—a spilled soda, a dog with a taste for plastic, or the inevitable drop under the couch. Keep yours in good shape by:
- Changing the batteries at least once a year (or when you notice laggy response).
- Wiping it down with a dry cloth every so often—especially the IR sensor window, which can collect dust.
- Storing it somewhere safe (a little remote pocket or a trusty side table works wonders).
If buttons start to stick or stop responding (even after a reset), it might be time for a replacement. Original Optoma remotes usually last years, but if you present a lot or use your projector every day, expect to swap out your remote every 3–5 years. Third-party options work in a pinch, but for the most reliable experience, sticking with the official remote is worth it.
Wrapping Up: Confidence With Your Optoma Projector Remote
Gaining confidence with your Optoma projector remote doesn’t have to feel like cracking a secret code or decoding ancient hieroglyphics. Once you’ve handled the basics—pop in fresh batteries, make sure the remote’s paired (if needed), and familiarize yourself with the core buttons—you’ll find everything clicks into place. Sure, there might be the odd hiccup (who hasn’t reset a remote in frustration?), but that’s just part of the adventure.
The best part? Once you’re set up, using your Optoma projector becomes second nature. Whether you’re controlling a movie night, teaching a class, or sharing photos with family, the remote puts everything at your fingertips. And hey, if you ever do misplace it, at least you know exactly what to do next time.